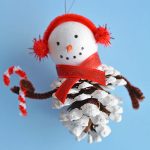
These pinecone snowman ornaments are SO CUTE and super fun to make! With a pinecone and a few simple dollar store craft supplies, you can have your pinecone snowmen put together in no time!
The very first step is painting your pinecones and it was surprisingly relaxing. I started day dreaming and before I knew it, I had 3 or 4 finished. Painting is the longest step, but it’s so worth it. Your pinecones end up looking like they’ve been freshly covered in snow.
You can search your yard or neighborhood for some usable pinecones, or you can buy them at the craft store, dollar store or Amazon. I found pretty much all of the supplies at the dollar store, so it was super easy and inexpensive to make these little guys! I love how they turned out!

If there’s one thing my kids LOVE doing around the holidays, it’s making easy crafts that they can hang on the Christmas tree each year. And even better if they can take them down to play with them.
You can hang these pinecone snowmen on the Christmas tree, or keep them out as a frosty decoration all winter long. I love when we can transform something as simple as a pinecone into a beautiful keepsake!
Check out our video for how to make Pinecone Snowman Ornaments:
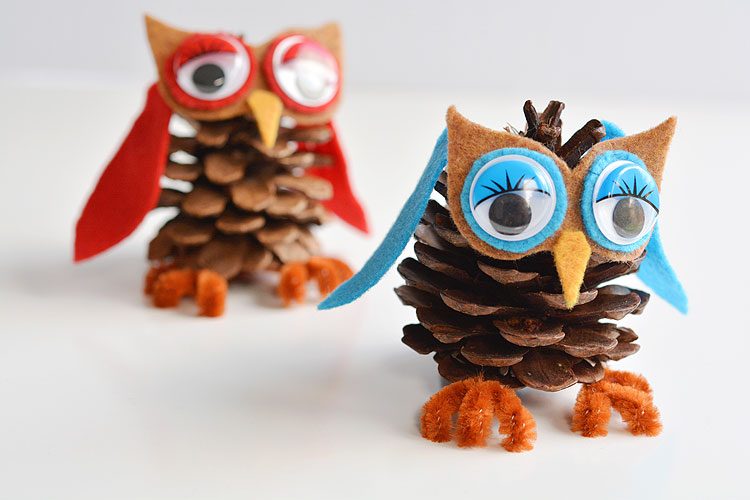
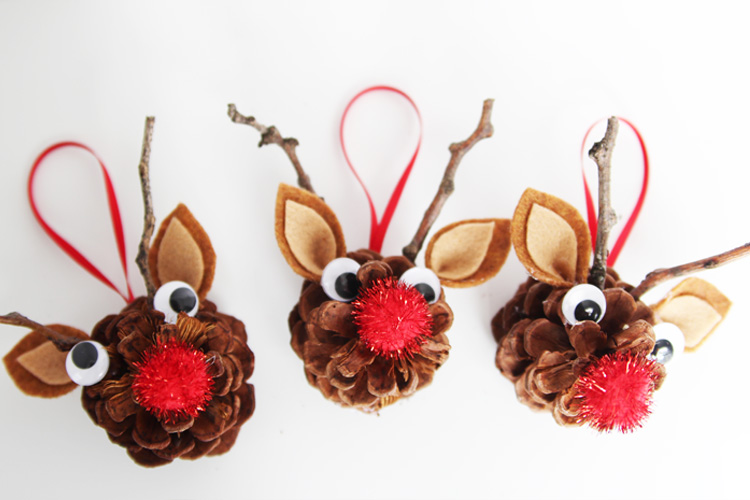
If you’re looking for even more crafty inspiration, here’s a few more of our favourite pinecone ornaments:
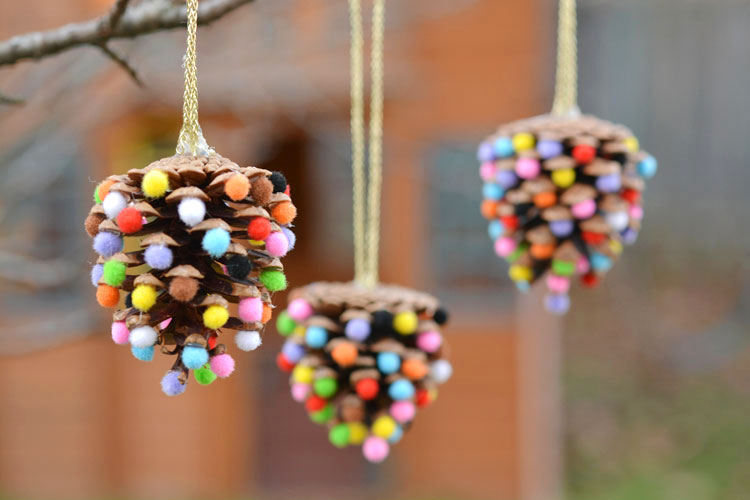
Easy Pom Pom Pinecone Ornaments
How to make Pinecone Snowmen:
Here’s a list of affiliate links to products on Amazon that are similar to the supplies we used:
- Pinecones
- White Craft Paint
- Paint Brush
- Styrofoam ball (1.5″ in diameter)
- Bamboo Skewer
- 12 inch Pipe Cleaners (red, brown and white)
- Red Pom Poms
- Red Ribbon
- Black Card Stock
- Metallic String
- Orange Sharpie/Marker
- Black Sharpie
- Scissors
- Glue Gun
- Printable Snowman Hat Template
Paint the pinecones with white acrylic paint. I painted both the top and bottom of each of the little tips on the pinecones. I didn’t paint all the way to the middle because I wanted to be able to see the beautiful shadows of the pinecone shape.

How to Make the Snowman’s Head
Push a bamboo skewer into the top of the Styrofoam ball. We’ll be pushing the snowman’s carrot nose into this hole after we make it in the next step.
I got my skewers from the dollar store. They’re the type of wooden skewers that you’d use to make shish kabobs.

Using an orange marker, colour about 3/4 of an inch of the pointy end of the skewer.

With a sharp pair of scissors, carefully score the skewer about 1 inch from the pointy end. Twist the skewer as you press the scissors into it so that there’s an indent all the way around.
My scissors weren’t strong enough to cut all the way through the skewer, but after I made the indent, it snapped easily at that point.

Push the flat end of the skewer into the hole you made in the styrofoam ball. The pointy end of the skewer should stick out, just like a snowman’s carrot nose.

Use a Sharpie to draw the face onto the styrofoam ball. I drew 2 dots for the eyes, and 5 dots for the mouth.

Cut a piece of string to be about 12 inches long. Tie the two ends together into a knot.
Poke a hole into the top of the styrofoam ball head using a bamboo skewer. The hole should be about a 1/2 inch deep.

Squeeze some hot glue into the hole.

Then use a bamboo skewer to push the knotted end of the string into the glue filled hole.
Make sure the string is in the hole deep enough to be secure, since this is how we’ll be hanging the snowman.

How to Make the Snowman’s Earmuffs
Bend a red pipe cleaner around the top of the styrofoam ball. Place one end where one “ear” of the snowman would be, and use your fingers to mark where the other “ear” would be.
Remove the pipe cleaner from the styrofoam ball, then cut the pipe cleaner. It should be long enough to reach around the top of the head from one “ear” to the other.

Add a small dab of hot glue from the glue gun to the two outside tips of the red pipe cleaner. Then press on the two sparkly red pom poms to make the snowman’s earmuffs.

Add small dabs of hot glue to the inside ends of the pipe cleaner and pom pom ear muffs. Then carefully slide them into place on the snowman’s head.

Assemble Your Snowman
Add a very generous glob of hot glue to the top of the painted pinecone. This is where the head is going to go, and you want to make sure there’s enough glue to keep it together.

Then carefully press the styrofoam head onto the big glob of glue on the pinecone. Press it down and hold it there for about 30 seconds or until the glue has dried.
Don’t worry if the glue squeezes out from under the head and is visible. We’re going to cover it up with a scarf.

Cut a piece of 3/8 inch ribbon to be approximately 10 inches long. Center the ribbon on the back of the snowman’s head, then wrap the ribbon around the front, crossing the two pieces of ribbon under the “chin”.
Add a small dab of glue onto the bottom ribbon where the two ribbons cross, then gently push the other ribbon on top.
Finally, trim the two ends of the ribbon to be about 1 inch long to finish off the scarf.

Cut the 12 inch brown pipe cleaner in half. Then bend the end of one of the pieces into a twig shape, like in the photo below.

Make a 90 degree bend in the pipe cleaner about 2 inches from the tip of the twig arm. Trim the rest of the pipe cleaner so there’s only about half an inch bent at the end.
Repeat these steps with the other piece of brown pipe cleaner so you have 2 twig arms, with a half inch 90 degree bend at the end.

Add some hot glue onto the 90 degree bend in each brown pipe cleaner arm, then push them into the pinecone where the snowman’s arms should be.

Make a Simple Pipe Cleaner Candy Cane
Take one red and one white pipe cleaner and twist them together to make a candy cane pattern.
Bend the end into an upside down J shape, then cut the pipe cleaners so the candy cane is about 1.5 inches tall.

Place the candy cane into the snowman’s twig hand. You can twist the brown pipe cleaner hand around the candy cane to hold it in place. Or you can add a dab of hot glue to the twig arm to attach it if you like.

How to Make a Paper Top Hat for Your Snowman
If you’d like to make a top hat for your snowman, I’ve made a fun little printable template for you.
>> Printable Snowman Hat Template <<
Cut out the three pieces in the printable template, then trace them onto black card stock. Then cut out the black pieces of the hat. (Even better if you can print the template right onto the black card stock!)
See the bigger circle with the smaller circle inside? I cut a straight line through both circles to get to the center. It leaves a cut in the paper, but you can position that cut on the back side of your ornament, so it won’t be visible.

Use a skewer to poke a hole in the middle of the smaller circle piece. If you can’t get the skewer through, you can use a push pin or needle through it to get a starter hole.

Cut a piece of string to be about 12 inches long, then knot the two ends together. Push the string through the hole in the black circle and pull until the knot is against the paper.
Add a small dab of glue on the knot to secure it to the black circle. (This will be the underside of the top of the hat, so it won’t be visible)

Add a line of glue at one end of the weird looking rectangle piece. Then wrap the other end around to meet it so it makes a circle shape.
Make sure you test the circle before you glue it to make sure you’re lining it up properly. The top circle of the hat should fit perfectly on top.

Bend the 4 tabs on one end of the circle piece inwards, then add a dab of hot glue to each of them.

Line up the small black circle that has the string coming out of it and press it onto the glue covered tabs.

Flip it over, and bend the other 4 tabs inwards. Add glue to each of those 4 tabs.

Center the larger black circle under this piece and press them together. See!? It looks like a top hat!

Add a small circle of hot glue around the smaller hole of the bottom of the hat.

Then press it on top of the styrofoam ball head instead of the ear muffs.

I know it’s a little more work but the top hat looks SO good! What a dapper little guy!

These little snowmen are SO CUTE! What a fun ornament craft to make with your kids!

It’s pretty amazing what you can make with a plain old pinecone!

Pinecone Snowman Ornaments
Equipment
- Scissors
- Glue Gun
Materials
- Pinecones
- White Craft Paint
- Paint Brush
- 1.5 inch Styrofoam Balls
- Bamboo Skewers
- 12 inch Pipe Cleaners Red, White and Brown
- Pom Poms Red
- Black Card Stock
- Ribbon Red
- Metallic String Silver
- Sharpies Orange and Black
Instructions
- Paint just the tips of the pinecone white, covering both the tops and bottoms.
- Push a bamboo skewer into the top of the styrofoam ball. This will make the hole we'll use for his nose.
- Using an orange marker, colour about 3/4 of an inch of the pointy end of the skewer.
- With a sharp pair of scissors, carefully score the skewer about 1 inch from the pointy end. Twist the skewer as you press the scissors into it so that there's an indent all the way around. Snap the end off.
- Push the flat end of the skewer into the hole you made in the styrofoam ball. The pointy end of the skewer should stick out, just like a snowman's carrot nose.
- Use a Sharpie to draw the face onto the styrofoam ball. Draw 2 dots for the eyes, and 5 dots for the mouth.
- Cut a piece of string to be about 12 inches long. Tie the two ends together into a knot. Next, poke a hole into the top of the styrofoam ball head using a bamboo skewer. The hole should be about a 1/2 inch deep. Squeeze some hot glue into the hole.
- Use a bamboo skewer to push the knotted end of the string into the glue filled hole. Make sure the string is deep enough to be able to securely hang your snowman.
- Bend a red pipe cleaner around the top of the styrofoam ball. Place one end where one "ear" of the snowman would be, and use your fingers to mark where the other "ear" would be. Remove the pipe cleaner, then cut it to reach around the top of the head from one "ear" to the other.
- Add a small dab of hot glue to the two outside tips of the red pipe cleaner. Press on the two sparkly red pom poms to make the snowman's earmuffs.
- Add small dabs of hot glue to the inside ends of the pipe cleaner and pom pom ear muffs. Then carefully slide them into place on the snowman's head
- Apply a generous amount of hot glue to the bottom of the pinecone. Take the head of the snowman and press it down on top of the glue and hold it for 30 seconds, until dry and secure.
- Cut a piece of 3/8 inch ribbon to be approximately 10 inches long. Center the ribbon on the back of the snowman's head, then wrap the ribbon around the front, crossing the two pieces of ribbon under the "neck." Add a small dab of glue onto the bottom ribbon where the two ribbons cross, then gently push the other ribbon on top. Finally, trim the two ends of the ribbon to be about 1 inch long to finish off the scarf.
- Cut the 12 inch brown pipe cleaner in half, and bend the end of one of the pieces into a twig shape. Make a 90 degree bend in the pipe cleaner about 2 inches from the tip of the twig arm. Trim the rest of the pipe cleaner so there's only about half an inch bent at the end.
- Repeat these steps with the other piece of brown pipe cleaner to make the second arm ensuring there's a half inch 90 degree bend at the end.
- Add some hot glue onto the 90 degree bend in each brown pipe cleaner arm, then push them into the pinecone where the snowman's arms should be.
- Take one red and one white pipe cleaner and twist them together to make a candy cane pattern. Bend the end into an upside down J shape, then cut the pipe cleaners so the candy cane is about 1.5 inches tall.
- Place the candy cane into the snowman's twig hand. You can twist the brown pipe cleaner hand around the candy cane to hold it in place. Or you can add a dab of hot glue to the twig arm to attach it.
How to make the Top Hat (Printable Template Here)
- Cut out the three pieces in the template, and trace them onto black card stock. Cut out the black pieces of the hat. (Even better if you can print the template right onto the black card stock.)
- Cut a straight line through the biggest circle to get to the smaller one in the center. There will be a cut in the paper but this portion will be positioned at the back so it won't be visible.
- Use a skewer to poke a hole in the middle of the smaller circle.
- Cut a piece of string to be about 12 inches long, then knot the two ends together. Push the string through the hole in the black circle and pull until the knot is flush against the paper. Add a small dab of glue on the knot to secure it to the black circle.
- Add a line of glue at one end of the weird looking rectangle piece. Then wrap the other end around to meet it so it makes a circle shape. Make sure you test the circle before you glue it to make sure you're lining it up properly. The top of the hat should fit perfectly on top.
- Bend the 4 tabs on one end of the circle piece inwards, then add a dab of hot glue to each of them. Line up the small black circle that has the string coming out of it and press it onto the glue covered tabs. Flip it over, and bend the other 4 tabs inwards. Add glue to each of those 4 tabs.
- Center the larger black circle under that piece and press them together. This will form your top hat. Next, add a small circle of hot glue around the smaller hole of the bottom of the hat and press it onto the styrofoam snowman head. Hold until dry and secure.

These pinecone snowman ornaments are so FUN and look super cute hanging from the tree! Such a fun Christmas craft for kids of all ages! Using dollar store supplies you can transform a regular old pinecone into a little bundled-up snowman complete with a top hat, scarf and earmuffs! It’s a great homemade Christmas ornament you can pull out year after year. Or you can leave it up all winter long as a frosty decoration!
Check these out for even MORE pinecone inspiration:

Easy Pom Pom Pinecone Ornaments
Source : onelittleproject.com
Read more...


Post a Comment
Post a Comment