This post is in partnership with Lionsgate. As always, the opinions are entirely my own.
These no-carve My Little Pony pumpkins are SO EASY to make! Seriously, you paint the pumpkin, peel off the cute little printable faces I’ve included down below, and add a dollar store feather boa as the hair. So simple! (And best use of a feather boa, ever!)
These pumpkins were inspired by My Little Pony: The Movie in theaters October 6. You can watch the trailer for it here:
When I was little, My Little Ponies were my favourite toy. I LOVED them. And you have no idea how much joy it brings me that My Little Ponies are still a thing and that my kids actually play with them and watch the TV show. Somehow, it makes me feel like it was just yesterday that I was playing with the little toys, and not the 30 some odd years ago that it actually was. (Good gracious… 30 years ago!? Yikes!? How is that even possible?!)
Even my 2 year old little guy has been carrying around a My Little Pony chariot and helicopter lately. He absolutely loves vehicles, whether it’s trains, fire trucks, helicopters or cars. He’s really not picky. The My Little Pony helicopter has been living on his dresser for weeks now and there were even a few nights that he slept with it in his bed. Makes me smile.
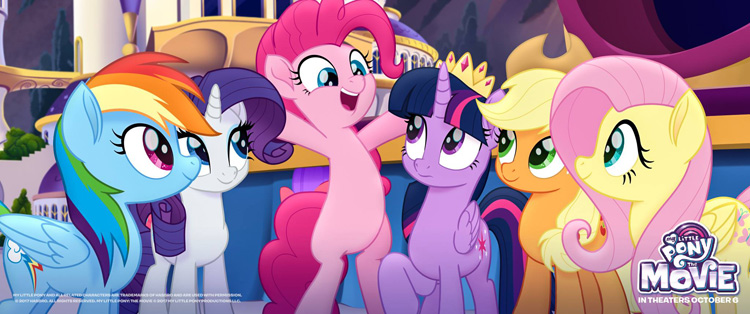
I really want to take my girls to see My Little Pony: The Movie. It looks so cute! And it’s always fun when I get to feel like a kid again. It’s all about a dark force that threatens Ponyville, and the Mane 6 – Twilight Sparkle, Applejack, Rainbow Dash, Pinkie Pie, Fluttershy, and Rarity – embark on an unforgettable journey beyond Equestria where they meet new friends and exciting challenges on a quest to use the magic of friendship to save their home.
The film has an all-star voice cast including Emily Blunt, Kristin Chenoweth, Liev Schreiber, Michael Peña, Sia, Taye Diggs, Uzo Aduba and Zoe Saldana. The movie features original music and songs performed by Sia, Diggs, Saldana, Chenoweth and Blunt.
OFFICIAL LINKS
Visit all the MY LITTLE PONY: THE MOVIE websites
Visit the Official Site
Like on Facebook
Follow on Twitter and Instagram
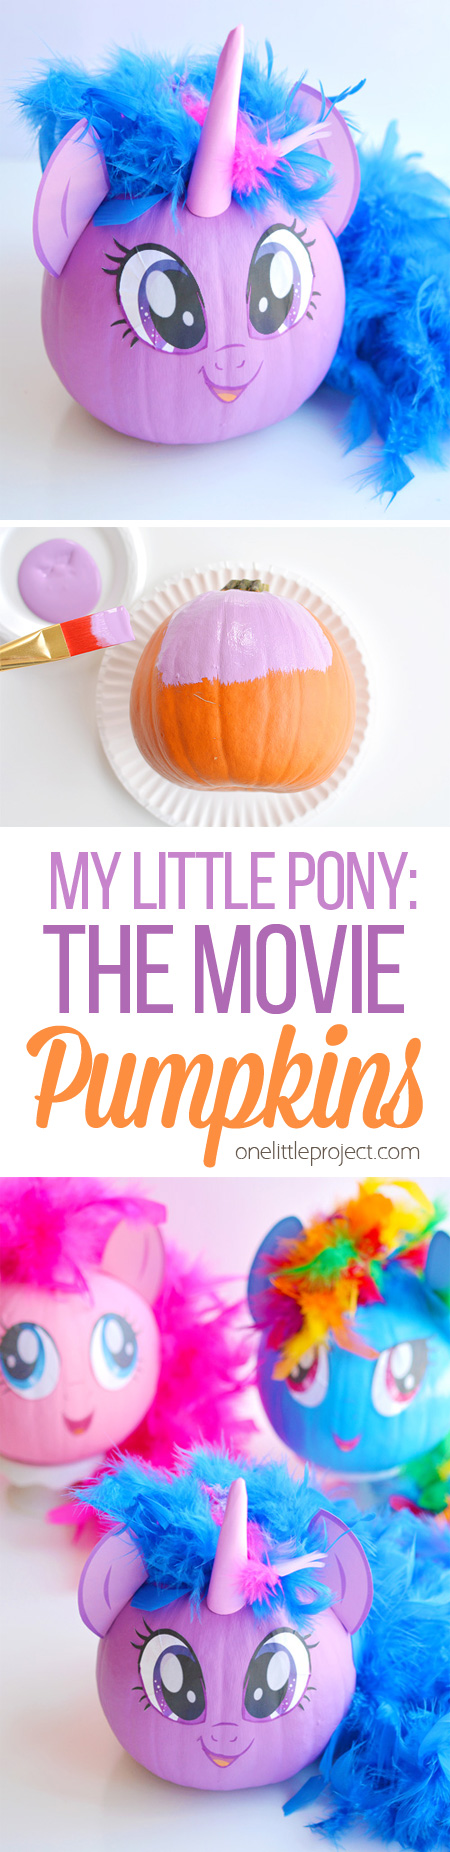
My Little Pony No-Carve Pumpkins with Free Printable Face Templates
Now, on to the no-carve My Little Pony pumpkin tutorial!
Seriously, aren’t they super cute? I recommend using pie pumpkins instead of full size pumpkins when you make them. The shape is more consistent and they use way less paint. Plus the printables I’ve included below are sized for pie pumpkins.
The affiliate links below will take you to similar products on Amazon that should work for this craft. You can probably get them cheaper at the craft store and dollar store, but the links will give you an idea of the supplies I used.
Here’s what you’ll need:
- 1 pie pumpkin (the smaller pumpkins meant for making pumpkin pie)
- Premium Acrylic Paint
- Paint Brush
- Feather Boa
- Thick Paper
- Scissors
- Sewing Pins
- Full Sheet Sticker Paper
- Free Printable Face Template (Rainbow Dash, Pinkie Pie and Twilight Sparkle)
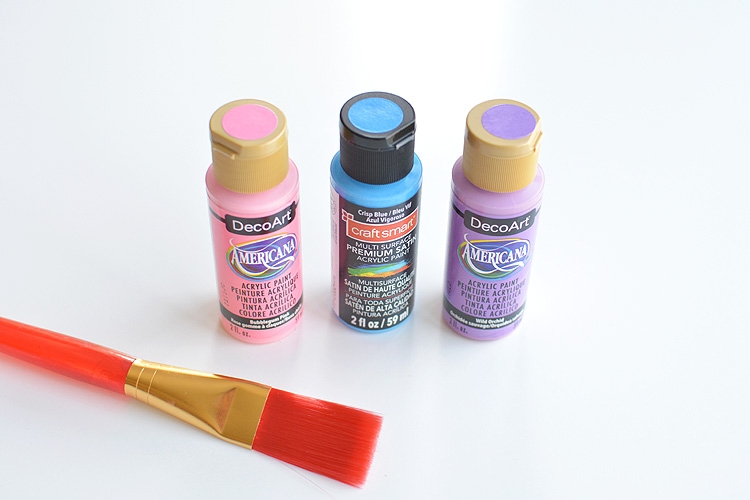
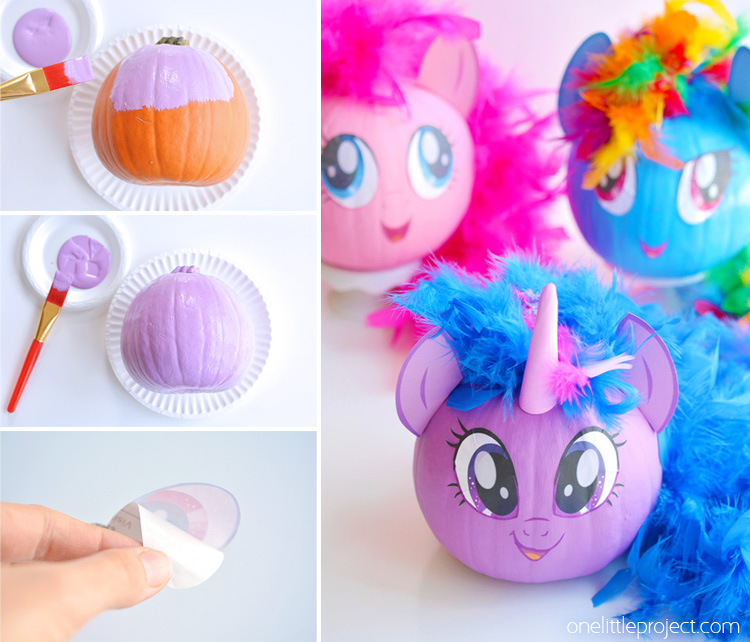
Make sure that you use premium acrylic paint to paint the pumpkins. It doesn’t really matter what brand. I used both DecoArt and Craft Smart paints and they worked amazingly well. I also tried using dollar store acrylic paint, but the coverage was horrible. The three colours I used were DecoArt Bubblegum Pink, DecoArt Wild Orchid and Craft Smart Crisp Blue.
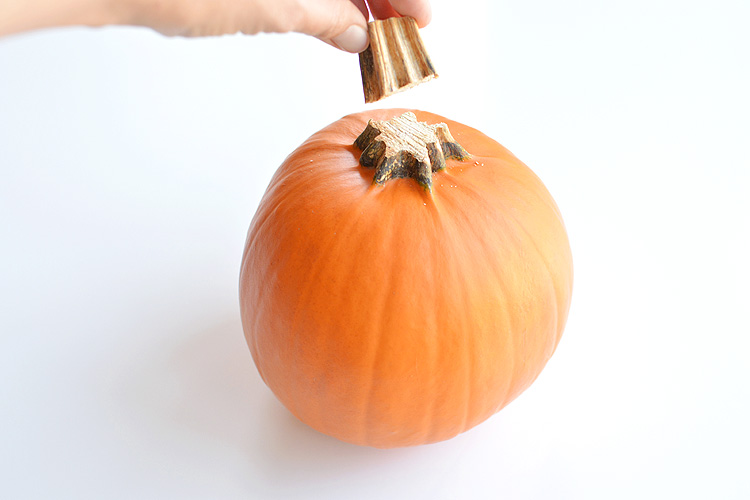
I used a saw to cut the stem off the pumpkin. Or rather my husband used a saw to cut it off. I’m not convinced you really need to remove the stem? The feather boas ended up being so bulky that I’m pretty sure they would have covered the stem.
I laid the pumpkin with the “bad side” down on a paper plate. (You know… the flat, misshapen side that sat on the dirt). I figured the bad side was going to be at the back and covered by hair so it didn’t matter if it wasn’t painted perfectly.
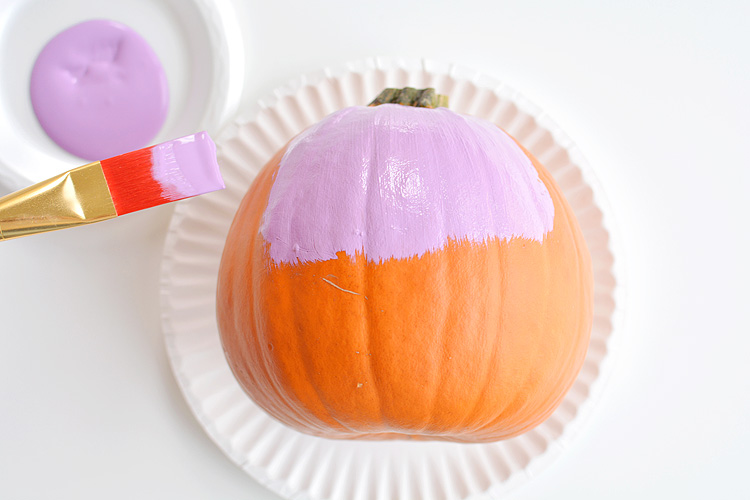
Paint an even layer all over the pumpkin, including the stem. Then let it sit for about 2 or 3 hours to dry.
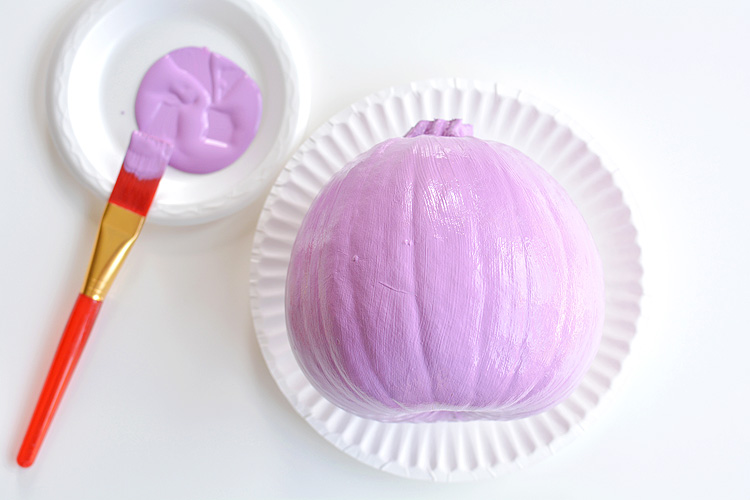
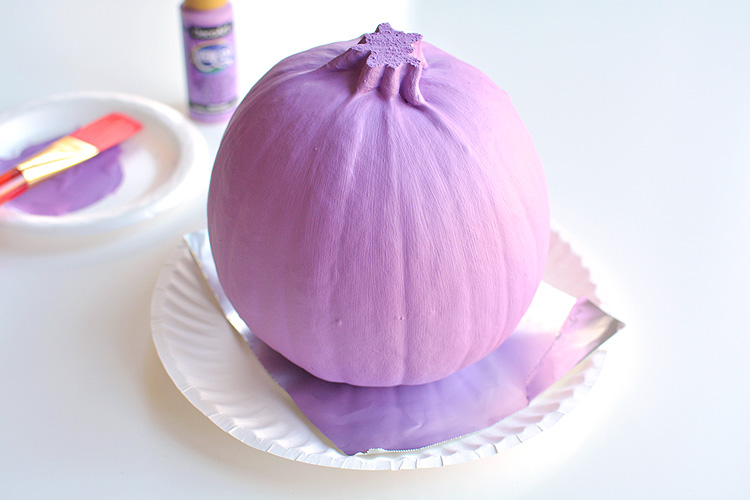
For the second coat, I sat the pumpkin upright on a small piece of aluminum foil. The paper on the paper plate sticks to the paint. Some of the paint stuck to the aluminum foil too and when I peeled it off there were a few missing paint spots on the bottom, but no one can see the bottom so it was no big deal. I let it sit overnight to dry.
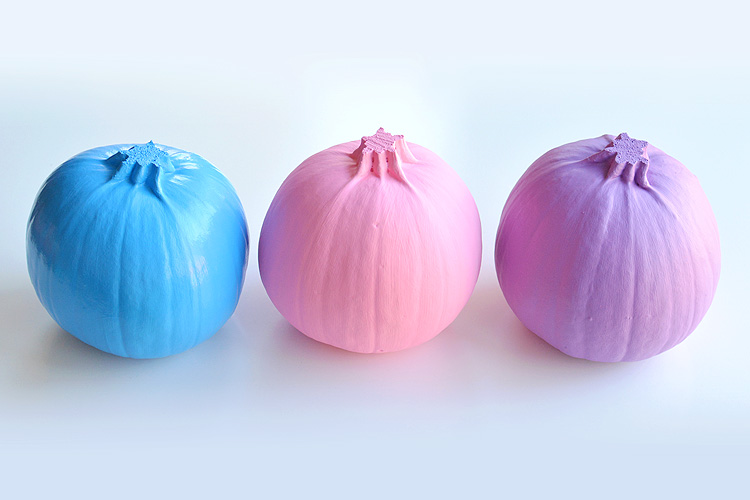
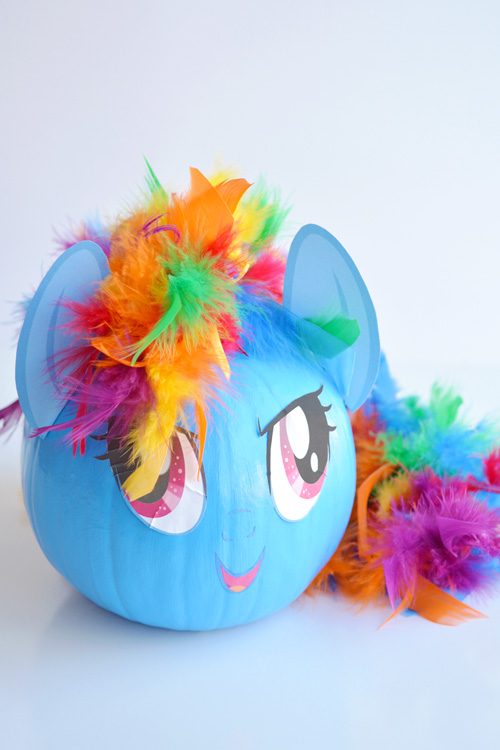
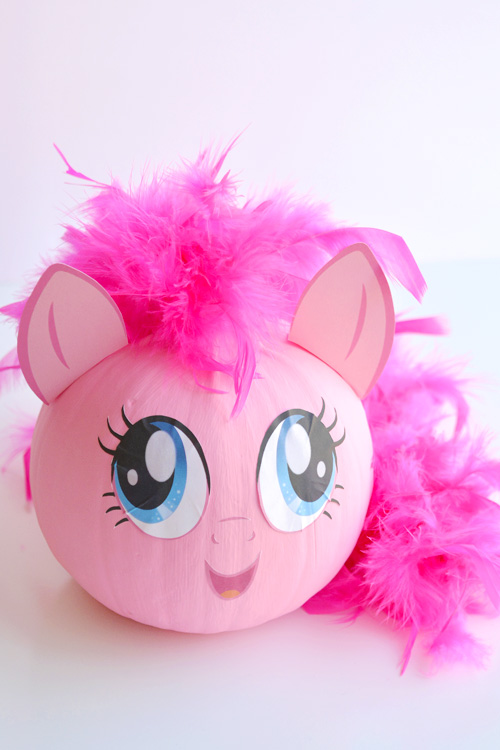
I also painted a blue pumpkin for Rainbow Dash, and a pink pumpkin for Pinkie Pie. I didn’t notice until I got home from the craft store, but my blue paint was satin finish and the pink and purple paints were matte finish. So the blue one is quite a bit shinier than the other two.
Free Printable My Little Pony Face Templates
Here are the free printable face templates for you to download. Click on the link and it will open up a printable 8.5″ x 11″ pdf in a new window:
Twilight Sparkle
Pinkie Pie
Rainbow Dash
Print the face templates on full letter size Sticker Project Paper or Full Size Shipping Labels. I really wanted to use something glossy but I couldn’t find anything in stores. I recommend trying to find Glossy Sticker Paper if you can get it. It will make the colours a lot brighter.

Then cut out all of the sticker pieces. It takes a few minutes to cut out the eyelashes and nose pieces, but it’s really not that bad. If you are finding it too tedious, you can cut the eyelashes off the eye and just paint them on the pumpkin with black acrylic paint afterwards.
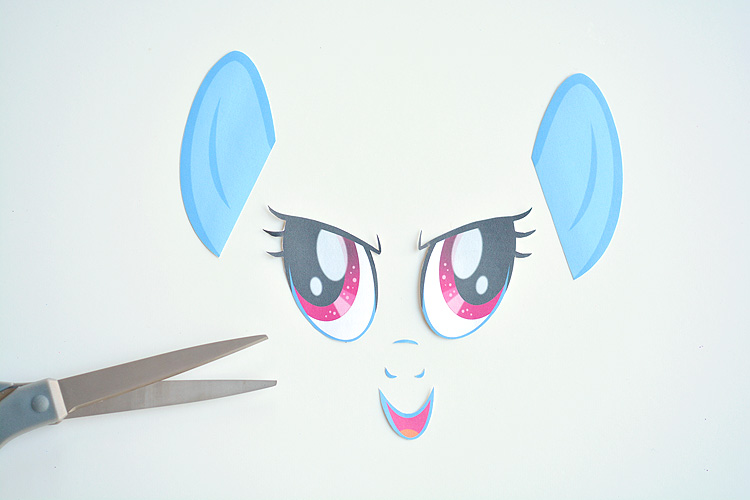
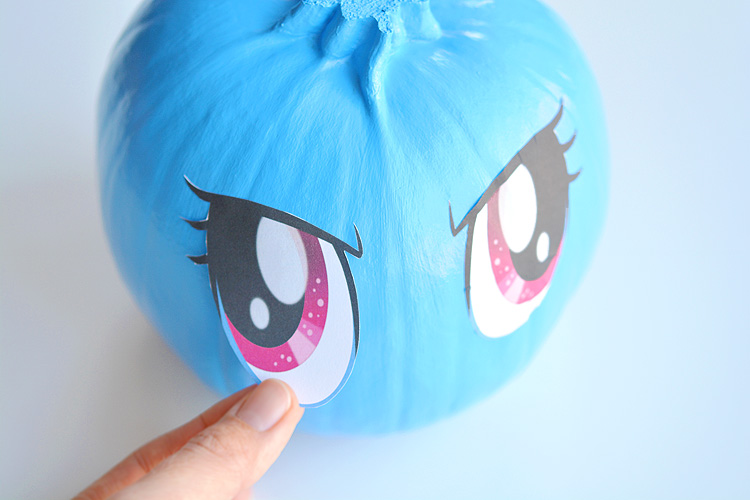
Peel off the sticker backing from the face pieces.

Then press them onto the painted pumpkin. Press down all of the edges to make sure it sticks.
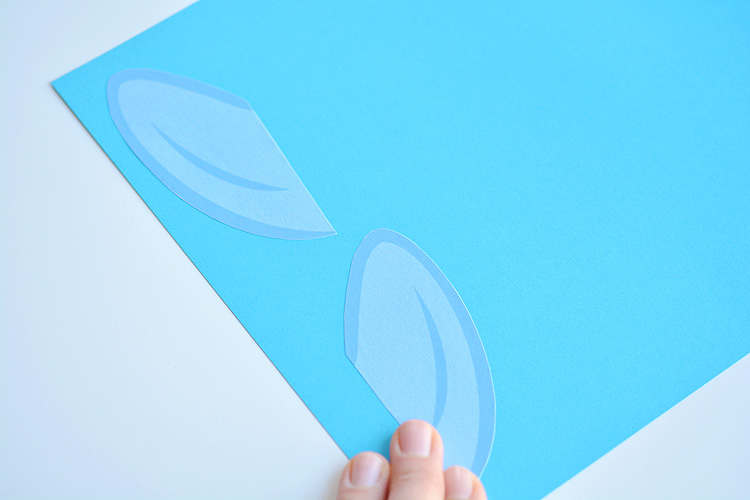
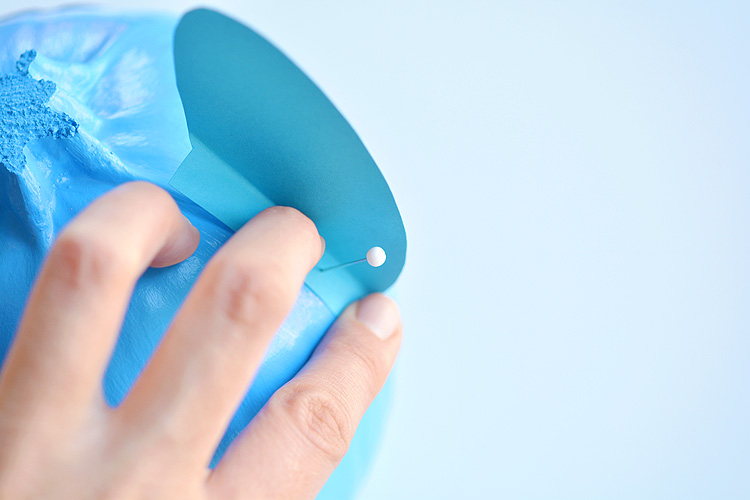
For the ears, peel off the backing and stick them onto a thick piece of paper. A cereal box would work too. You need something a little bit sturdy so the ears can stand on their own.
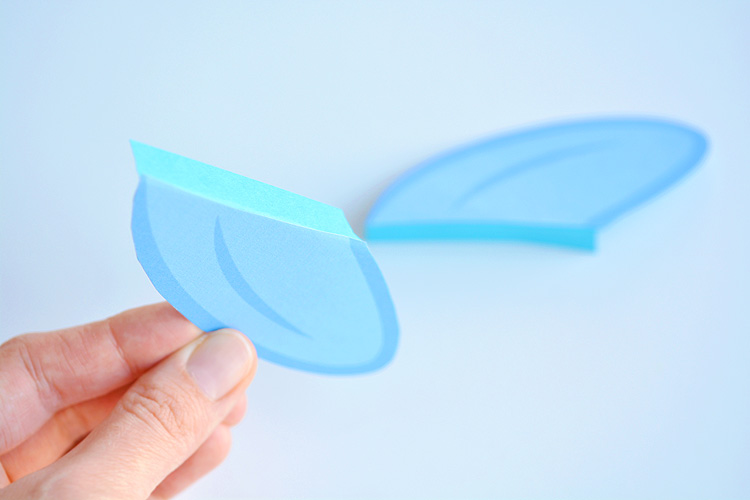
Then use scissors to cut the thick paper out around the ear. Just make sure you leave a 1/2″ tab along the flat edge so you have a way to attach it to the pumpkin. You’ll need to fold the tab backwards.
Position the ears on the side of your pumpkin. I used sewing pins to attach the paper ears to the pumpkin. They went through really easily! Thumb tacks would work well too. I held each ear in place with two pins each.
Then style your pony’s feather boa into a hair style. I used feather boas from the craft store, but sometimes you can find them at the dollar store too. I used about 2 or 3 sewing pins to hold the feather boas in place.
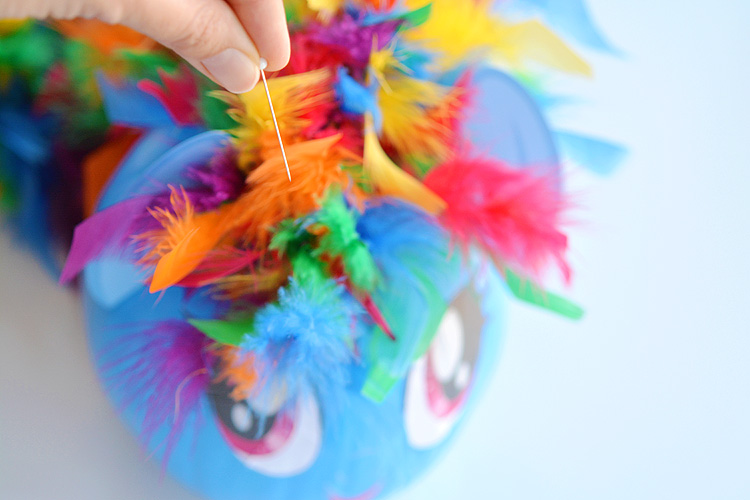
You’ll probably need to cut the boas to a manageable size. I found they were way too long when they were full length.
I love how awesome the feather boas look!! So perfect for My Little Pony pumpkin hair!!
For Twilight Sparkle’s unicorn horn, you’ll need to cut out a tall triangle (about 5” tall and about 3” wide) from thick purple paper and roll it into a cone shape. Use tape to hold it together and then trim the bottom of the cone so it lies flat against the pumpkin. I attached the horn to the pumpkin with regular tape, but you can also use another pin to hold it in place if you need to.
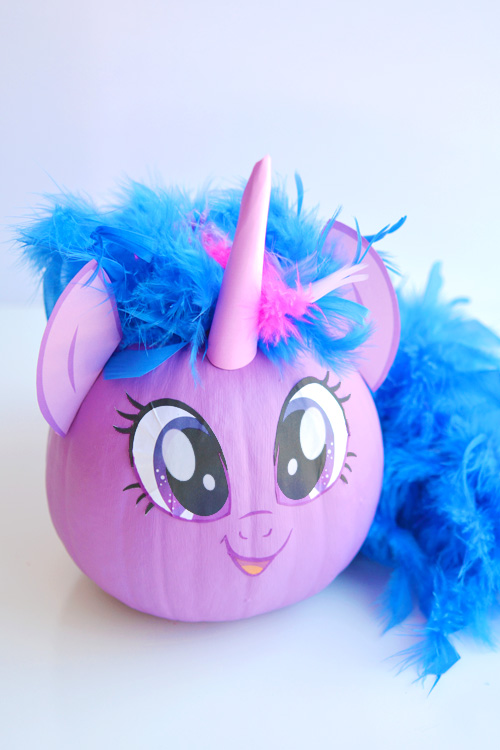
I think Twilight Sparkle is my favourite pumpkin. She just ended up looking so cute with her little unicorn horn! But the other two are pretty awesome too. I love the rainbow feather boa!
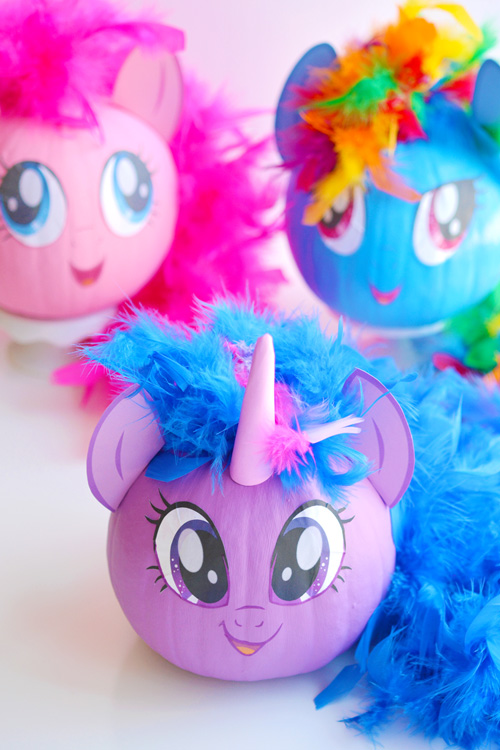
Pony friends forever! I love how the three My Little Pony pumpkins looked beside each other! They are just so colourful and happy looking!
These no-carve My Little Pony pumpkins are so easy to make. The kids will love painting the pumpkins! Using peel off sticker eyes instead of painting the eyes by hand makes it so easy to make the pumpkins look like the actual characters. Of course, if you’re more artistic than I am, you can paint the face on with acrylic paint, but I was pretty relieved to use the template!
Source : onelittleproject.com
Read more...


Post a Comment
Post a Comment