This post is sponsored by Warner Bros. Pictures. As always, the opinions are entirely my own.
Have you ever noticed how baby food jars are the EXACT same shape as LEGO heads? How cool is that!? All you have to do is add cute little faces to them, paint the inside, and they turn into awesome night lights!
The LEGO Batman night lights in the tutorial below were inspired by the characters in The LEGO Batman Movie, which is coming to theaters February 10. My 6 year old loves the LEGO movies. Even the trailer for this one cracks me up:
You know those kids who get huge LEGO kits for Christmas and then spend about 4 hours meticulously following the instructions until all by themselves, they’ve built whatever amazing thing came in the box?
Those are not my kids.
At Christmas, we gave our 4 year old and 6 year old two big LEGO Friends house kits. On Boxing Day, they woke up early and I found myself sitting with them at the kitchen table at 7am – still dark outside – with a LEGO instruction book in one hand and a strong coffee in the other hand. Because my kids refuse to follow the instructions on their own.
After an hour or so, my husband came downstairs and he took over building the LEGO houses – And – I actually started getting JEALOUS that he was stealing my glory! How bad is that!? I guess I wanted to be the one who brought out the excitement in them as they watched the whole thing come together. Those LEGO kits are really cool!
I bought a small LEGO Batman kit for my girls to play with last week to go along with this post (This is an affiliate link to the one I bought). I passed them the instruction book, somehow thinking they’d grown enough since Christmas to build it by themselves, and they just stared at it blankly. haha
So we sat down together, (in between me running back and forth to the kitchen to get dinner ready, of course) and they helped me by finding all the pieces I needed for each step. At least they enjoy helping me. It’s about the small victories, right?
Here’s some more info on The LEGO Batman Movie:
The LEGO Batman Movie – In Theaters February 10
In the irreverent spirit of fun that made “The LEGO® Movie” a worldwide phenomenon, the self-described leading man of that ensemble – LEGO Batman – stars in his own big-screen adventure. But there are big changes brewing in Gotham, and if he wants to save the city from The Joker’s hostile takeover, Batman may have to drop the lone vigilante thing, try to work with others and maybe, just maybe, learn to lighten up.
Will Arnett reprises his starring role from “The LEGO Movie” as the voice of LEGO Batman, aka Bruce Wayne. Zach Galifianakis (“Muppets Most Wanted,” the “Hangover” films) stars as The Joker; Michael Cera (TV’s “Arrested Development”) as the orphan Dick Grayson; Rosario Dawson (TV’s “Daredevil”) as Barbara Gordon; and Ralph Fiennes (the “Harry Potter” films) as Alfred.
Official Websites
Visit the Official Website
Like ‘The LEGO Batman Movie on Facebook
Follow on Twitter and Instagram
Rated PG
How to Make LEGO Batman Night Lights Using Baby Food Jars
Now on to the tutorial!
The affiliate links below will take you to similar products on Amazon that should work for this craft. You can probably get them cheaper at the craft store, but the links will give you an idea of what supplies I used.
Here’s what you’ll need:
- Baby Food Jars (Earth’s Best or Heinz have great LEGO head shapes!)
- Goo Gone
- White and Skin Coloured Acrylic Paint
- Sharpie Fine Tip Markers (various colours)
- LEGO Batman Faces Printable
- Self adhesive sparkly black craft foam
- Gray felt
- Giant Chenille Pipe Cleaners (brown and green – I can’t find a link for them on Amazon, but I found mine at Michael’s)
- Hot glue gun
- Water
- Paper Towel
- Battery Operated Tea Lights
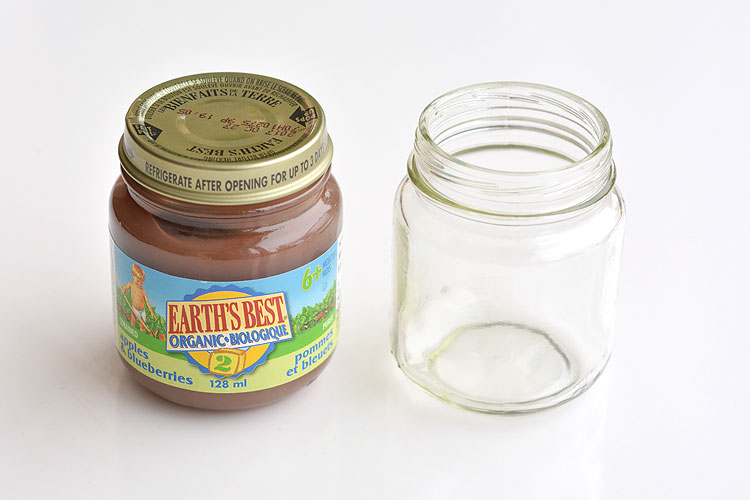
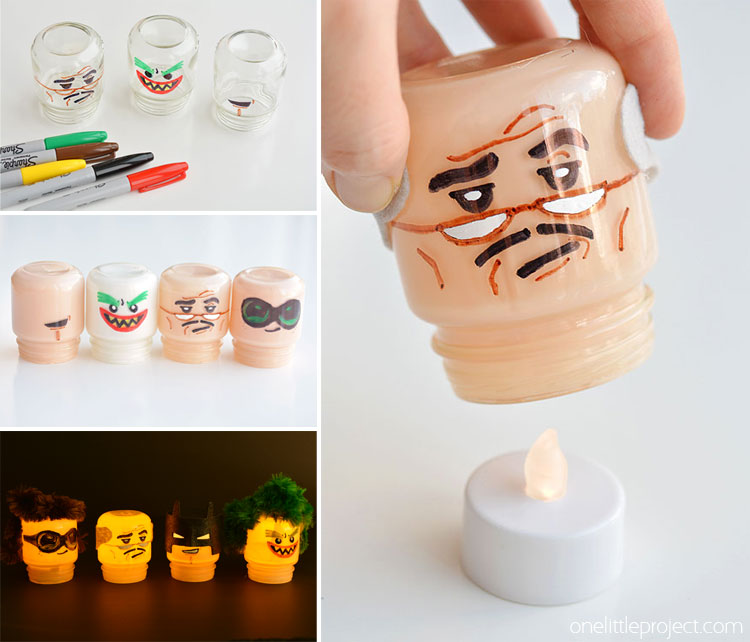
Start by peeling off the labels from the baby food jars. I had to use Goo Gone to get rid of some of the glue residue, but it was pretty easy to get them clean.
Next you’ll need to draw the faces onto the baby food jars using Sharpies. By all means, if you think you can do it freehanded, go right ahead! Drawing faces just isn’t my strong suit though, so I created this free little printable for you. It makes it super simple to get perfect faces!
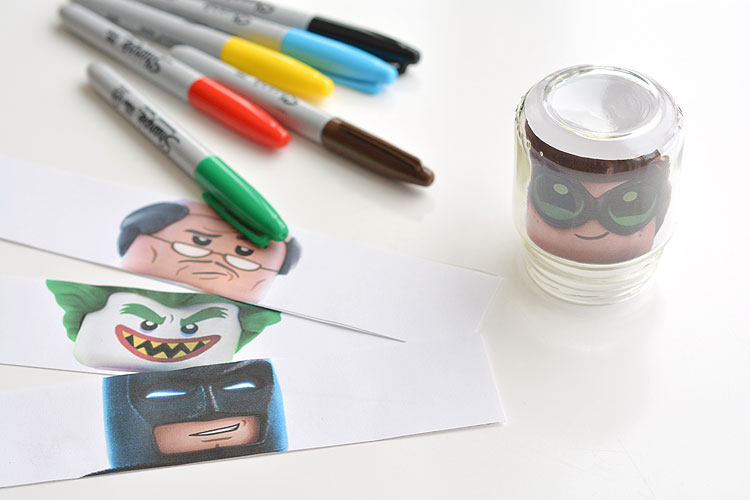
Cut out each of the faces, roll them up, and place them into the baby food jars.
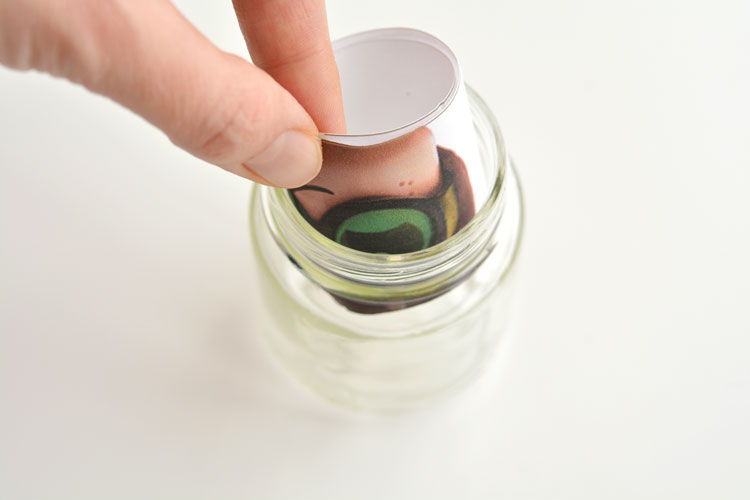
Use Sharpie fine tip markers to trace and colour in the faces.
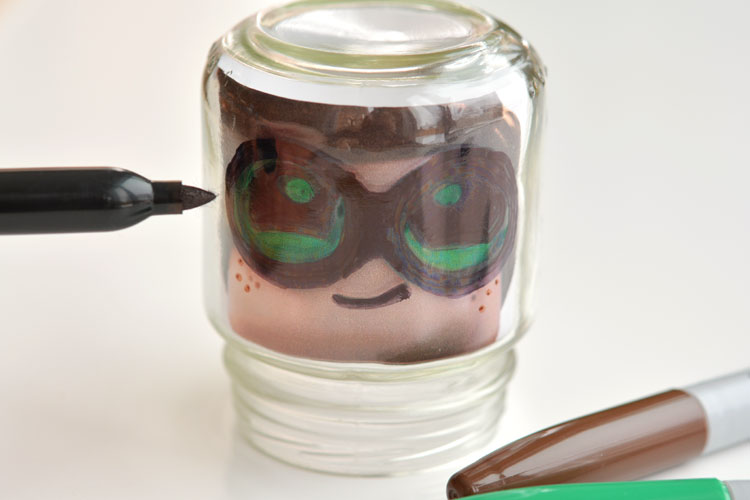
You’ll probably want to do two coats with the Sharpies to get better coverage on the glass.
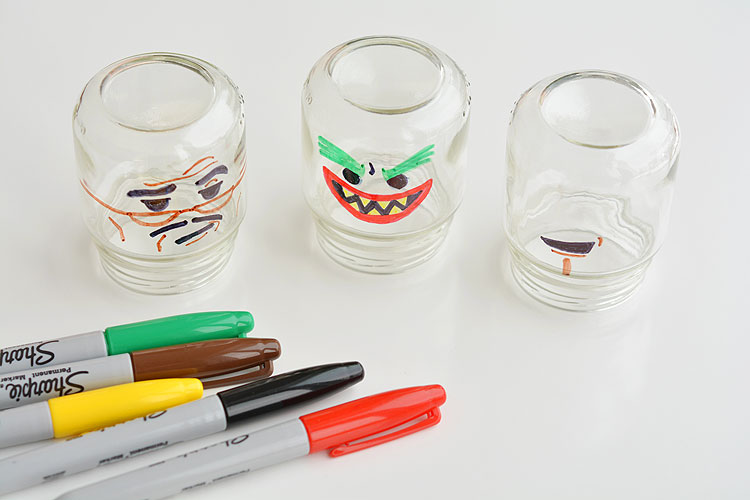
I left Batman pretty simple with just a mouth since he’ll need a mask later.
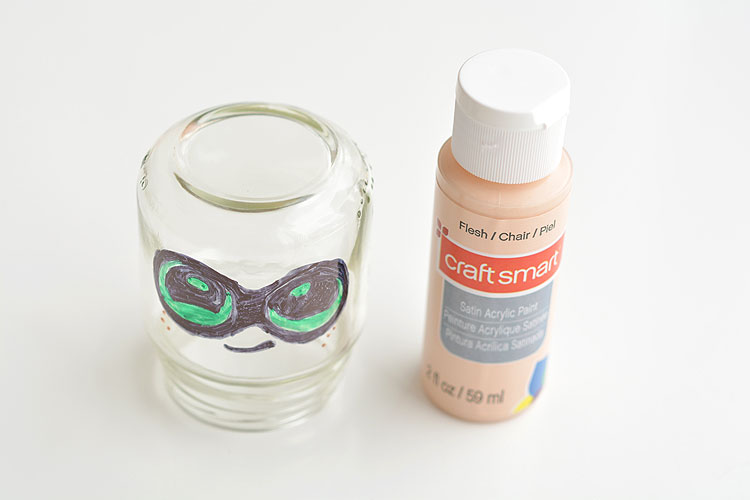
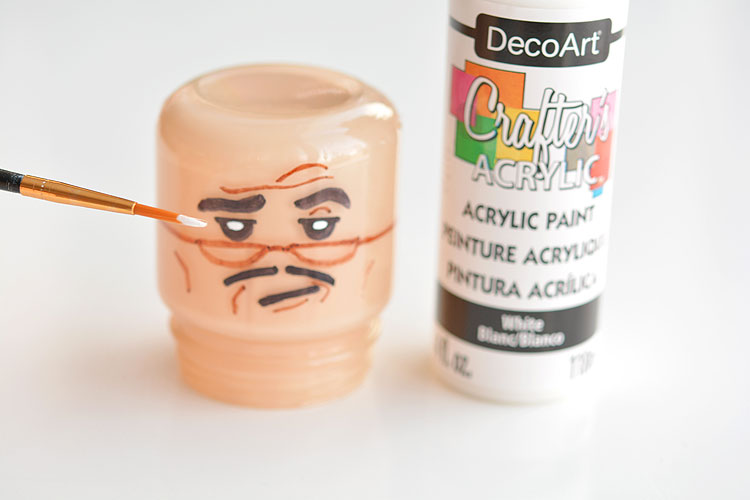
Next, you’ll need some skin coloured acrylic paint. I used “Flesh” by Craft Smart from Michaels.
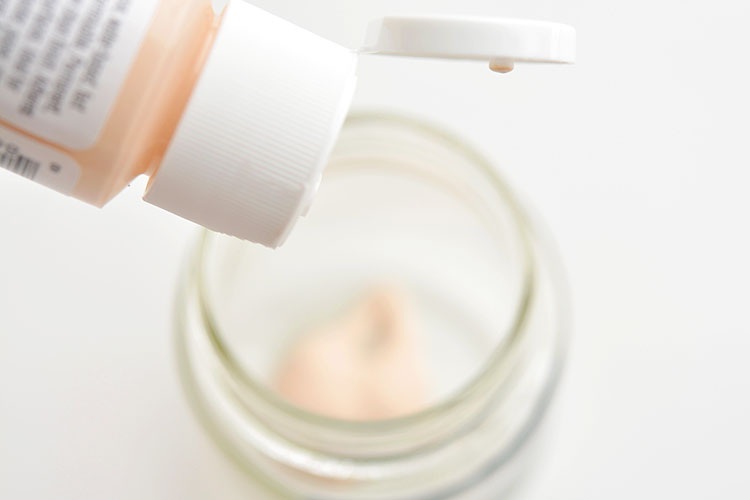
Squeeze a generous amount of paint into the jar and add about 1/2 Tablespoon of water. Just eyeball it. You need enough water to help the paint spread around, but not so much that it keeps the paint from sticking. Don’t worry, if you add too much water and find that the paint isn’t sticking, just pour it out and add more paint.
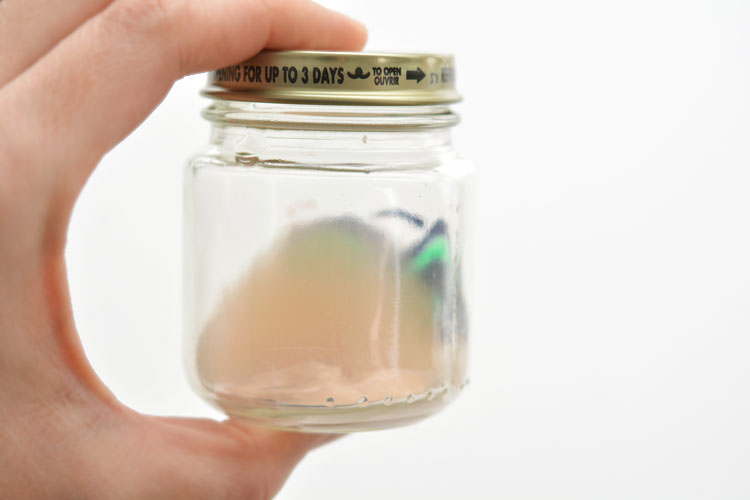
Screw the lid back on the jar and give it a good shake to spread out the paint.
Take the lid off, pour out any extra paint and use a paper towel to wipe any drips from the neck of the jar.
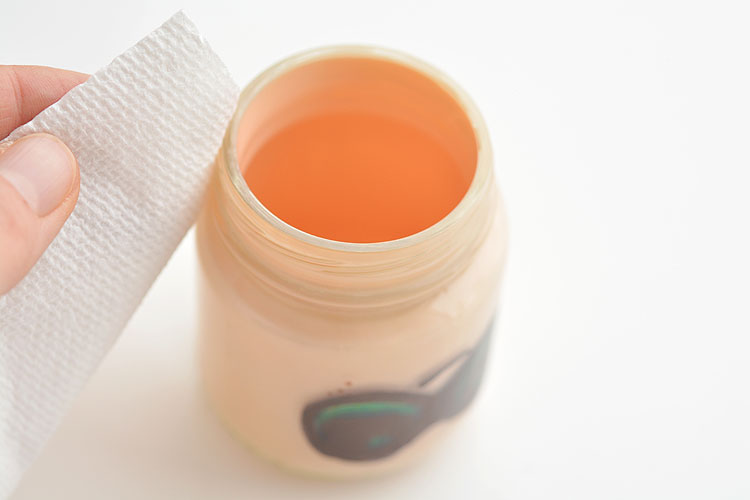
Place the jars upside down to drain. I lined a baking sheet with aluminum foil, added a layer of paper towel so that the paint wouldn’t pool and then put the jars on some wooden skewers to leave room for the paint to drip out.
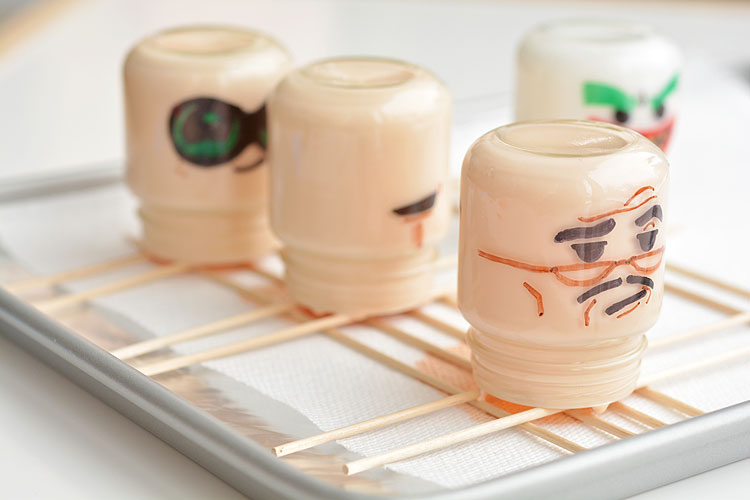
Let them drain for at least 20 minute or so. Every once in awhile, lift the jars and wipe down the rim with paper towel. You don’t want little mountains of paint to form.
I didn’t have the patience to wait a day or two for the paint to dry, so after all the paint had dripped out, I laid the jars on their side (with the faces pointed up so that any pooling paint was at the back) and turned a fan on to blow inside of the jars. It took about 3 hours for them to dry completely with the fan on them.
If you leave them to dry on their own without a fan, it might take a day or two for the paint to dry completely.

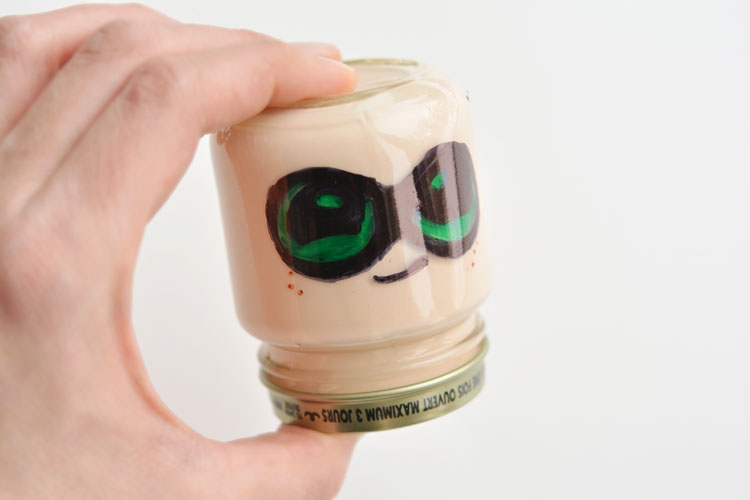
If you like, you can add white paint to embellish the eyes, glasses and smiles.
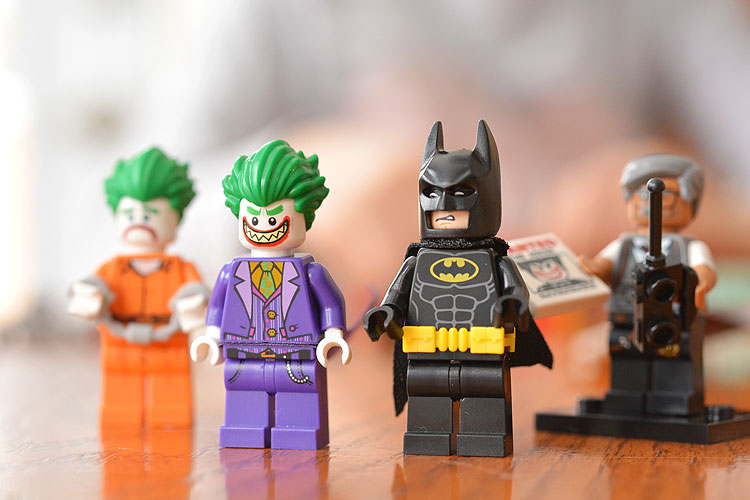
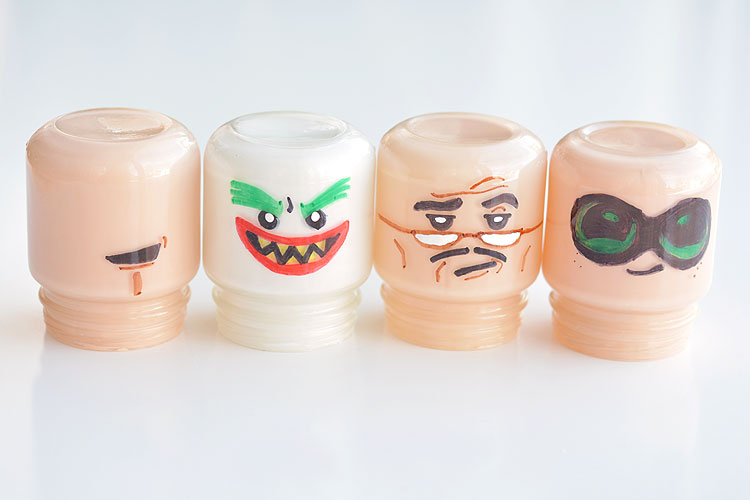
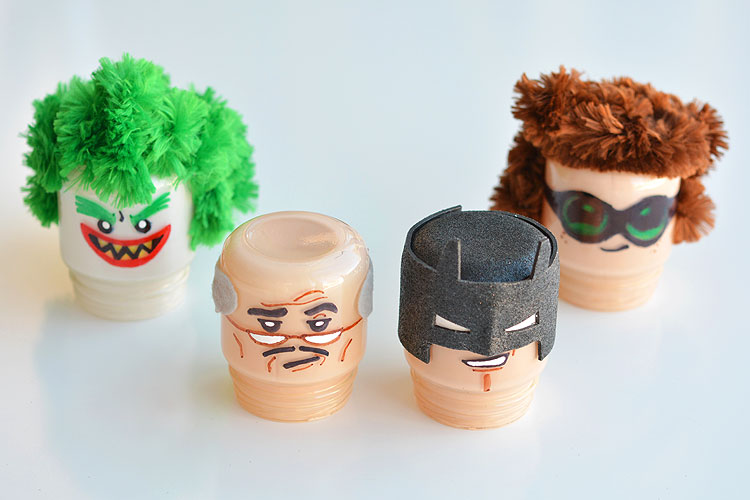
Here’s what they all look like bald, before any extra features are added. I love how the baby food jars make a perfect LEGO head shape!
For Batman, I used sparkly black, self adhesive craft foam. You’ll want to cut out a circle for the top of his head, and a bat mask, similar to the one I cut out below.
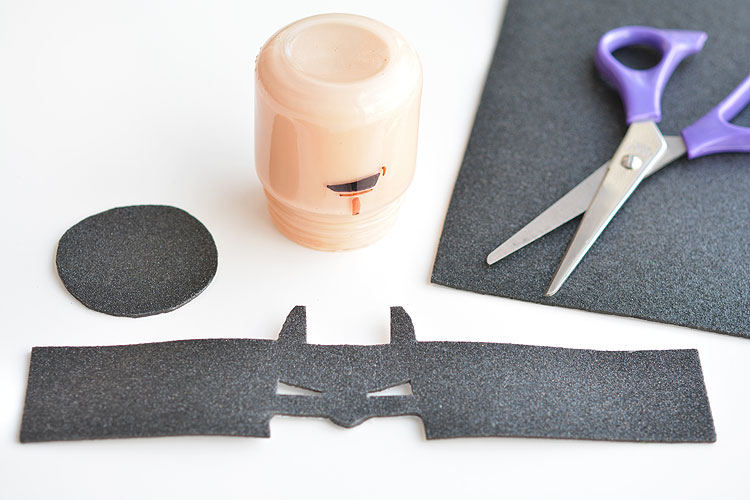
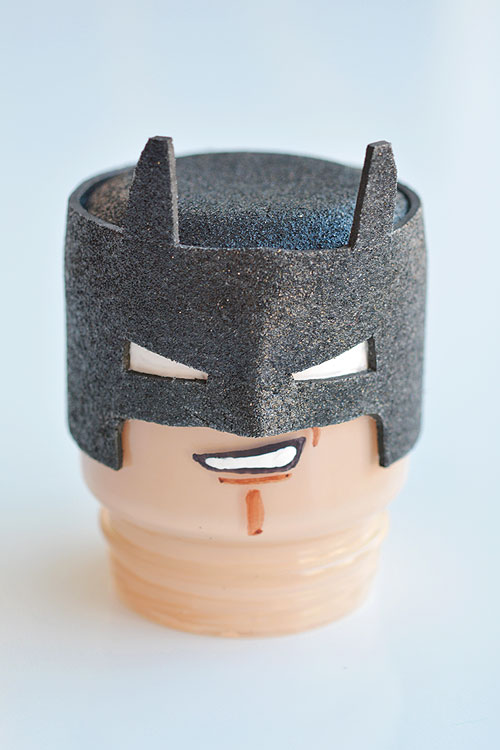
I decided to add a line of white paint for the eyes before I added the mask, but here’s how he turned out. Pretty cool, don’t you think? Since it was self adhesive foam, all I had to do was pinch the nose to give it some shape. So awesome!
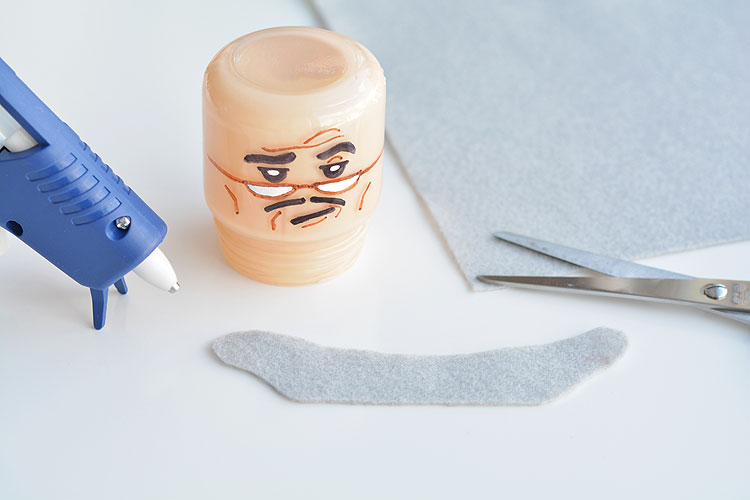
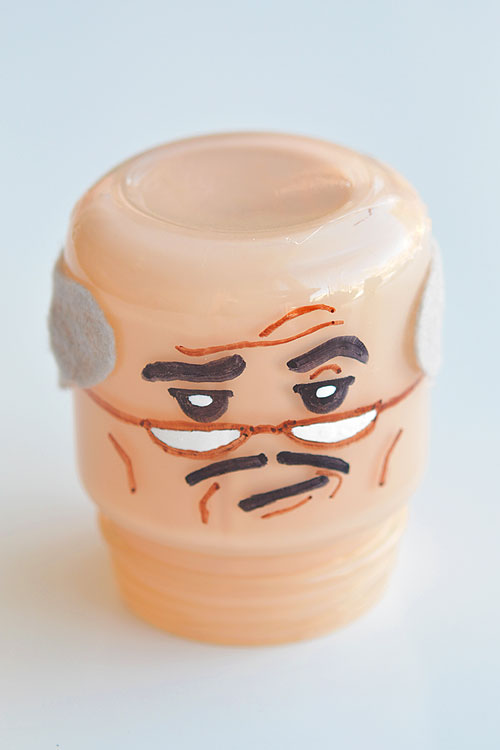
Alfred was my favourite character to make. His face turned out so well! I just cut out a small piece of gray felt for his hair and used hot glue to attach it to the jar.
I love the look on his face!
The Joker and Robin were a bit more challenging, just because I had to figure out how on earth to make their hair. I decided to use giant chenille pipe cleaners, but maybe you can think of something even better?
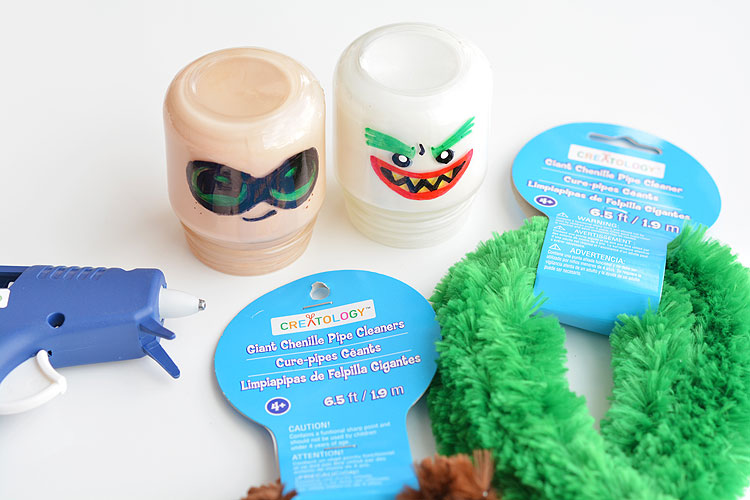
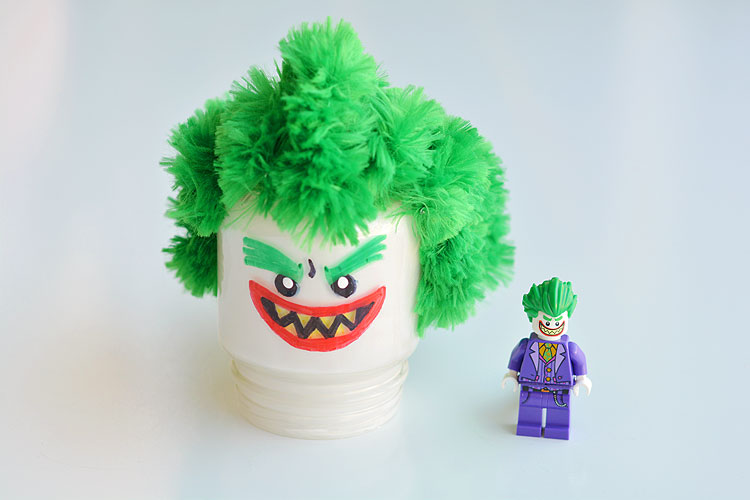
For the Joker’s hair, I cut out small strips of the giant pipe cleaners using wire cutters and shaped them as best I could to the shape of the Joker’s hair. I used hot glue to hold it in place.
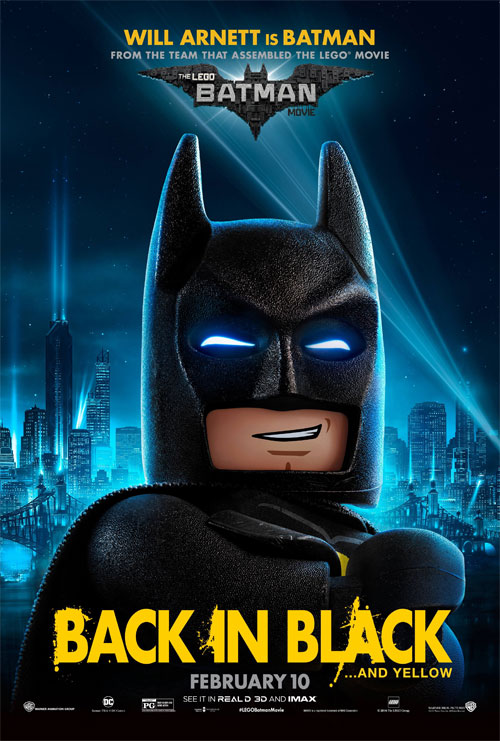
Here’s a side by side photo of my baby food jar Joker and the actual LEGO Joker. Not bad, right?

LOL This one makes me laugh a bit. Here’s a side by side with the LEGO Joker. Oh, that hair!
Here’s all the night lights when they were finished. They turned out so well! Especially the Batman and Alfred characters!
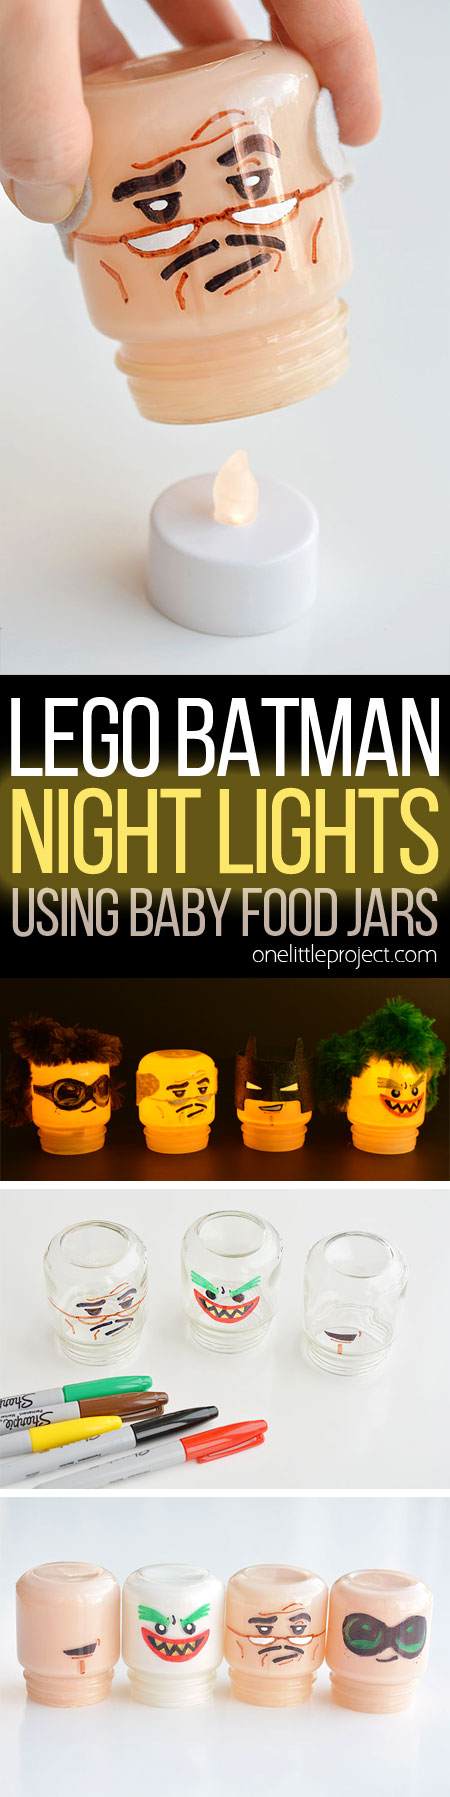
And to turn them into night lights, all you need are a few battery operated tea lights to place underneath each of the jars.
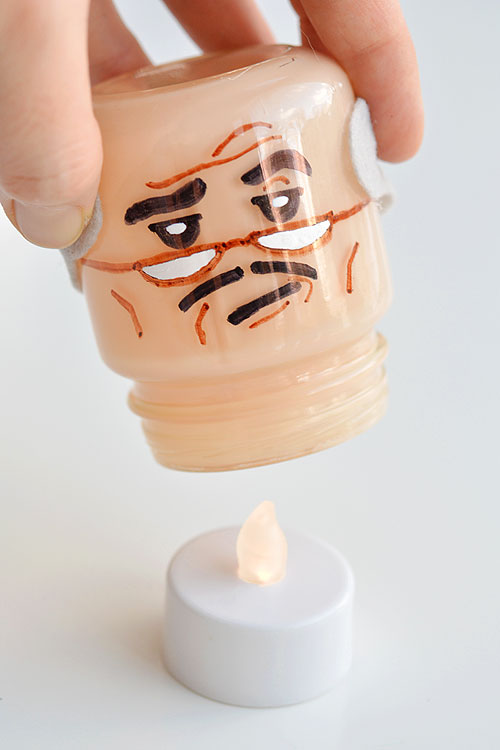
Turn off the lights, and they glow!
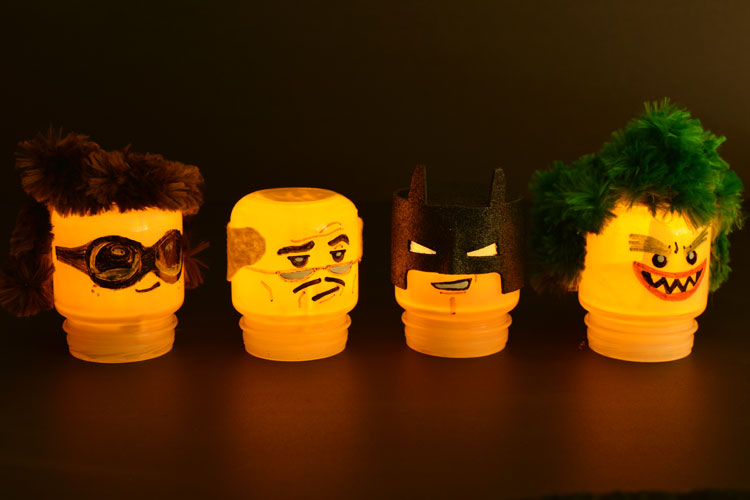
I was worried the paint would be too thick for the light to shine through, but it wasn’t a problem at all.
These LEGO Batman night lights are such a fun little activity if you have any LEGO fans in the house. Or Batman fans. Or LEGO Batman fans. Seriously, these are so much fun to make and are simple enough that the kids can do a lot of the work themselves!
Source : onelittleproject.com
Read more...


Post a Comment
Post a Comment