OK you guys, I think I’ve fallen in love with another kids activity. These crystal stars are awesome! Any activity where I get to make something beautiful from bright rainbow colours, and I’m totally on board! I think I might love it almost as much as I love making puffy paint window clings. These are so easy to make, and they look SO COOL when they’re done!
I wasn’t sure what my 5 year old and 3 year old were going to think, but they had a blast. I was sitting in the chair folding pipe cleaners around the cookie cutters and their little noses were right in there as they said “Oooooo! What are you making Mommy!?”. They couldn’t wait to get their hands on the pipe cleaner stars. And then of course we had to make pipe cleaner magic wands too. (We didn’t grow crystals on the wands, but we really should have!).

It takes a few hours to grow the crystals, but the actual work involved with putting them together is really fast. We whipped up our crystal stars in about half an hour before we left to visit my mother and father in law for the day. And then by the time we got back at bedtime, the crystals had fully formed!
Check out our video on How to make Crystal Stars:
Looking for even more super fun kids crafts? Check these out!
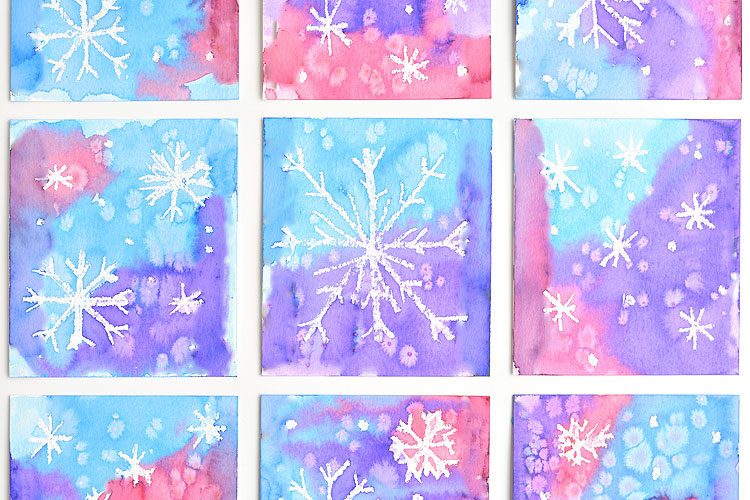
Magic Salt and Watercolour Snowflake Art
How to Make Crystal Stars
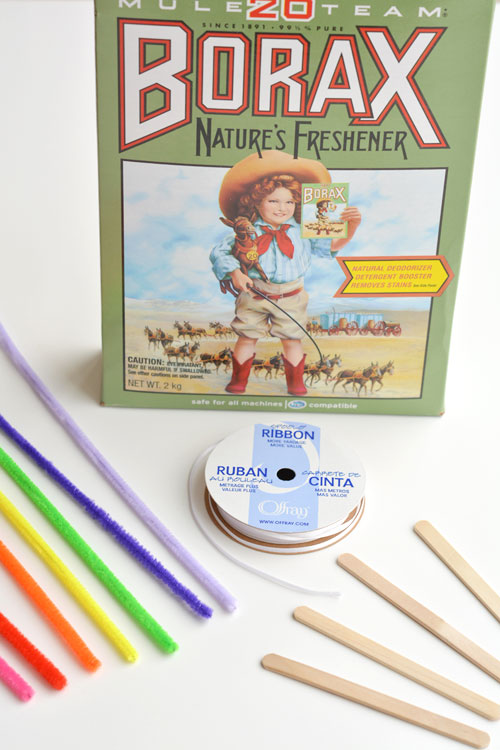
The full printable directions are at the bottom of this post, but here’s what you’ll need:
- Borax
- Water
- Pipe Cleaners
- A Star Shaped Cookie Cutter
- Thin Ribbon or String
- Popsicle Sticks
- Mason Jars
I had Borax leftover from when we made Homemade Gak last summer (also a super fun experiment!). But if you need to buy it, we found ours at Walmart in the section with the Oxy Clean. You can also order it online from Amazon. (affiliate link).
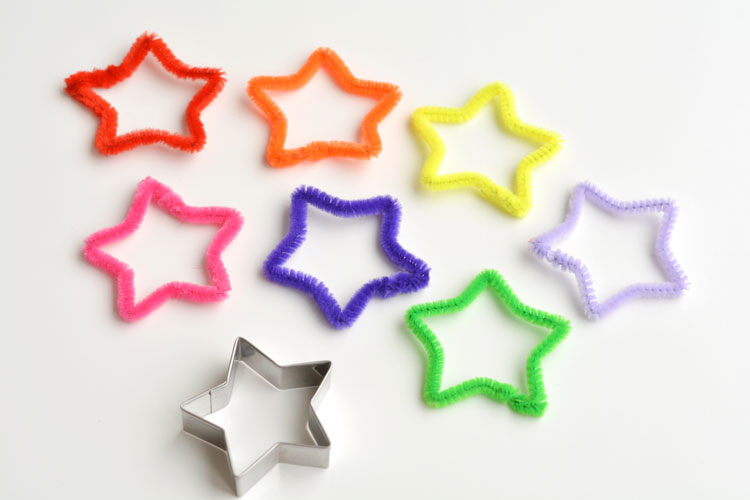
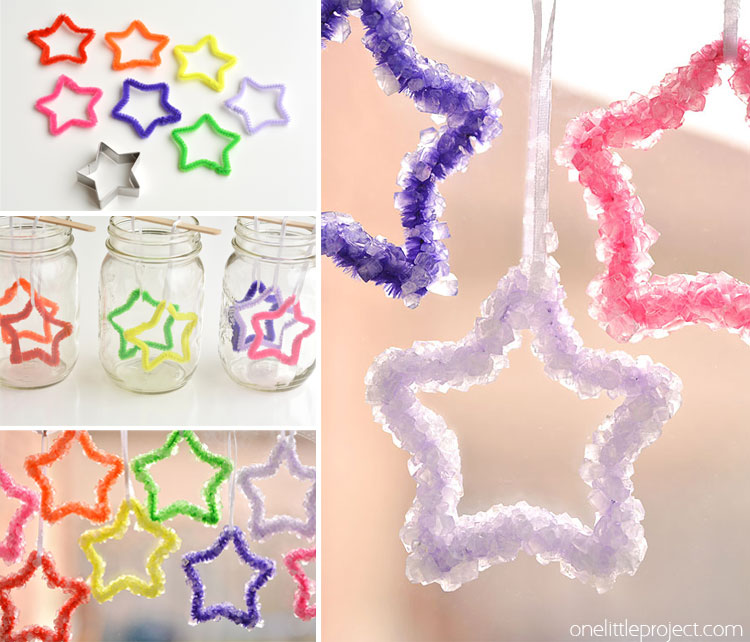
Using a cookie cutter is such a great way to bend perfect stars! Or you could make other shapes too, depending on the season! If you want to bend the stars free-handed, by all means, give it a try, but I loved how perfect they looked using the cookie cutter.
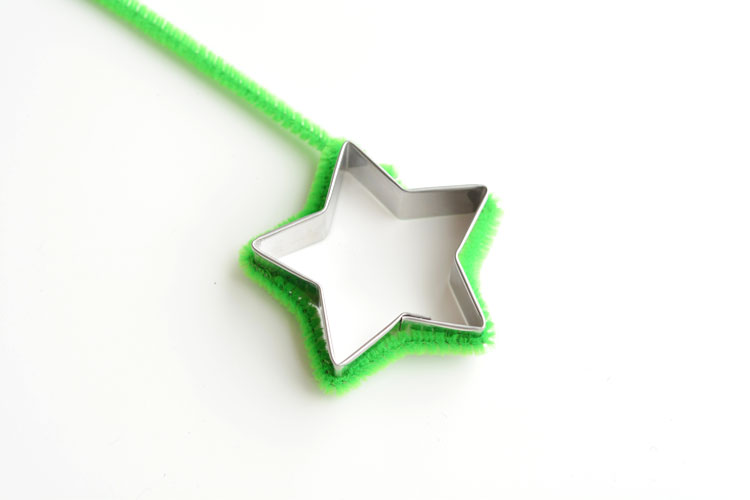
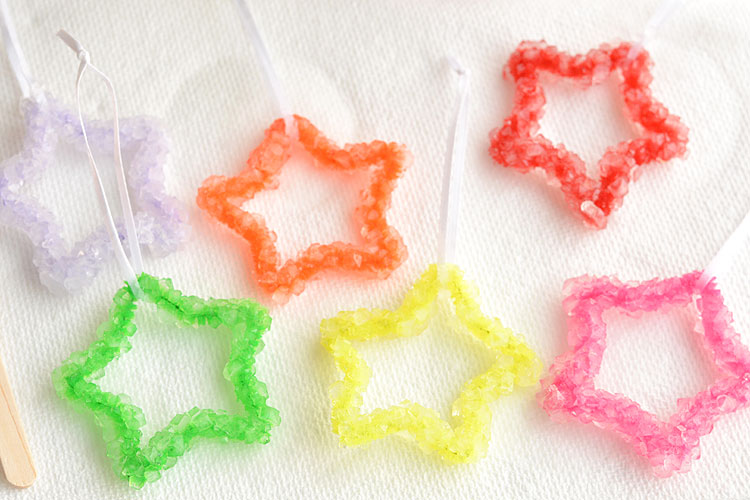
Snip off any extra pipe cleaner once you’re done making your shapes. (Or you know, leave it there, and you’ve just made a magic wand…) Since I go crazy for anything rainbow coloured, I made the stars in all the colours of the rainbow.
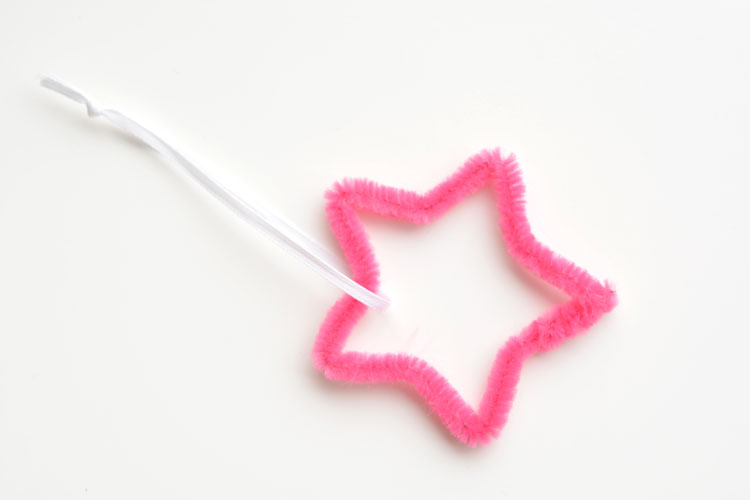
Then tie a piece of thin ribbon or string from the star.
Hang the string over a popsicle stick, and dangle the stars inside 2 cup mason jars. We were able to fit three stars max in the jars, but two stars was more comfortable.
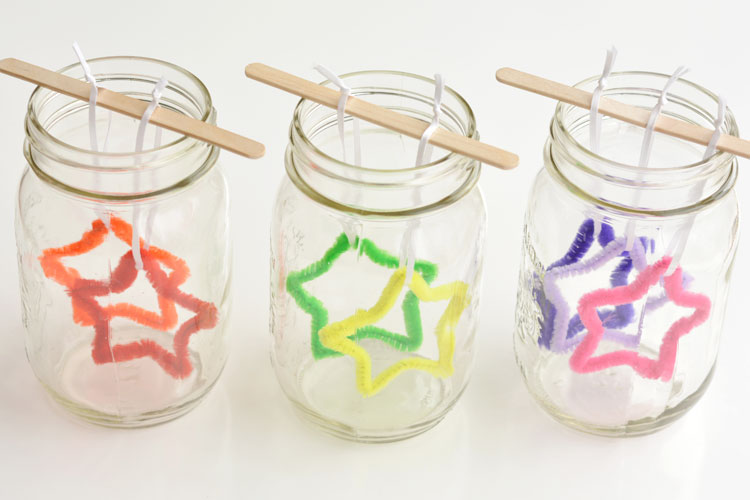
You need to make sure the stars dangle freely without touching the bottom of the jar, the sides of the jar or each other. My 5 year old and 3 year old were super excited to help out.

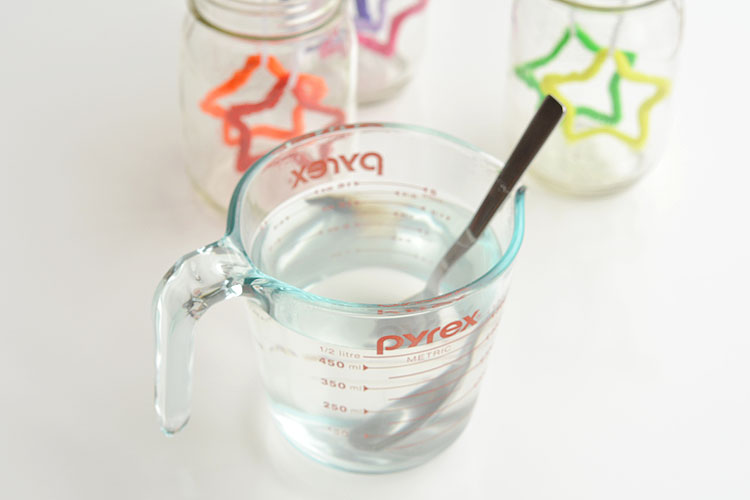
Mix together the borax and boiling water until the borax is completely dissolved.
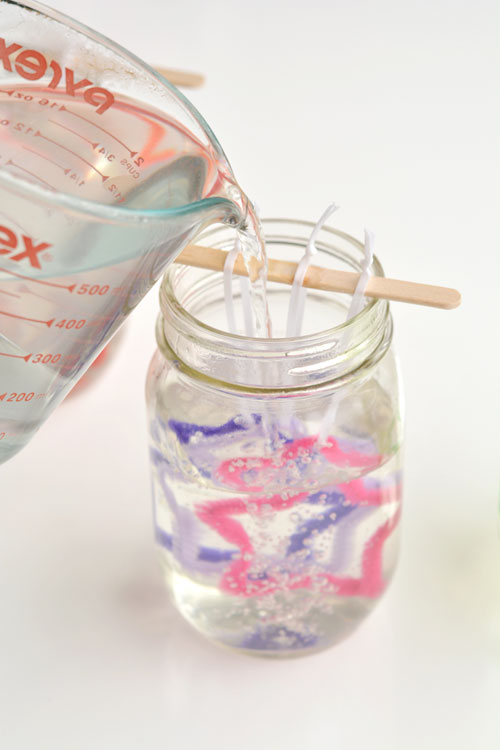
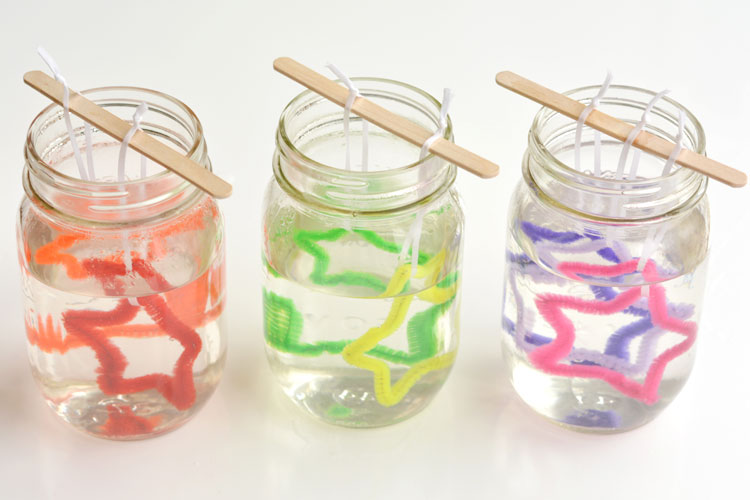
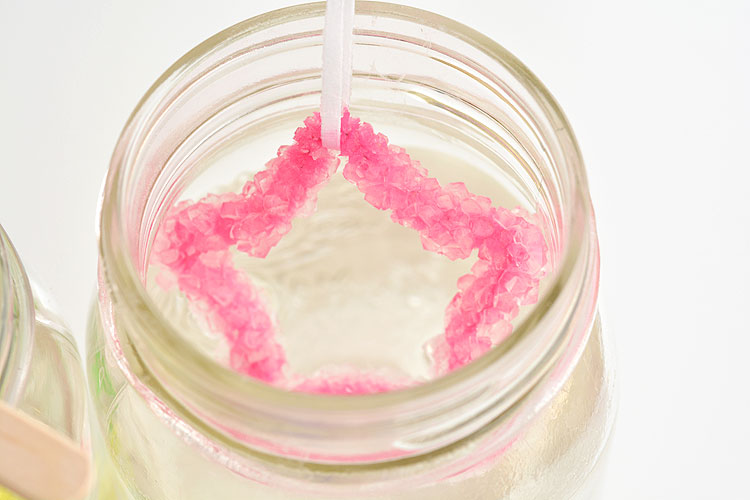
And then pour it into the mason jars until the tops of the stars are covered. The crystals will grow on the ribbon as well, so I don’t really recommend filling the jars completely.
If you spill anything, be sure to clean it up fairly quickly or you’ll grow crystals on your counter too. And you probably don’t want to do that. Remember, borax is abrasive, so be gentle as you wipe it up.
Repeat the recipe at the bottom of this post as needed, depending on how many jars you’re filling. We made three batches for 4 mason jars and 9 stars.
I guess you could mix the borax and water together all at once if you want to, but for us, it was way easier to pour from a 2 cup measuring cup, than a large bowl with a spout on it.
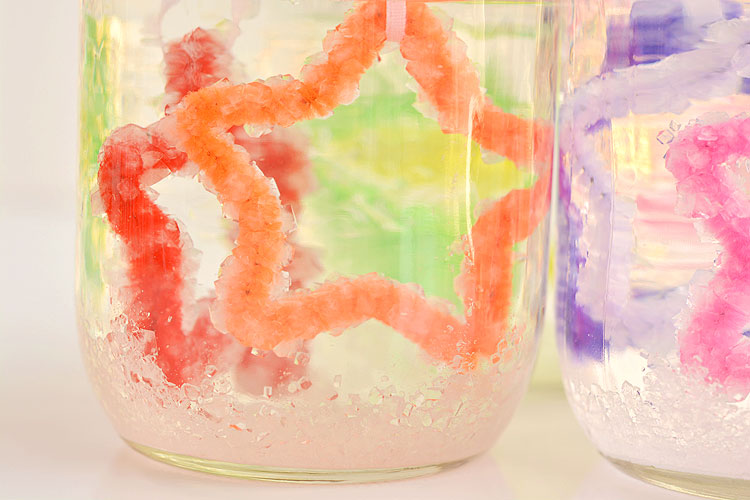
We left our crystals for about 20 hours and they looked like this:
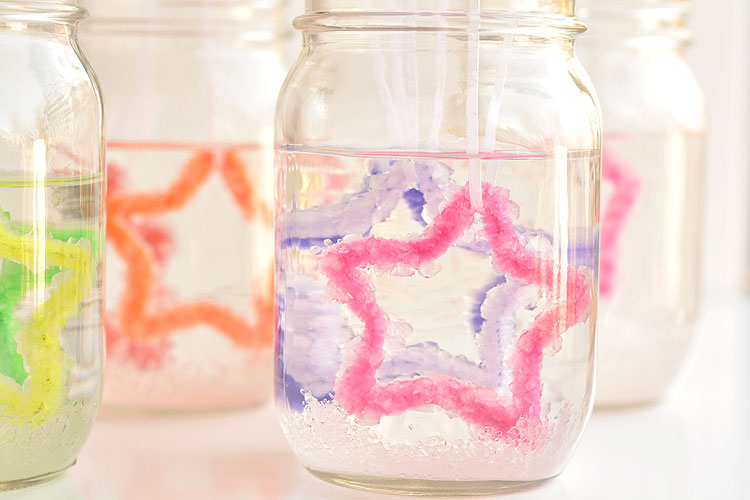
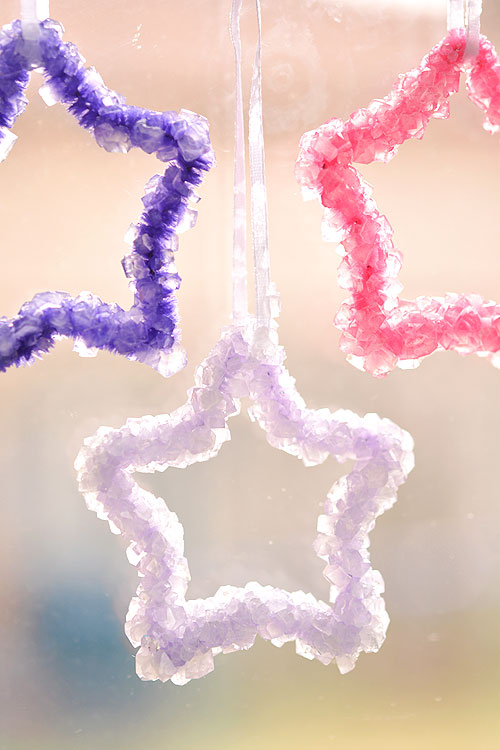
All the rainbow colours make me reeeeeeally happy. I just can’t help but share all the photos!
We checked on the crystals when we got back from my in-laws house, about 6 or 7 hours after we made them – and they looked done. So you definitely don’t have to leave them overnight if you’re in a hurry. I left ours longer because I wanted to make sure we had the full effect.

Wide mouth mason jars would work the best if you have them. The stars really harden up after the crystals grow, so it was a bit of a challenge to squeeze them out of regular mason jars. Oops!
Seriously though, how cool are these!?
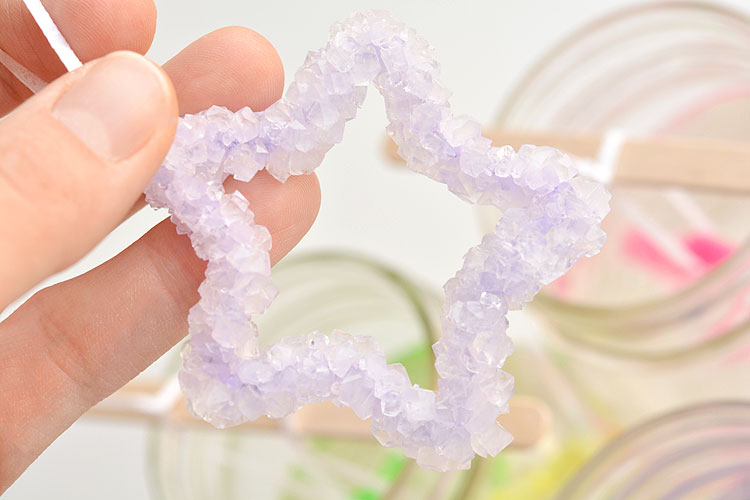
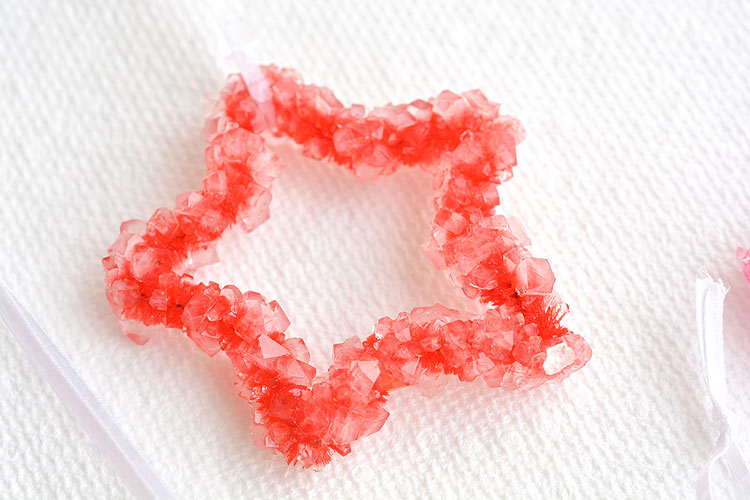
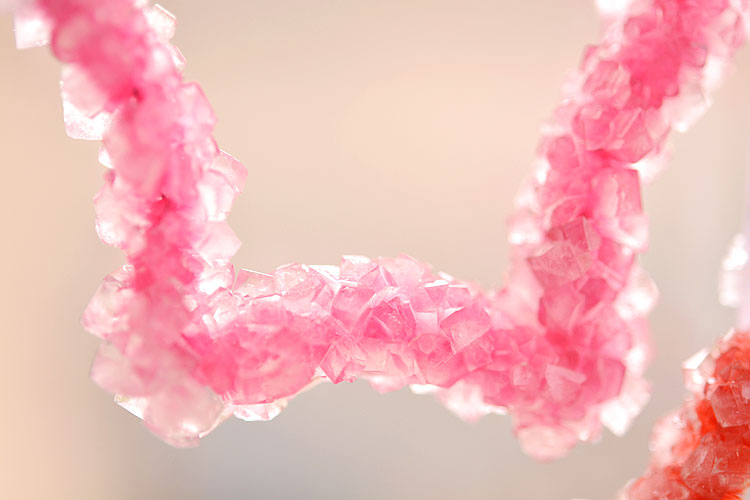
The crystals looked like little ice cubes growing on the pipe cleaners.

And I love that you could see the colour of the pipe cleaner through the crystals. So pretty!
Lay them out on a paper towel to dry.
And what did I do with all of that leftover borax water, you ask? I did a few loads of laundry and poured in one jar of borax water per load of laundry for some extra fresh clothing – Afterall, borax is an excellent detergent booster! (Just make sure you only pour in the water, not the crystals.) After you’ve poured the borax water into the laundry, use a spoon to scrape out the crystals – they come out really easily while everything is still wet.
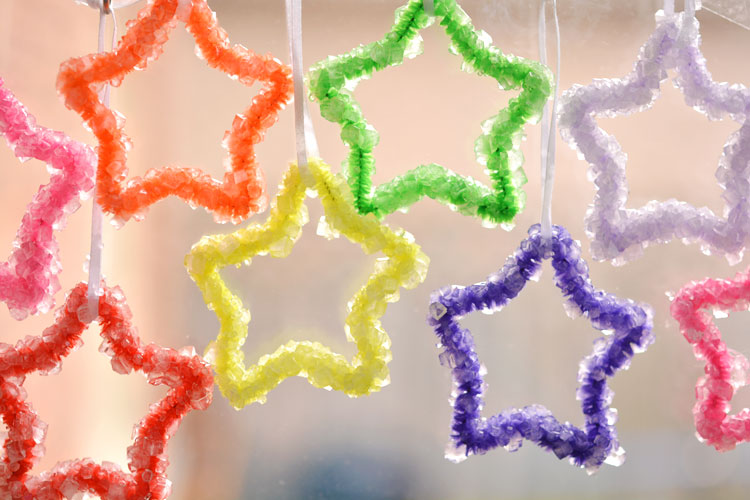
We hung ours in the window for a cute little star display.
I’ve heard that you can add some food colouring to the water to enhance the colour. That would definitely be a fun thing to try next time!
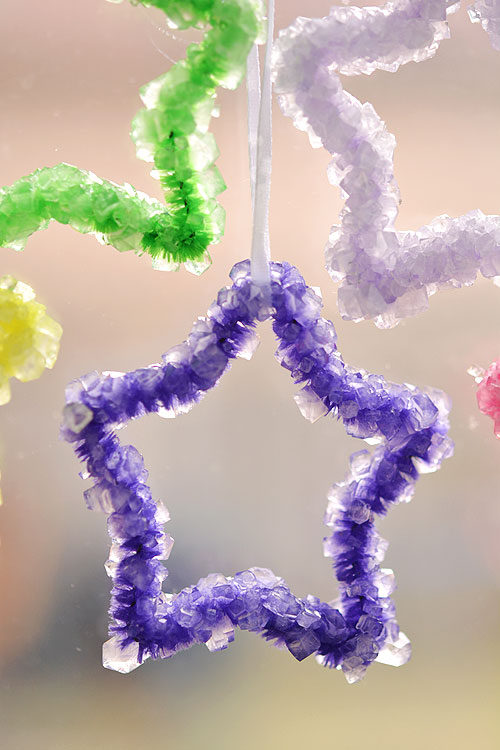
They look delicate, but don’t be fooled, they are really strong! We dropped ours on the floor a few times, and they held up perfectly.

We have these hanging in the window for now, but I think I might save them for the Christmas tree next year. Wouldn’t they make pretty Christmas ornaments??

How to Make Crystal Stars
Materials
- 2 cups Boiling Water
- 1/2 cup Borax
- Pipe Cleaners
- String
- Popsicle Sticks
- Star Shaped Cookie Cutter
- Mason Jars
Instructions
- Bend the pipe cleaners around a cookie cutter to make the star shape.
- Tie a thin ribbon or string around the stars and hang them from a popsicle stick.
- Depending on how big your jars are, hang two stars from the popsicle stick and let them dangle freely in the mason jar, making sure they aren't touching each other or the side of the jar.
- Pour 2 cups of boiling water into a glass measuring cup.
- Add the borax and stir until dissolved.
- Pour the hot liquid into the mason jar.
- Leave them for 6 to 24 hours and watch the crystals grow!
These crystal stars are really easy to make, and they look beautiful! It’s pretty incredible that it’s only borax and water! You can make them in any shape and any colour. Hang them in the window or save them to use as Christmas ornaments. I definitely recommend trying this one!
Here are some more awesome kids craft ideas:
Magic Salt and Watercolour Snowflake Art
Source : onelittleproject.com
Read more...


Post a Comment
Post a Comment