Who’s with me on breathing a HUGE sigh of relief that the kids are back at school? Phew! My 6 year old started Grade 1 yesterday and couldn’t be more excited about it! But my 4 year old on the other hand, had a bit of a rough time. She started Junior Kindergarten and was pretty stressed out about it.
She walked into the fenced area of the school yard, stood by herself looking around for about a minute, and then she burst into giant crocodile tears. And then I was sniffling behind my sunglasses, watching her helplessly from behind the fence. I’m sure she’ll eventually get used to it, but it was so hard to watch her like that! Half the kids were happily waving goodbye to their parents, and the other half were in tears, just like my daughter. It just broke my heart!
We got a call from her amazing teacher at lunch time to check in and say that she was doing great at school. And that my girl went straight to the craft table and got to work on making some artwork. My daughters LOVE crafts. When they got home from school and saw these chalk stenciled pumpkins on the kitchen table, even after a busy first day at school they were super excited to make these pumpkins for themselves!

These chalk stenciled pumpkins are so easy to make and they’re SO MUCH FUN! I love how the chalk on the dark paper makes the whole thing look like it’s glowing! It’s such a fun little craft project!
Chalk Stenciled Pumpkins
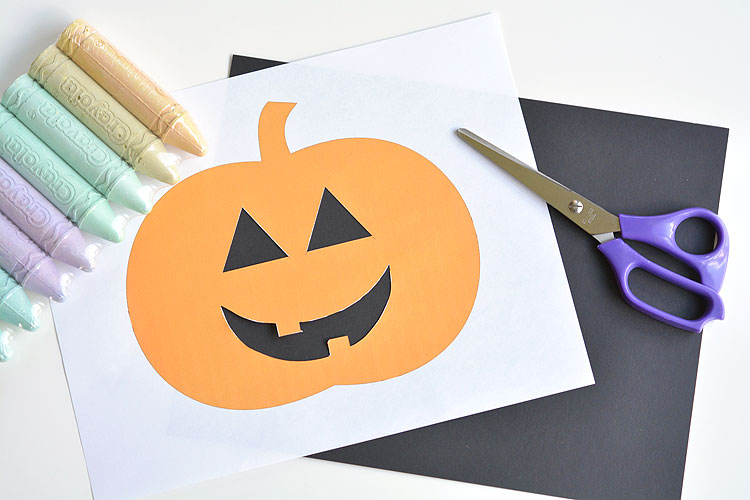
Here’s what you’ll need:
- Black Card Stock (Or black construction paper, I used cardstock because it’s slightly darker)
- Orange Chalk or Sidewalk Chalk
- Scissors
- Double Sided Tape
- Cotton Ball
- Printable Pumpkin Template
I’ve been wanting to try these pumpkins since we made chalk stenciled Christmas lights last year using the same technique. It’s such a fun little process and the kids seem to really love it! We don’t let them use their sidewalk chalk in the house very often, so it was like a fun little adventure!
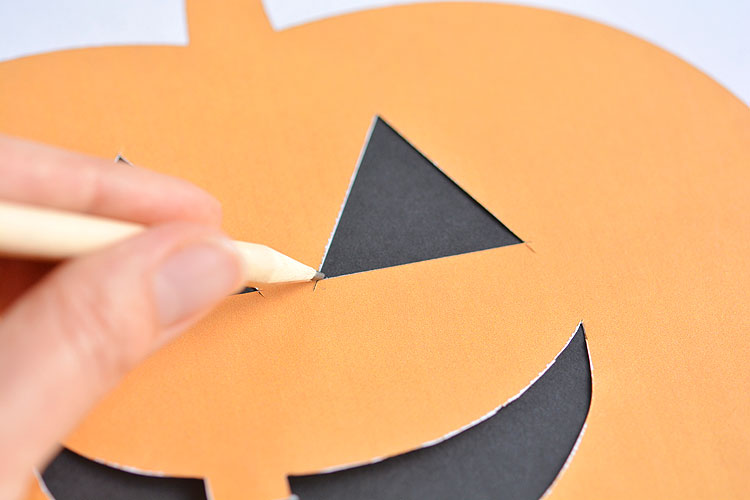
I used my craft knife to cut out the eyes and the mouth, but you can definitely use scissors too. If the kids are doing it themselves, print out two of the pumpkin templates. Then they can cut the eyes out of one of the templates and the pumpkin out of the other one.
After I cut the eyes and mouth out of my template, I used a pencil to lightly mark where the stencil pieces need to go on the black paper. The kids can skip this step if they just want to go free handed, but I’m a perfectionist about these things, so it made me happy to have everything where I wanted it.
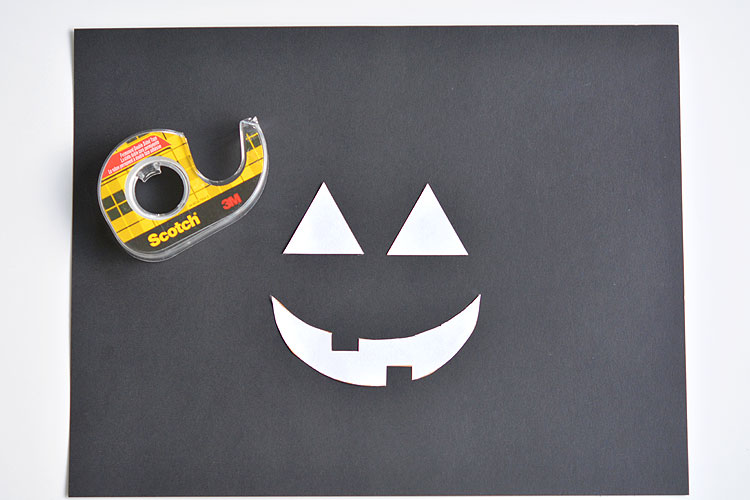
It’s easiest if the stencils are attached to the black paper so they don’t move around while you’re doing the chalk tracing. I used a few small pieces of double sided tape to keep the face in place. Since I didn’t want the tape to wreck my black paper, I pressed both sides of the tape to my hand a couple of times to make it just a little less sticky.
Then using my pencil marks as a guide, I attached the face to the paper.
I used leftover orange sidewalk chalk, but you can use regular chalk as well. It’s a great project for that box full of chalk scraps with nothing but little nub size pieces like I’m using here.
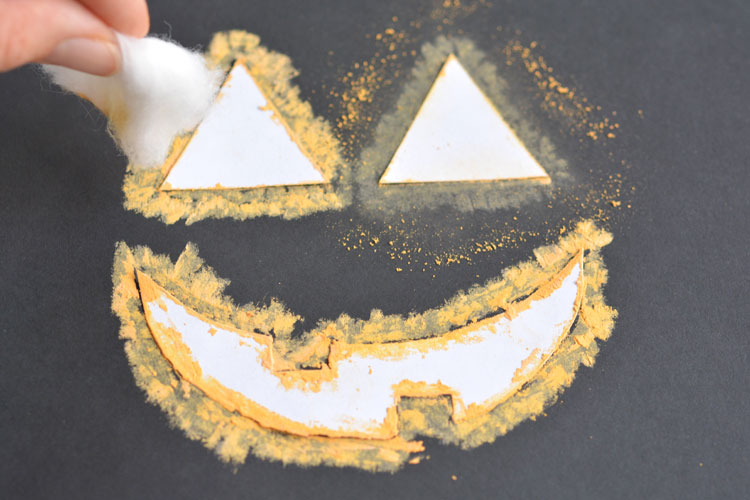
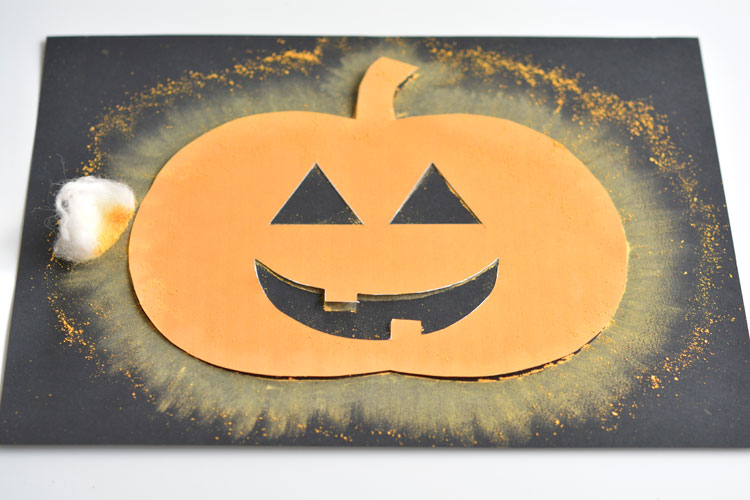
Trace around the outline of the stencil pieces with the chalk to make sure it’s all covered, and then draw short, straight lines away from the stencil like I’m showing in the picture below.
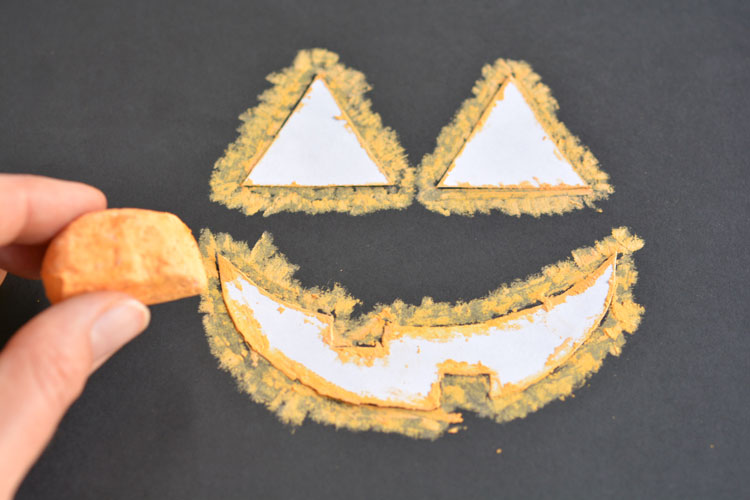
Take a cotton ball and gently rub the chalk away from the stencil to make it look like it’s glowing.
It makes quite a bit of chalk dust, so you might want to blow it off outside or into the sink.
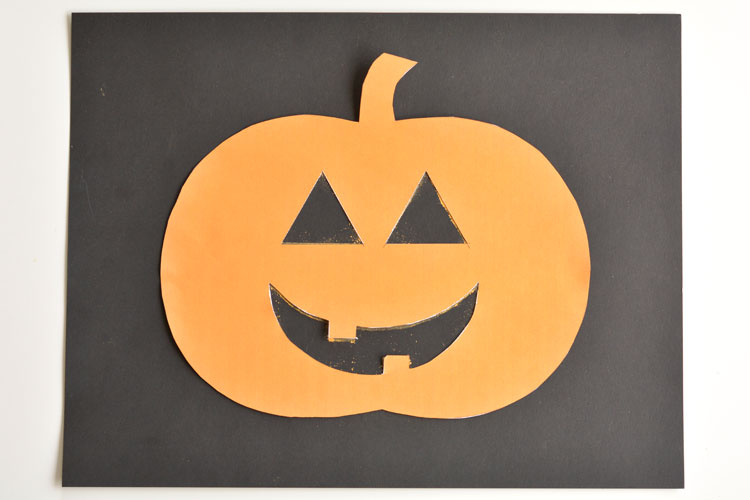
Next, add a few small pieces of double sided tape to the back of the pumpkin template and line it up with the face beneath it.
Again, I pressed the tape against my hands a couple times to get rid of some of the stickiness so the tape wouldn’t rip the paper when I took it off.
Use the chalk to draw around the outline of the pumpkin, and then draw short, straight lines away from the stencil until you’ve gone around the entire outer edge of the pumpkin.
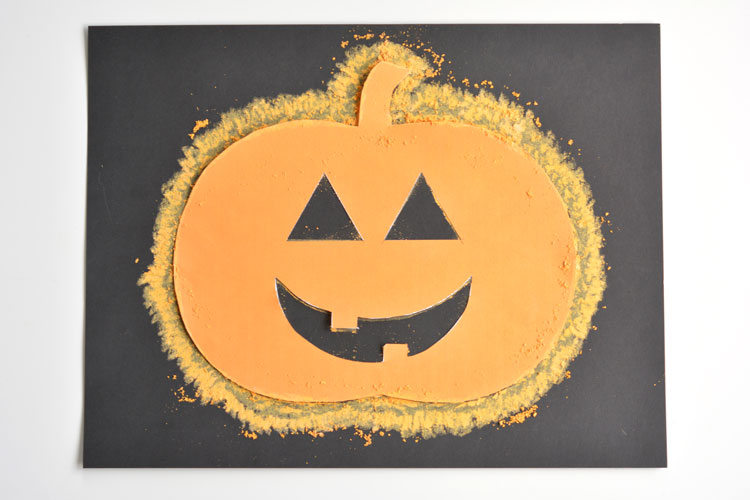
Use the cotton ball to gently rub the chalk away from the pumpkin.
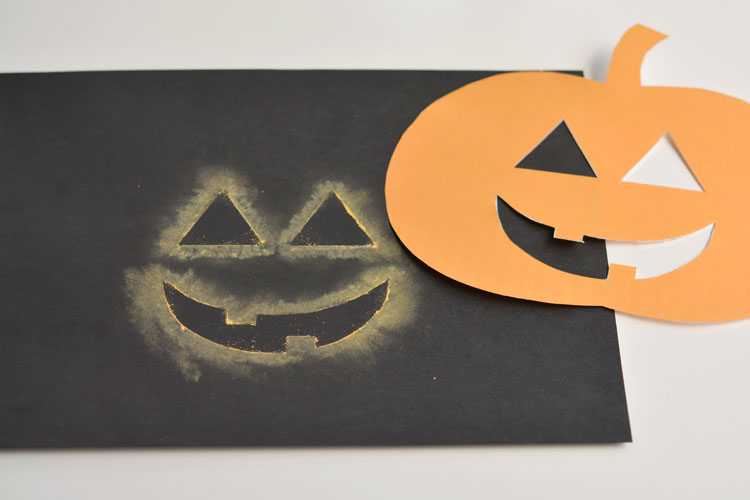
Remove the stencil and blow off the chalk dust. If you have any stray chalk marks, use a dry paint brush or Q-tip to carefully rub them away while blowing on the page.
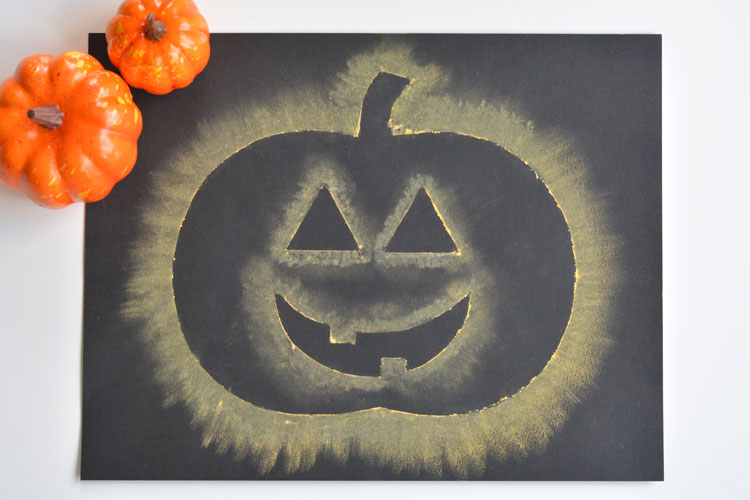
Isn’t it adorable?! If you want to keep the picture from smudging you can spray a light layer of hairspray over top. Just make sure you use an aerosol container with a very fine mist.

How fun is that?! These chalk stenciled pumpkins are a great Halloween craft idea! You can use my printable pumpkin template, or you can make your own jack-o-lantern faces! Make them spooky, make them happy, or just make the pumpkin outline! It’s a fun and easy fall craft for the kids!
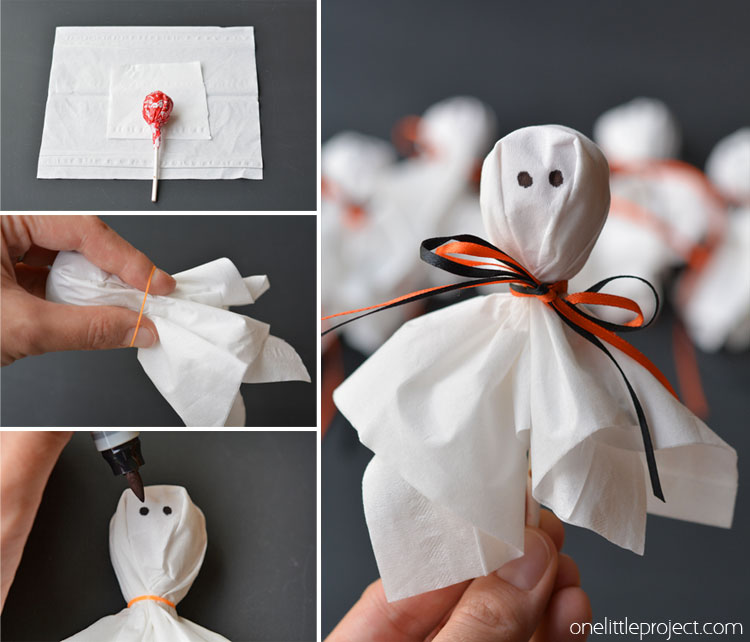
If you’re looking for more fun and easy Halloween craft ideas, check out our lolly pop ghosts. They’re a super easy treat idea idea for your kids to take to a Halloween party.
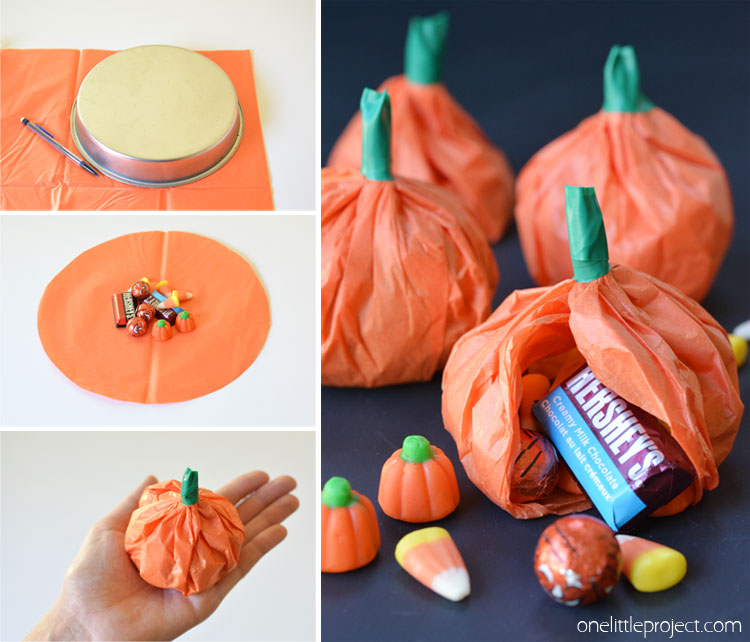
Or you can check out our tissue paper pumpkin favours – one of our most popular posts on the whole blog!
Source : onelittleproject.com
Read more...


Post a Comment
Post a Comment