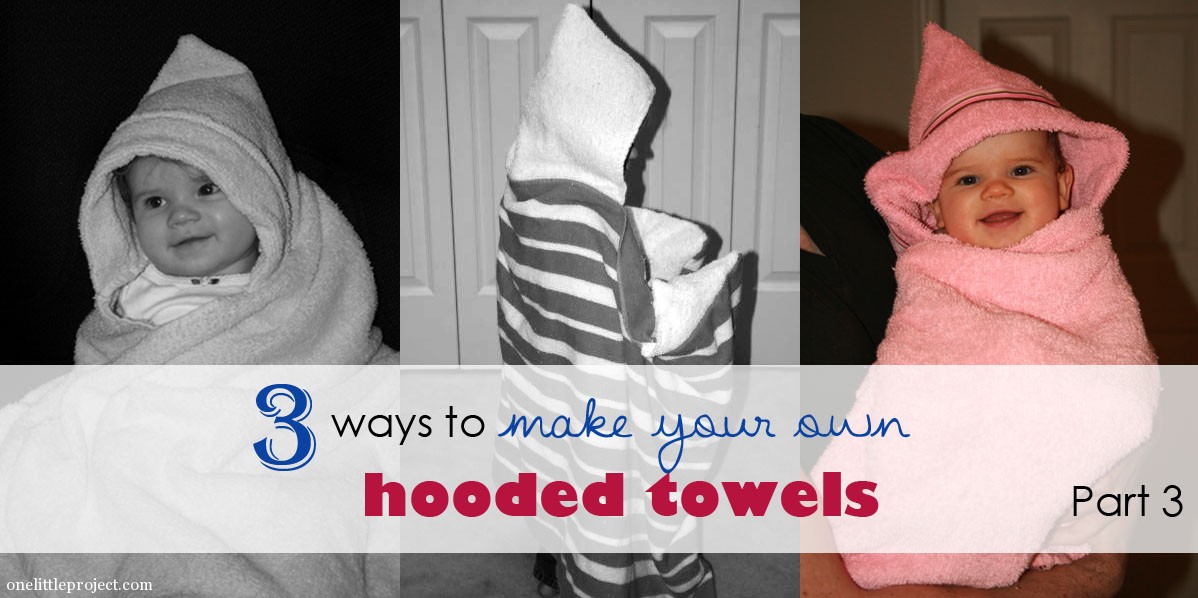
This is the final day in my series of tutorials for ways to make hooded towels. I had no idea there were so many different methods! The best part is that now I have 3 wonderful hooded towels for my girls to use, and they were ridiculously inexpensive!
In case you didn’t start by reading 3 Ways to make your own hooded towels – Part 1, or 3 Ways to make your own hooded towels – Part 2 let me recap:
- I love hooded towels for my kids.
- Hooded towels are VERY easy to make and only require a bath towel and a hand towel.
- I bought inexpensive towels from Walmart and they turned out to be terrible quality, so I suggest spending a few more dollars for a nice quality towel.
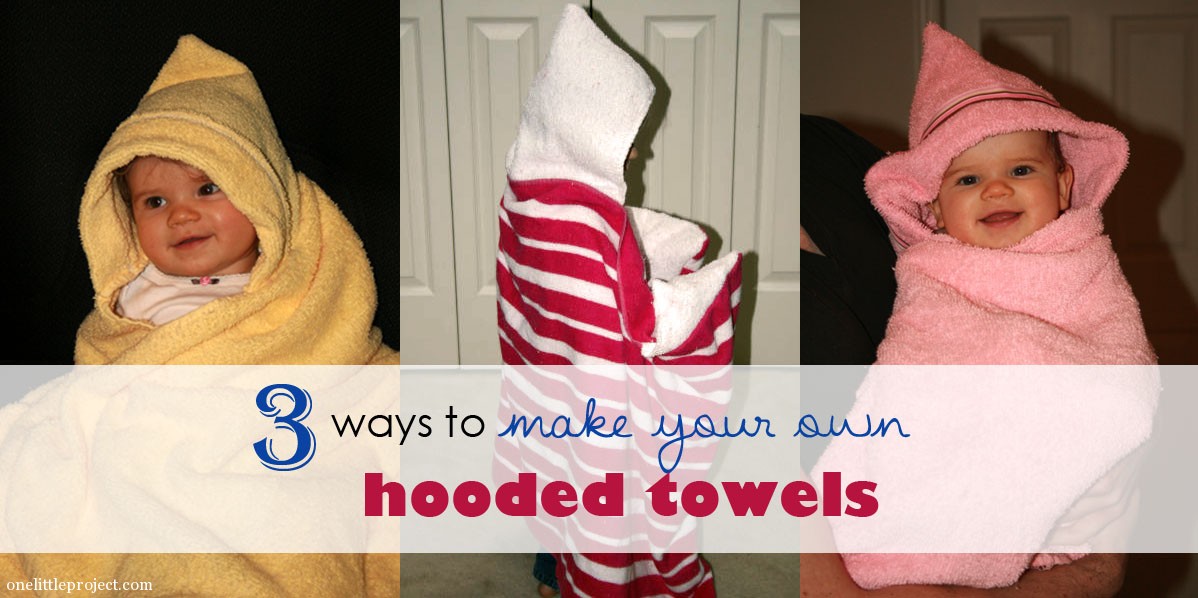
- Part 1 was my favourite hooded towel that I would be most likely to give as a gift.
- Part 2 was the easiest way to make the hood for the towel, with pockets added for the hands.
Today I’m going to share a third method of making a hooded towel that I came across on One Simple Bliss. I love the look of this towel! I just think it is so pretty with the ribbon sewed on! But out of the three methods, this is the most complicated one to make. I really didn’t understand how to make it until I was making it for myself (but then it definitely made sense when it was in front of me). Also, since it’s a double layer of towel for the hood, it makes for a very thick seam at the back of the towel that might be a problem for some sewing machines. But the design is really pretty, most of the seams are hidden, and it makes a very sturdy hood, even with a flimsy towel.
Now that we’ve been through this twice already, let’s get started!
3 Ways to make your own hooded towels – Part 3
Just like in 3 Ways to make you own hooded towels – Part 1 and 3 Ways to make your own hooded towels – Part 2 you will need a bath towel and a hand towel, and for this hooded towel, I also used some wide ribbon. This is another one of the poor quality bath towels from Walmart that cost me $3.97. Although I do suggest buying nice towels, this one uses a double layer of towel for the hood so don’t buy the towel too thick or the sewing machine won’t be able to make it through all the layers. For reference, the hand towel was about 12″ x 24″.
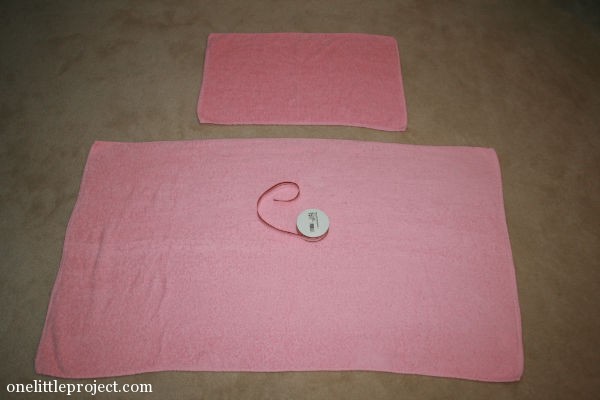
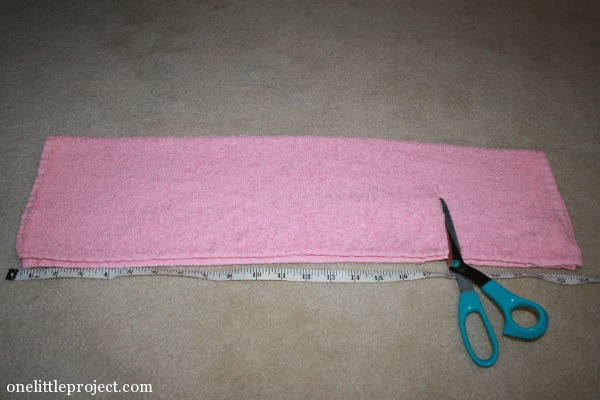
With this hooded towel, you can either keep the hand towel the size that you bought it, or you can trim it to the size that you want it. Since I didn’t want the bath towel to droop below the shoulders, I cut it to 18″ long so it would be the right size for my girls.
Cut a piece of ribbon slightly longer than the towel. With the hand towel still folded, place the ribbon about 1″ from the fold and pin it in place through only one layer of the towel.
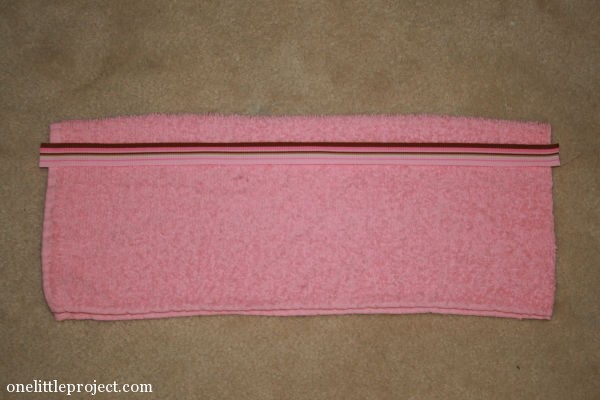
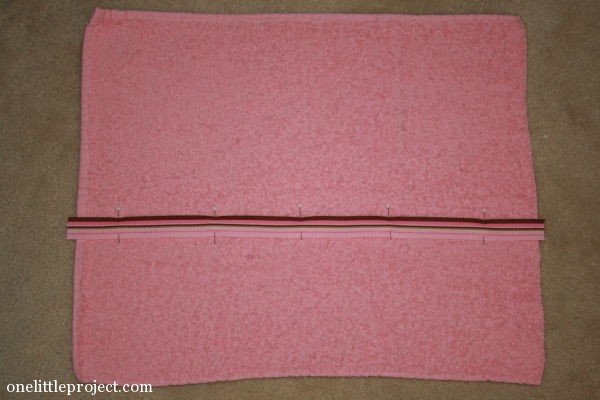
Sew the ribbon in place.

With the ribbon inside out, pin the two short ends of the towel together like this:
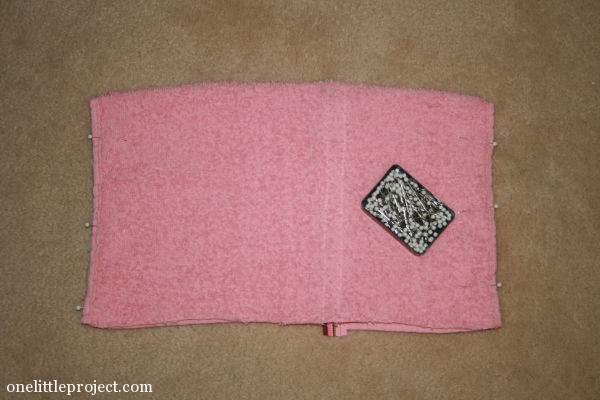
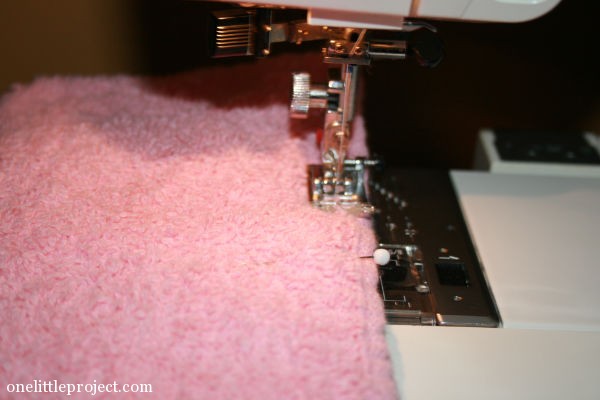
And sew the two ends.
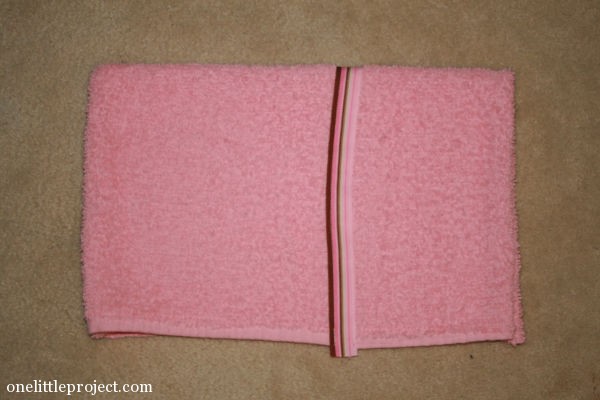
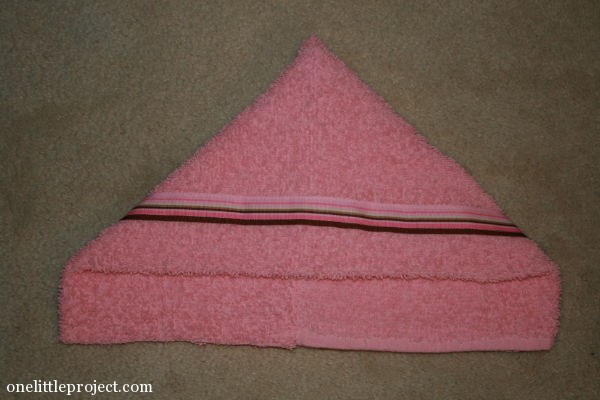
Turn it right side out and you should have something like this:
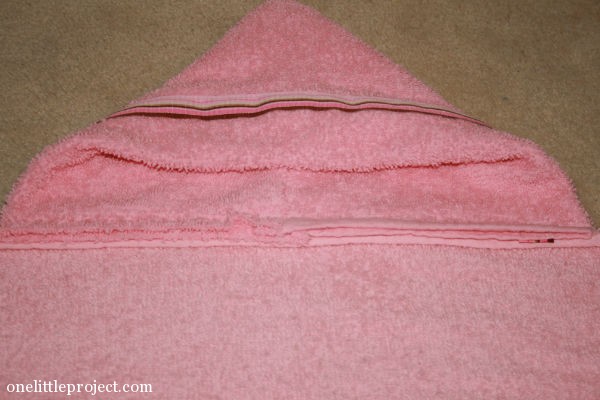
This is the part I had trouble understanding until I was making it myself. It’s hard to get through pictures but it makes sense when you are doing it yourself. Take the corner on the left, and tuck it into the corner on the right.
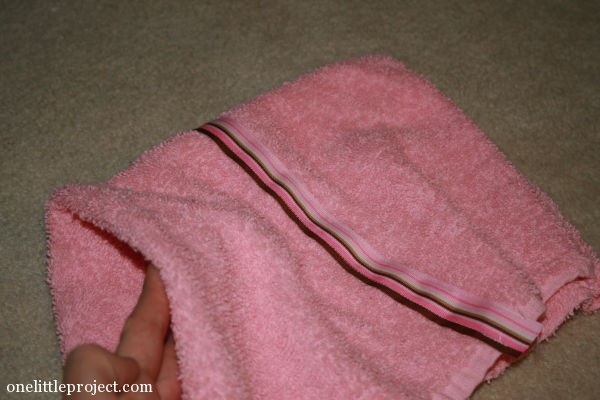

Then you’ll have a nice sturdy hood, with no seams exposed. I definitely like it when the seams are hidden!
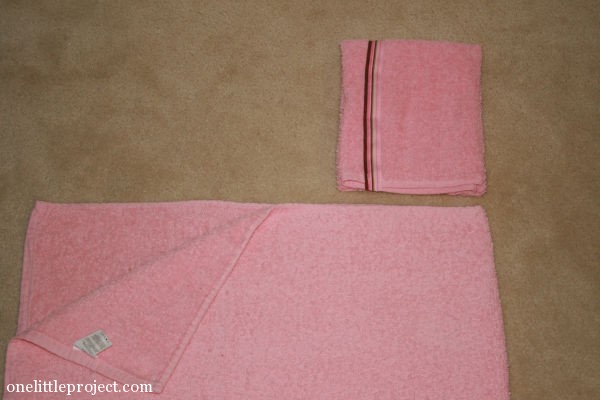
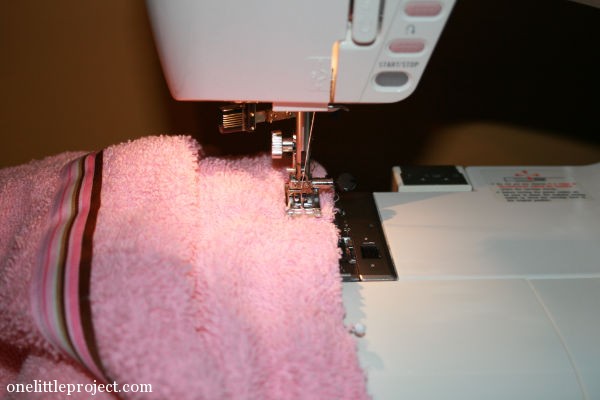
Fold the bath towel in half, fold the hood in half, mark the centers, and pin them together as shown below.
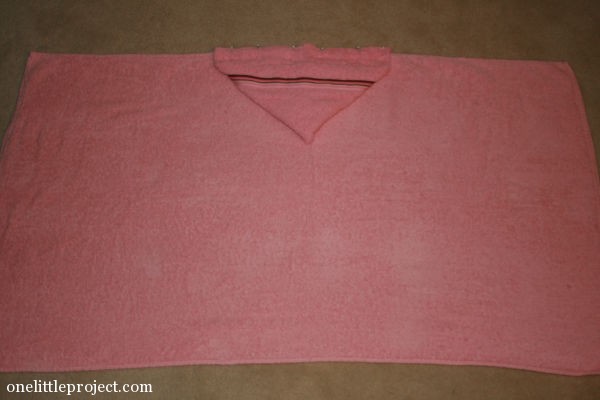
Sew the hood to the bath towel. This was a little thick and I was worried it was almost too thick for the sewing machine, especially at the seams, but it did go through.
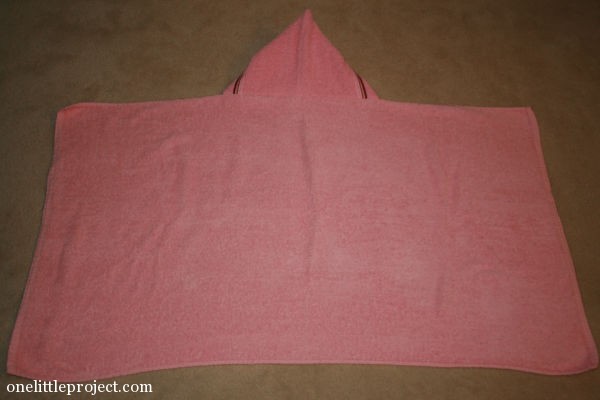
And that’s another hooded towel complete! I couldn’t get the hood to sit properly right side up, so I had to photograph this one upside down.
As I said, I love the hood on this towel, it’s just a lot of layers at the seam.
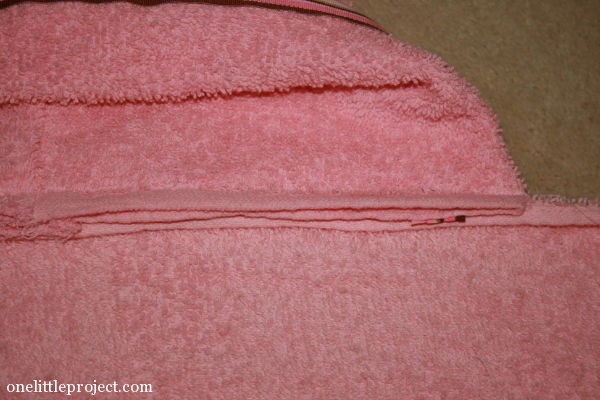
If you check out One Simple Bliss she shows how you can fold the bottom edges of the hood under so that they aren’t visible. Her towel turned out great, but I would still be worried that it’s a lot of layers for the sewing machine to go through.

Yet another super cute hooded towel! I really love how pretty the ribbon makes it look!

That concludes my 3 part series on hooded towels. Phew! You are an expert now.
So to summarize,
- Part 1 was my favourite hooded towel that I would be most likely to give as a gift.
- Part 2 was the easiest way to make the hood for the towel, with pockets added for the hands.
- Part 3 is a beautiful hooded towel, but it’s thick and a little more complicated to make than the other ones.
If you haven’t already, be sure to check out 3 Ways to make your own hooded towels – Part 1 and 3 Ways to make your own hooded towels – Part 2.
Source : onelittleproject.com
Read more...


Post a Comment
Post a Comment