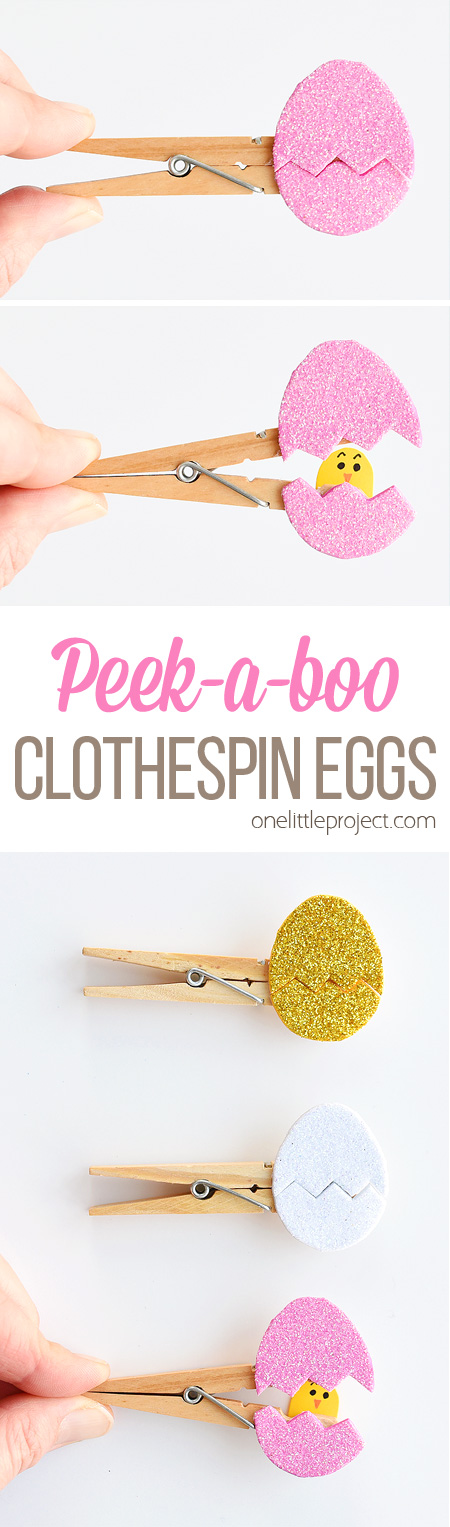
These clothespin eggs are so easy to make and they are so adorable! Each one takes less than 5 minutes to make and the kids have had so much fun opening and closing them to see the little surprise chick inside! It’s a super fun and simple craft to make with the kids for Easter!
Have you ever seen those Facebook videos that mock what we all expected parenthood to be like vs what parenthood actually is? You know, those moments where you envisioned your perfect children sitting around the kitchen table quietly eating their meals, while the parents talk to each other about their days? Or the kids sitting quietly on the floor playing with ONE toy?
Or the kids doing anything quietly… or anything you’ve asked them to do for that matter!? ha… my kids aren’t quiet. And they often look at their dinner plate and say, “Yuck! I don’t want that!”. My husband and I definitely don’t get to talk at dinner and the number of times at a meal that I have to grumble, “Sit back in your chair!!” astounds me.
So when I come across an unexpected, simple moment where I actually feel like I’m doing a good job at this mom thing, I like to enjoy it. And when I made these clothespin eggs, there was a second where I was like “What!? Maybe I AM doing something right!?”
When my daughters came home from school and saw that I had made these clothespin eggs for the blog, their eyes lit up and they had the biggest smiles. They were all “Wow!” and “Ooooo!” And for a brief moment, I felt like a “cool mom”.
It was one of those moments where I was like, “Yup, I’m your mom and I made that cool thing you’re playing with. You like it and that makes me feel awesome!” It was a very brief moment, of course, haha. But it felt pretty great to make something the kids were excited about. So I’m just going to go ahead and take it as a parenting win!
And come on, these little clothespin eggs ARE pretty cute, if I do say so myself! I hope you and your kids enjoy them too!
Check out our video on How to Make Peekaboo Clothespin Eggs
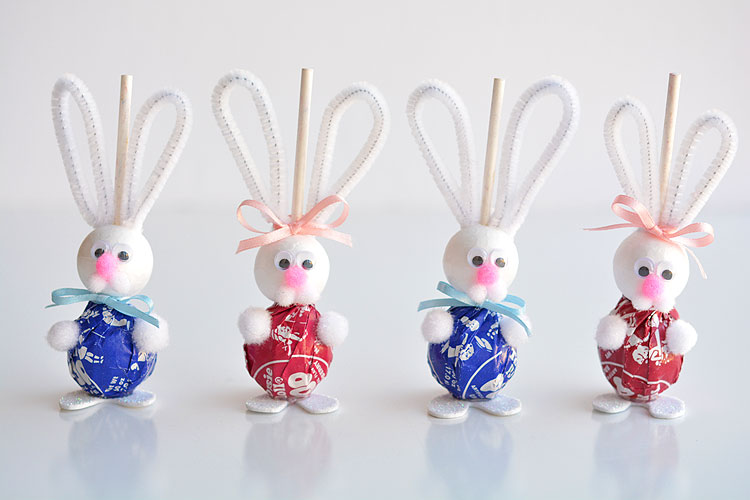
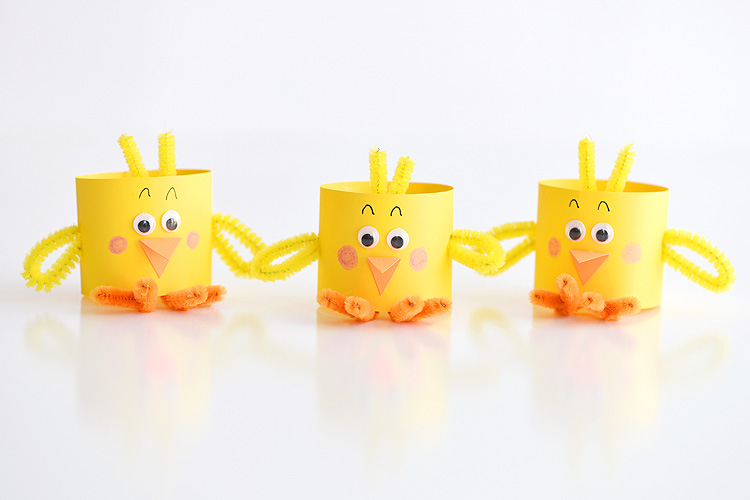
If you loved this craft, here are some more Easter favourites for you to try out!
How to Make Peekaboo Clothespin Eggs
You can probably get your supplies at a better price at the dollar store or craft store, but these Amazon affiliate links will give you an idea of the supplies that I used. Here’s what you’ll need:
- Glitter craft foam
- Clothespin
- Small scrap of yellow paper or card stock
- Small scrap of craft foam or cardboard
- Crafter’s Tape
- Black and orange gel pens
- Scissors
I got my glitter foam and clothespins at the dollar store. They don’t always have the glitter foam, so every time I see it, I snag a couple of packages. You can even get crafter’s tape at the dollar store. I haven’t tried it myself yet, but I’ve definitely seen it on the shelves.

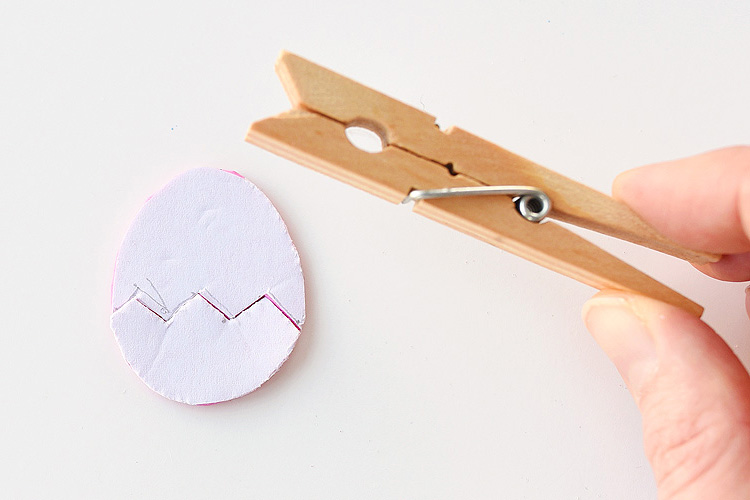
Start by cutting out a small rectangle of glitter foam, about 1.5″ wide by 2″ tall, then trim around the corners to turn it into an oval egg shape.
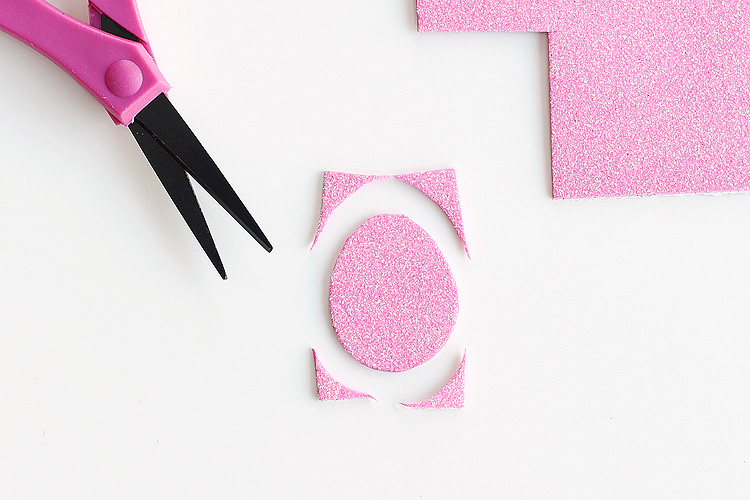
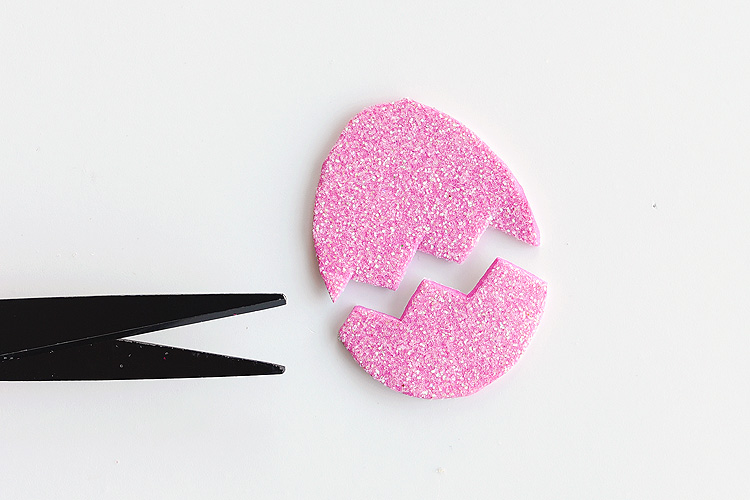
Cut a zig zag shape across the egg. I recommend drawing a line with a pencil on the back of the egg before you cut. You don’t have to, but it makes the zig zags look way better if you’ve planned them out a little bit.
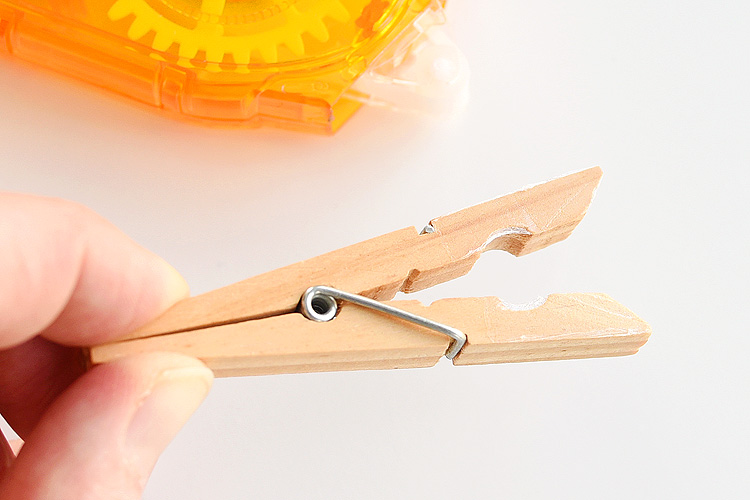
Pinch open the clothespin. While it’s open, add a small strip of crafter’s tape to 3/4″ of the side, front edge of the top and bottom where the egg is going to go.
Make sure the clothespin is open when you add the crafter’s tape so you don’t accidentally tape it shut.
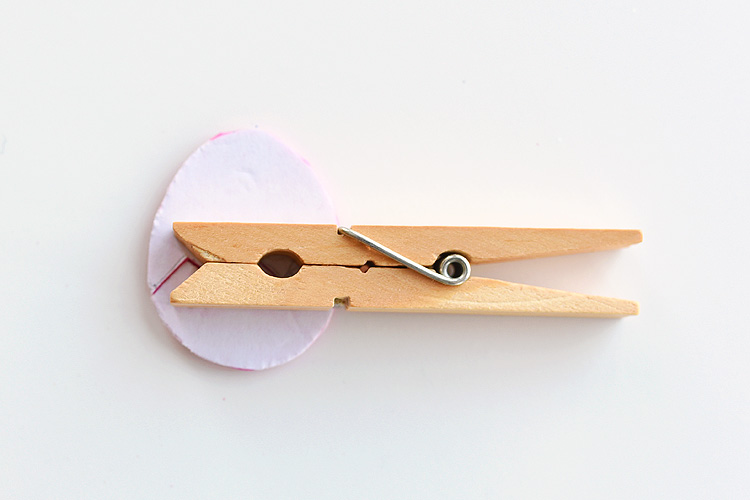
Lay the egg upside down on the table, making sure the top and bottom egg pieces are lined up and together.
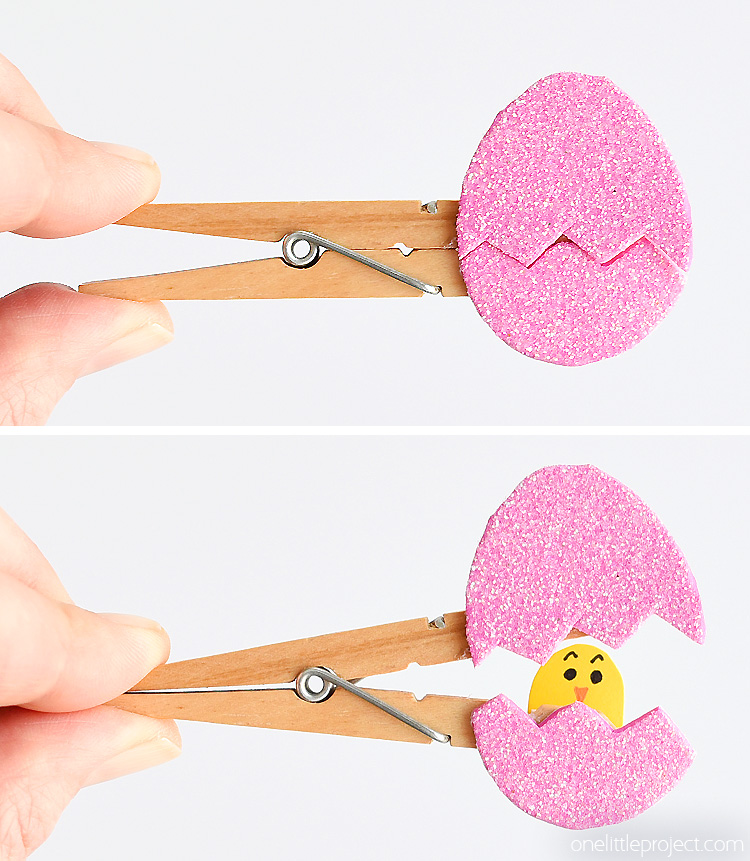
Carefully press the clothes pin onto the back of the foam egg so that the opening in the clothespin lines up with the opening in the cracked egg.
Try to line it up so that the end of the clothespin where your chick is going to go is in the middle of the egg.
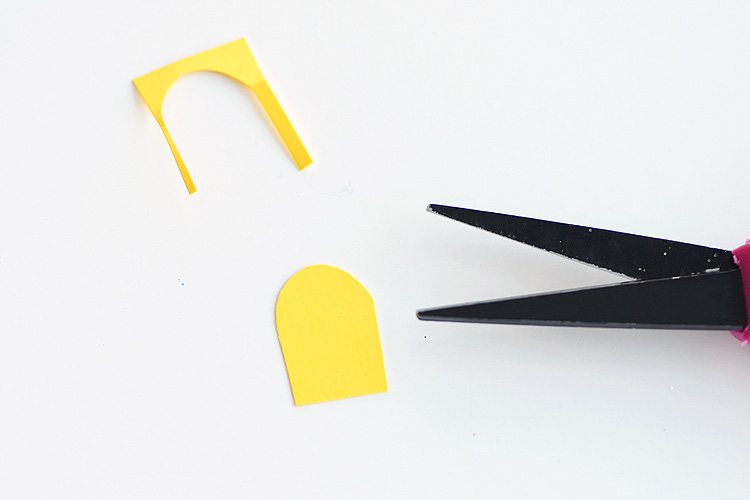
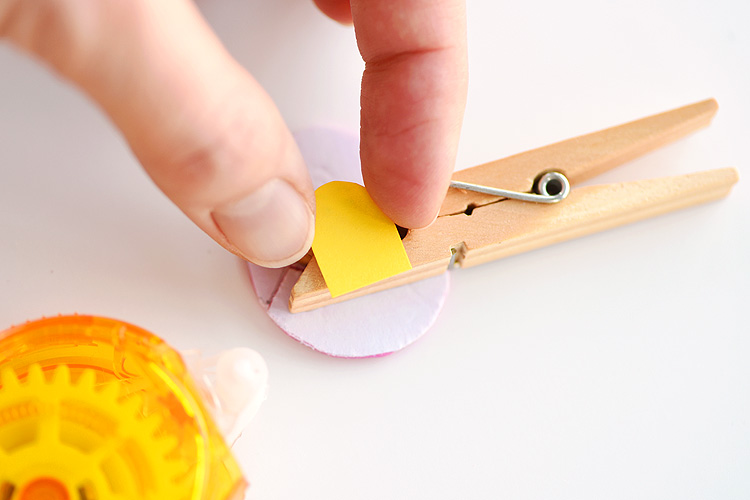
Cut out a tiny chick shape from yellow paper or cardstock. Mine was about 1/2″ wide by 3/4″ tall.
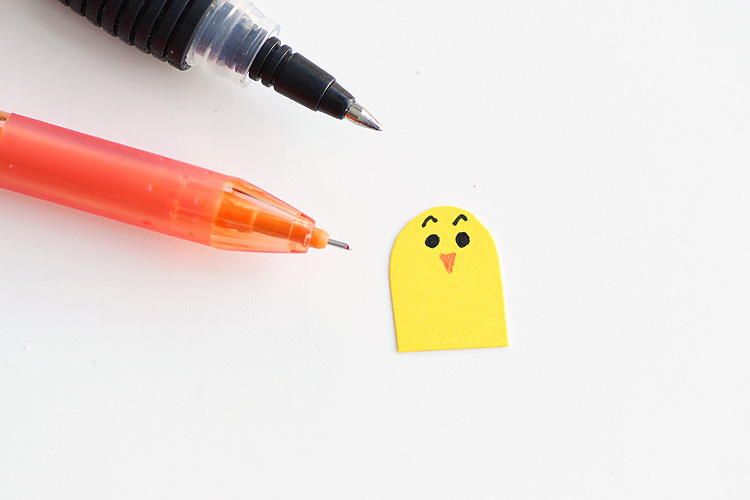
Then use a black gel pen and an orange gel pen (or black and orange markers) to draw the eyes and beak onto the little paper chick shape.
This next part is completely optional, but I find it really helps to make sure your clothespin opens and closes easily without shutting on top of the chick and bending it. If you attach the chick right onto the clothespin, I find that wooden clothespin pieces shift and often end up crushing the chick when it closes.
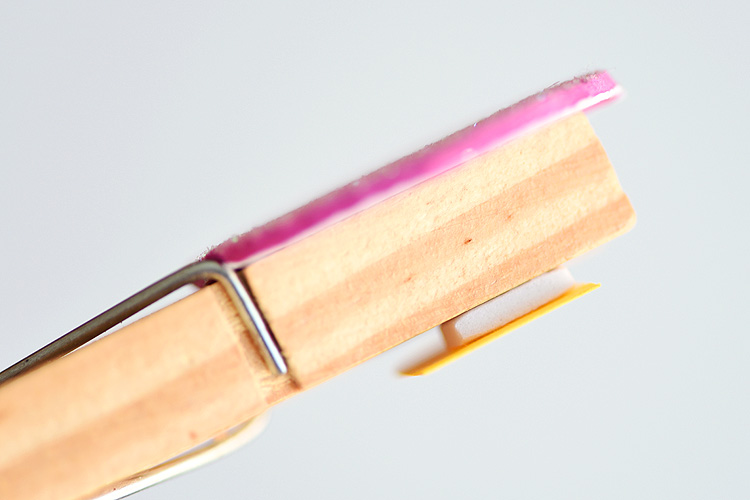
So I recommend taking a tiny piece of craft foam (or cardboard, or anything else with a little bit of thickness to it) and using crafter’s tape to attach it to the back of the clothespin where the chick is going to go.

Then add a little bit of crafter’s tape to the paper chick and attach it to the little foam spacer you just attached.
It’s a small difference, but having the chick spaced out just a little bit so it’s not directly on the clothespin makes it really easy to open and close the clothespin when you’re done – especially if kids are going to be playing with them.
When you flip it over to the front, you should be able to see the top of the chick’s head and the entire face when the clothespin is open. If it’s not in the right position, just peel off the chick and adjust it.

Then repeat in a bunch of different colours! These make me smile…
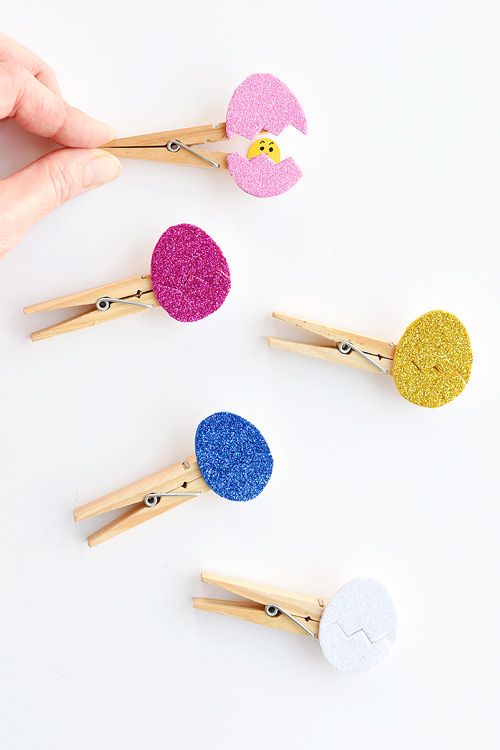
They’re so simple to make and they just look so darn cute!
These peekaboo clothespin eggs are so easy to make and they look SO CUTE! Each one takes less than 5 minutes to make and they look adorable! They’re an awesome low mess craft idea and are such an adorable Easter craft idea!! My kids loved the hidden surprise chick inside the egg!
If you’re looking for more fun Easter craft ideas, check these out!


Source : onelittleproject.com
Read more...


Post a Comment
Post a Comment