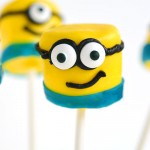
Okay guys, these minion marshmallows are SO MUCH FUN! My kids have been begging me to make them for weeks, and they turned out so well! They are relatively easy to make, and they look super cute! I can’t believe you can turn a marshmallow into a minion, but check out these awesome marshmallow minion pops!?

The full, printable recipe is at the bottom of this post.
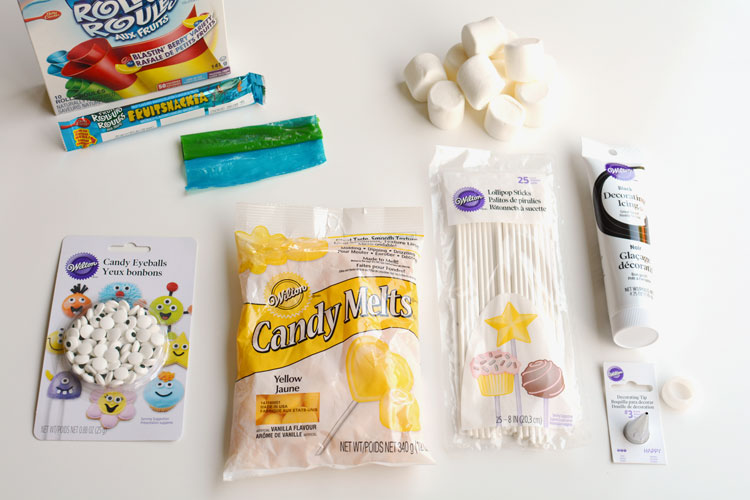
Here’s what you’ll need:
- Marshmallows
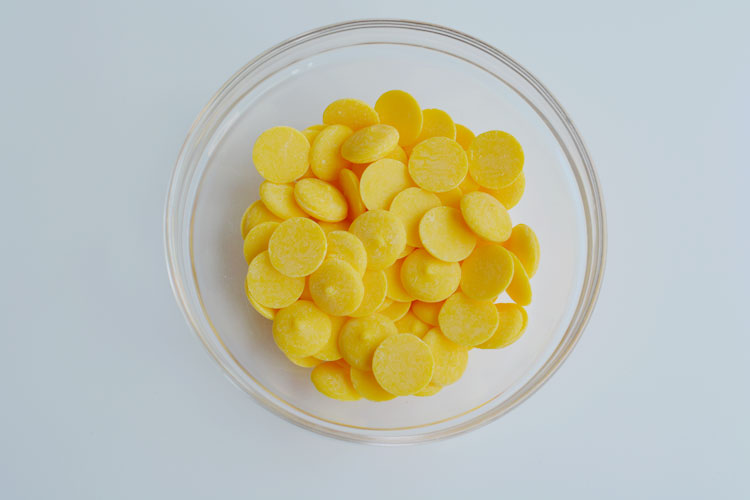
- 1 bag of yellow candy melts
- 2 tablespoons cooking oil
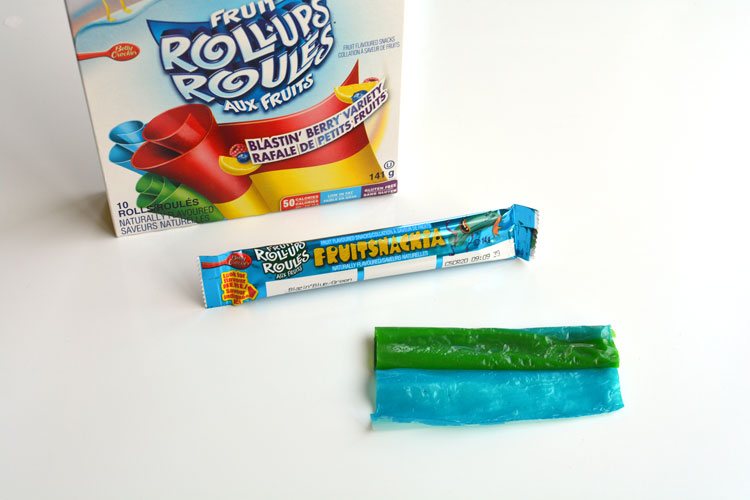
- Blue fruit roll-ups
- Lollipop sticks
- Candy eyeballs
- Tube of black decorating icing
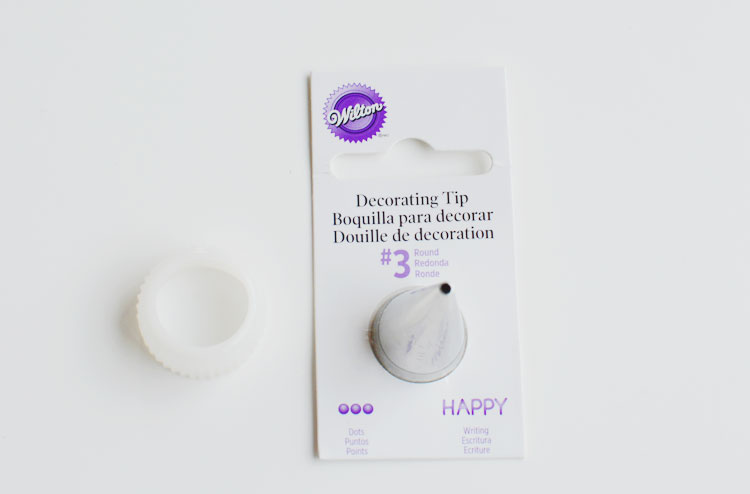
- Wilton Decorating Tip #3
- Wilton decorating coupler
I don’t think they make plain blue fruit roll-ups, but I did manage to find these Blastin’ Berry Variety, that had half green, half blue ones, so I just cut off the blue. Believe me, the kids were thrilled to get the unused green part!
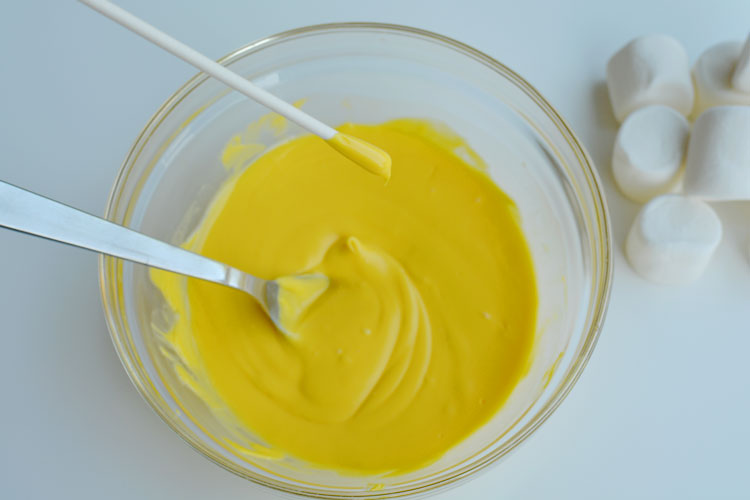
Pour the yellow candy melts into a microwable bowl and melt according to the package directions. It took about 3 minutes on 50% power for mine to completely melt, stirring every minute.
Add about 1 or 2 tablespoons of cooking oil to the melted chocolate. I usually use cooking oil, but I forgot to pick it up at the store, so I used avocado oil instead, and it worked too. Without the oil the chocolate is really thick, and it will be next to impossible to get a smooth finish. You want to add enough oil that it drizzles nicely off your spoon like in the photo below.
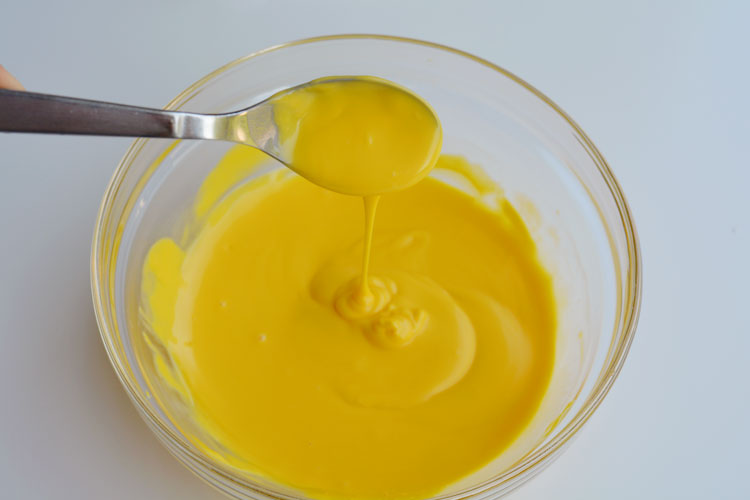
Just to show you a comparison, the marshmallow below on the left was dipped in the yellow candy melts before I added the oil. The marshmallow on the right is the one with the oil mixed in. See how the one on the left is all bumpy and you can see marks and grooves in the chocolate? You don’t want that. With the oil, the chocolate evens itself out into a nice consistent finish.
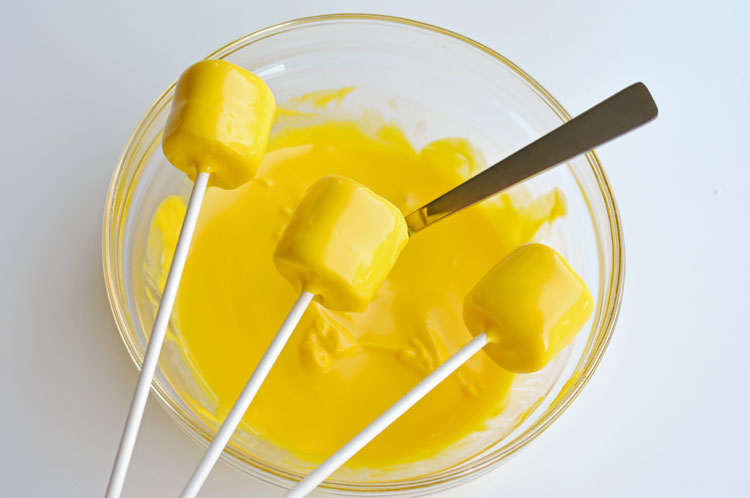
Dip the end of the lollipop stick into the yellow chocolate:
And gently poke it through the bottom of a marshmallow. Push it through until it has almost come out the other side. No worries if it comes all the way through, just poke it back in and the chocolate will cover it.

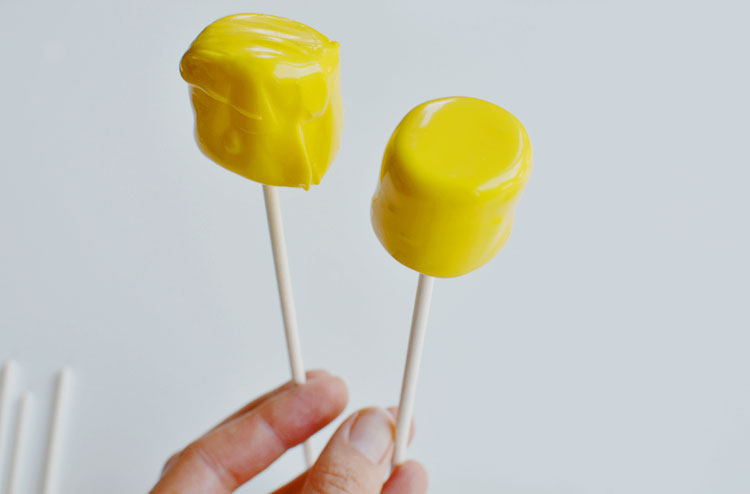
Dip your marshmallows in the chocolate and use a spoon to make sure they are evenly covered. Once they are coated, tap the sticks on the edge of the bowl until all the extra chocolate drips off, back into the bowl. Excess chocolate will not only drip all over your counter, but it will also leave bumpy drips on your marshmallows.
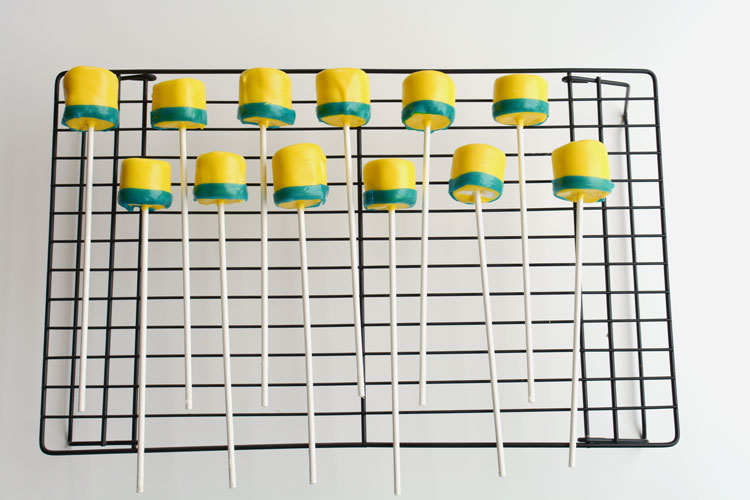
This it the part I found the trickiest – standing them up to dry so they didn’t bump into each other. See my lovely contraption in the photo below to hold up the marshmallows while they set? (It’s nice, isn’t it?) That’s some white play dough on the bottom, with the sticks going through a cooling rack to hold them up. It didn’t work very well, so if you can find a piece of styrofoam, or florists foam, I highly recommend using that instead! If they bump into each other while they are setting, they’ll stick together, so be as careful as you can.
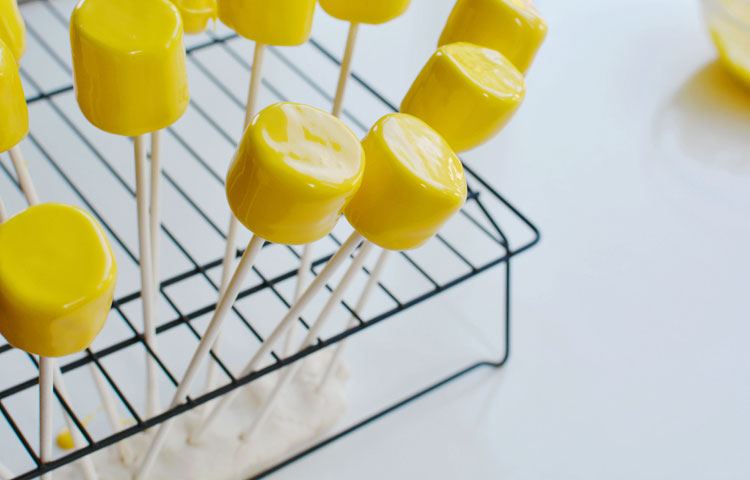
I let the marshmallows set for a full hour. With the oil added to the chocolate, it takes a little longer for them to completely harden.
Now the real fun begins! Cut the fruit roll-ups into 1/4″ wide strips. If you have trouble with the fruit roll-ups sticking together, put them in the fridge for 5 minutes and they’ll come apart much more easily. The width of the fruit roll-ups fits perfectly around the marshmallow and overlaps just enough to hold it in place.
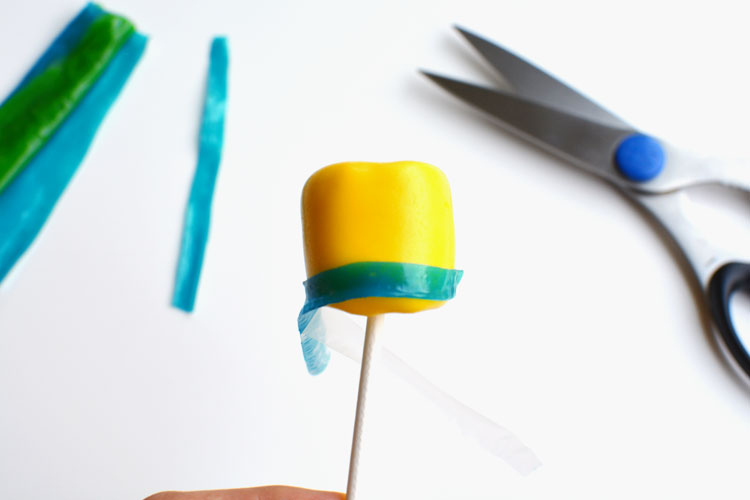
Leave the plastic on the fruit roll-up as you work and pull it off when everything is in place. Use your fingers to gently bend the fruit-roll ups under the bottom of the marshmallow so it’s not just hanging there. Repeat the process for however many minions you plan to make.
I used Wilton Decorating Tip #3 for the faces. It’s a great writing tip that will give you a small, smooth line of icing. You’ll also need a decorating coupler to hold the tip in place. I got mine at the bulk store, but you can also get them at Michael’s or on Amazon.
Pick the best side of the marshmallow, and start by putting a large dot of black decorating icing in the middle for the eye. Draw a thin line to the left of the eye and another one to the right of the eye – You don’t have to go all the way around, in fact if you do, you’ll have a lot of trouble putting it down to dry. Then draw a crooked mouth, a smile or a “O” shaped mouth.
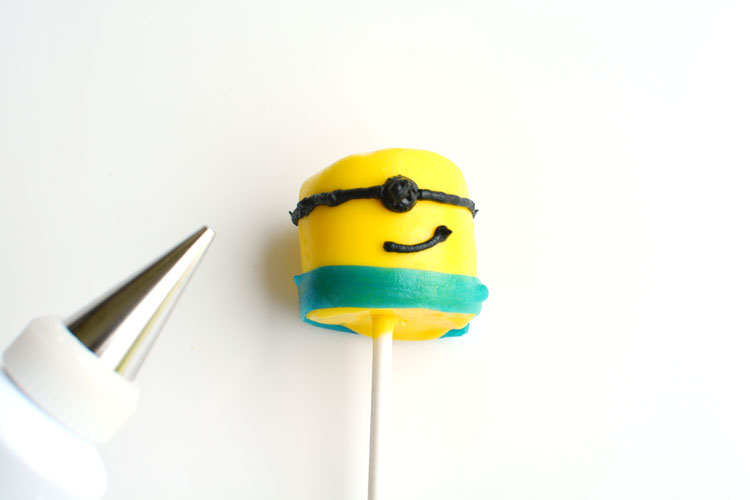
Take one of the candy eyeballs, and gently press it onto the big dot of icing. Try to press it so the black comes out evenly on all sides of the eye. Don’t draw an outline around the eye – that will just make a mess!

Repeat the process for the rest of your minion marshmallows. Make some with two eyes, some with one eye, some with smiles and some with smirks. I wish I had thought of doing “O” shaped mouths when I was doing these, because that would be been super cute too!

These little minions crack me up! They are so fun to look at! And I’m amazed how easy they were and how well they turned out!

I wasn’t crazy about the taste of them, since it is just waaaaay too sweet. But your kids will probably love them.

These would be amazing to make for a minion themed birthday party, or even as a treat to take to a school party! Wrap them in little cellophane covers, tie them with ribbon and you can give them out as party favours.

If you don’t want to have them as marshmallow pops, you could take the sticks off, and use them to decorate a cake instead. Imagine how cute and easy it would be to make a minion cake with these as toppers?
Or you could use them as cupcake toppers, or even set them out on a minion themed party table as little decorations.

Minion Marshmallows
Ingredients
- Marshmallows
- 1 bag of yellow candy melts
- 2 tablespoons cooking oil
- Blue fruit roll-ups
- Lollipop sticks
- Candy eyeballs
- Tube of black decorating icing
- Wilton #3 decorating tip
- Wilton decorating coupler
Instructions
- Melt the candy melts in the microwave according to the package directions.
- Stir 1 to 2 tablespoons of cooking oil into the melted candy melts until the chocolate drizzles smoothly off a spoon.
- Dip the end of a lollipop stick in the melted chocolate then stick it into a marshmallow.
- Coat the marshmallow with the yellow chocolate and tap the stick against the bowl to remove the excess.
- Poke the sticks into a piece of styrofoam and let the chocolate set for about 1 hour. (Don't put them in the fridge to set)
- Cut the blue fruit roll-ups into 1/4" strips. Wrap them around the bottom of each marshmallow.
- Use the black icing tube fitted with the writing tip to draw the faces on the marshmallows. Add a big dot (or two) of black icing to hold the eye.
- Gently press one or two candy eyeballs onto the large dot(s) of icing.
- Allow the icing to harden for at least 30 minutes.

These minion marshmallows are easy to make (but they do take some time) and they end up looking SO CUTE! You can turn them into marshmallow pops, use them as cake or cupcake toppers, or wrap them up in cellophane to give out as party favours. The decorating is super easy as long as you have the right utensils. Your kids are going to love these!
Source : onelittleproject.com
Read more...


Post a Comment
Post a Comment