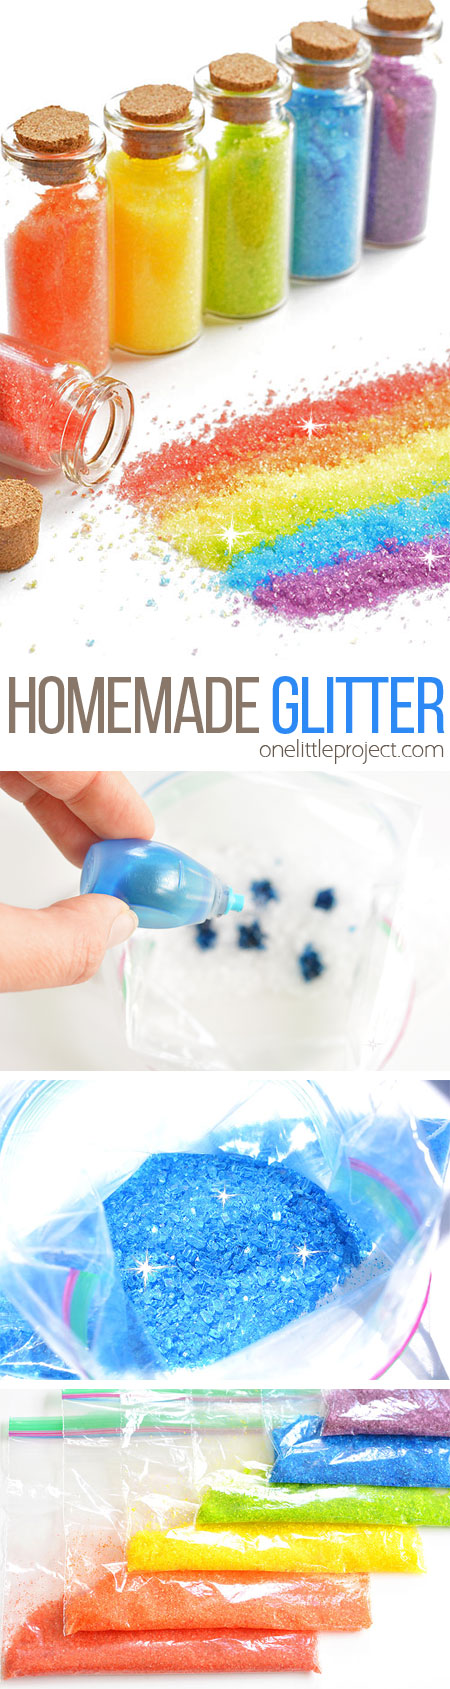
This homemade glitter is such a fun project to try with the kids! The kids LOVED mixing all the colours together and experimenting with the different ingredients. It sticks to glue just like regular glitter, but it is sooooo much easier to clean up!
I really don’t like store bought glitter. In fact, I kind of despise it. Because when glitter falls on the floor, it stays on the floor. Forever. And then we have a sparkly floor and I end up walking around the house for weeks with sparkles in my hair. How they end up in my hair, I have no idea, but it happens pretty much every single time we pull out the glitter for a craft.
This homemade glitter is sooooooooooo much better than store bought glitter if you’re giving it to kids. I mean, if you’re a grown up, and you want to make a serious craft project with some serious glitter, this probably isn’t the stuff for you. But if you have messy kids like mine who are going to squeeze out a giant pool of glue onto their paper and then pour half the tube of glitter over top of that pool of glue, then you’re going to love this stuff! It’s way easier to clean up than regular glitter, way cheaper – And you won’t find mysterious glitter specks stuck in your hair!
When I first became a mom, I was really paranoid about messes. Not that I’m super easy going about it now, but I’m better than I was. My oldest daughter wasn’t allowed to play with markers until she was at least 4 years old because I was afraid she would draw all over the furniture. And the same with paint. And any other messy crafts for that matter. Which is kind of crazy, because she’s a really tidy kid!
Three kids later, and now I’ll see a marker on the floor without a lid on, and I’ll just leave it on the floor – because why bother picking it up when someone is going to drop it down there again in 30 seconds anyway? I’ve realized that it’s next to impossible to try to control their messes. Breathe Momma. Just breathe. (I’m still working on trying to let it go. Ha!)
I’m pretty excited about how easy this glitter is to clean up. I’m totally on board for anything that makes my life just a little bit easier! And even better if the kids have fun with it!
How to Make Homemade Glitter
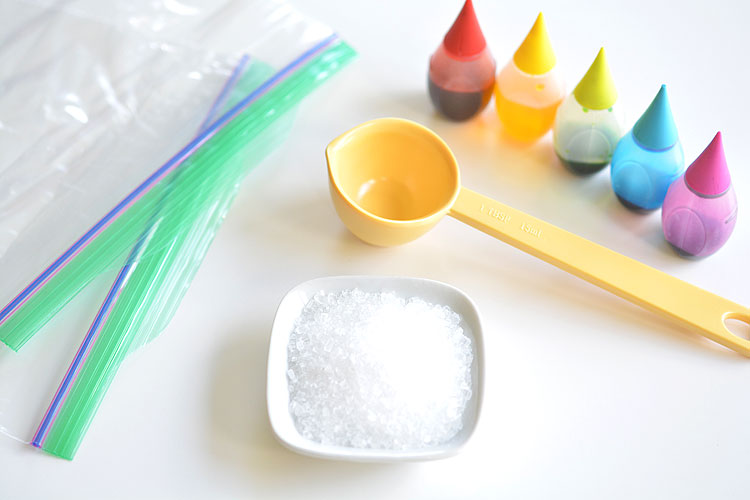
The full printable recipe is at the bottom of this post, but here’s what you’ll need:
- Epsom salt (or regular salt or sugar)
- Liquid Food colouring
- Zip Lock Bags
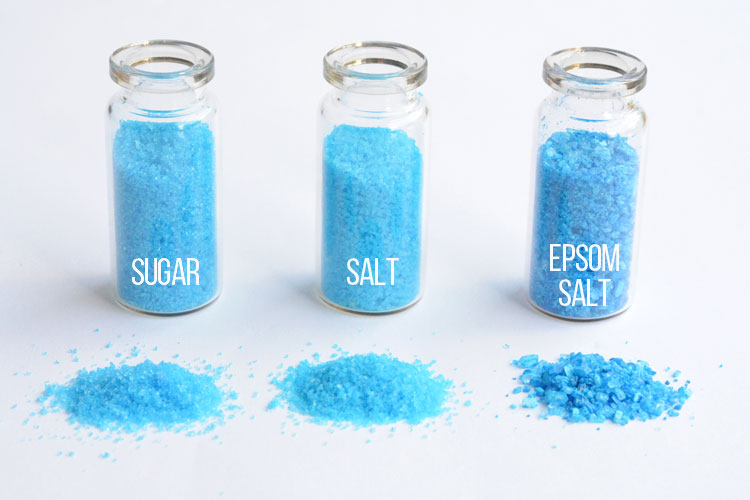
I wasn’t sure which type of homemade glitter would be the best, so we treated this as a science experiment to figure it out. We made homemade glitter from Epsom salt, regular salt AND sugar. I’ll show you the differences down below.
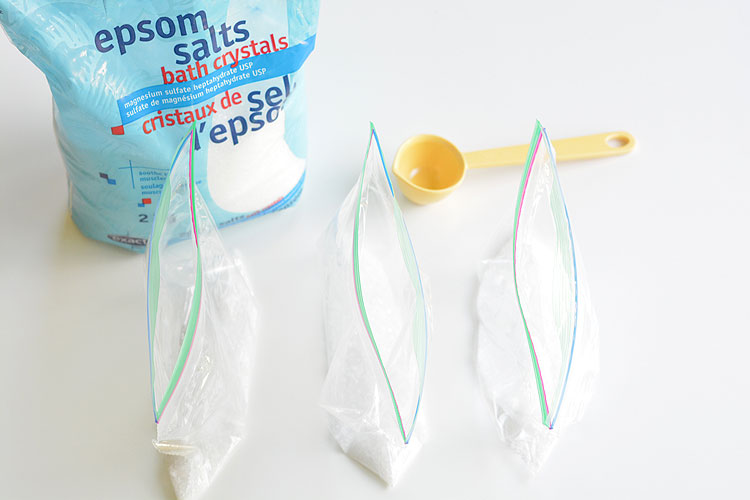
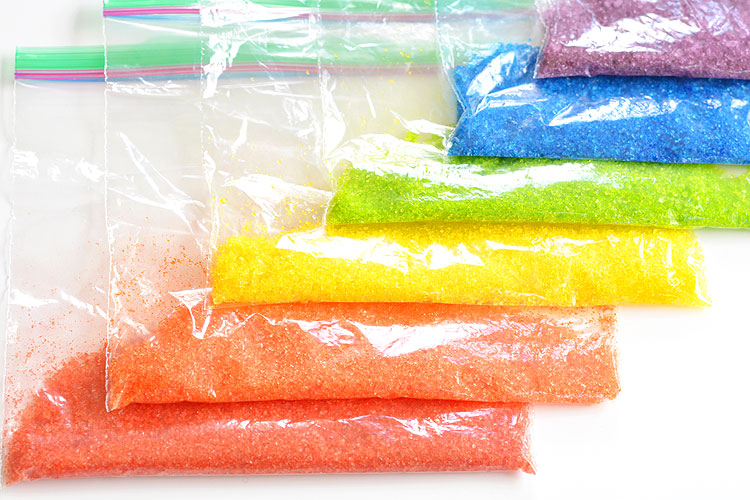
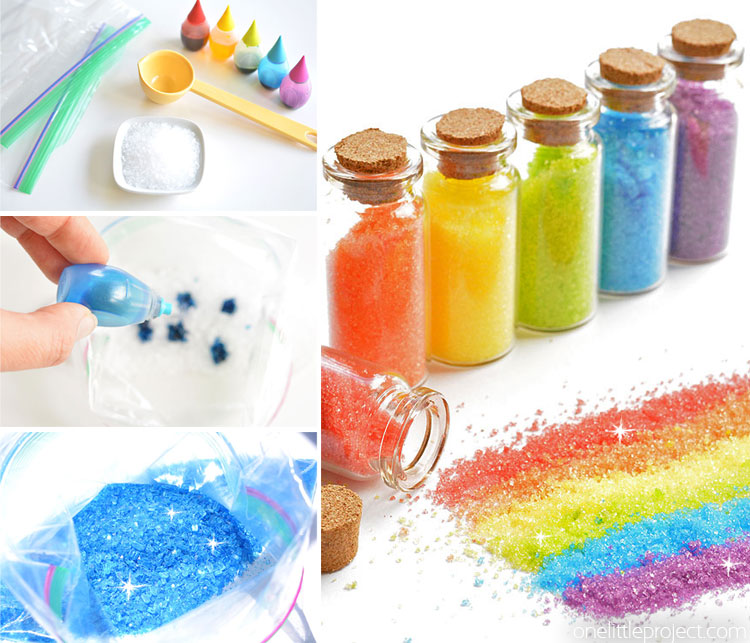
Fill your zip lock bags with a little bit of epsom salt (or salt or sugar). We did 2 Tablespoons per bag.
Next squirt about 10 to 15 drops of liquid food colouring into each bag.
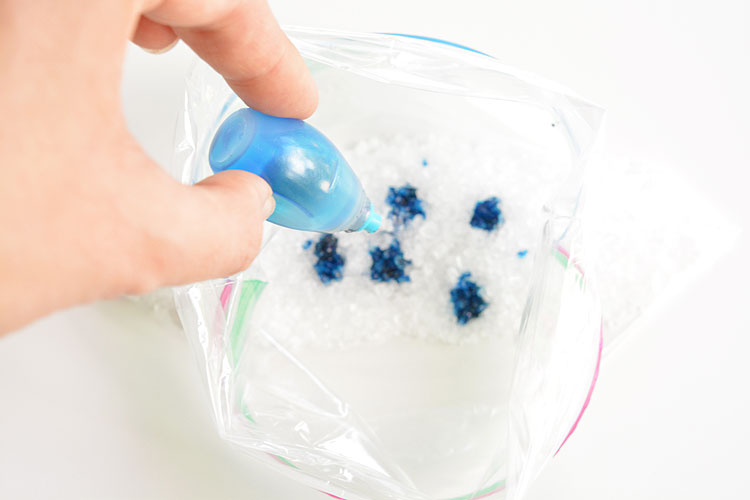
Then seal the bag, shake it up and squish it until the colour is evenly distributed. The kids LOVED this part!
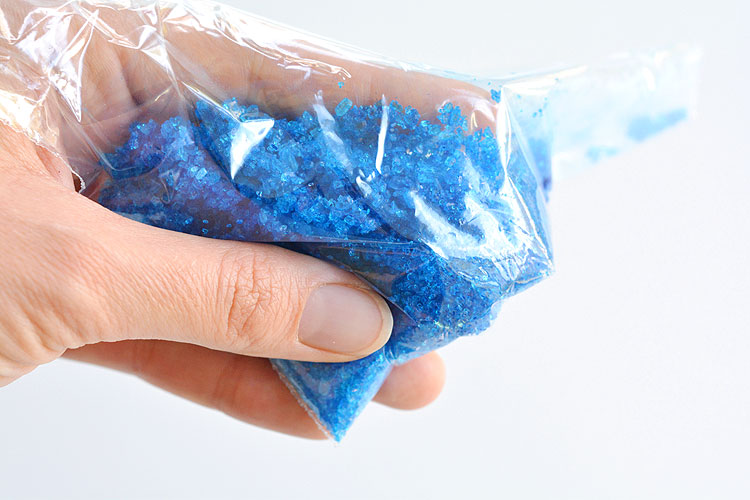
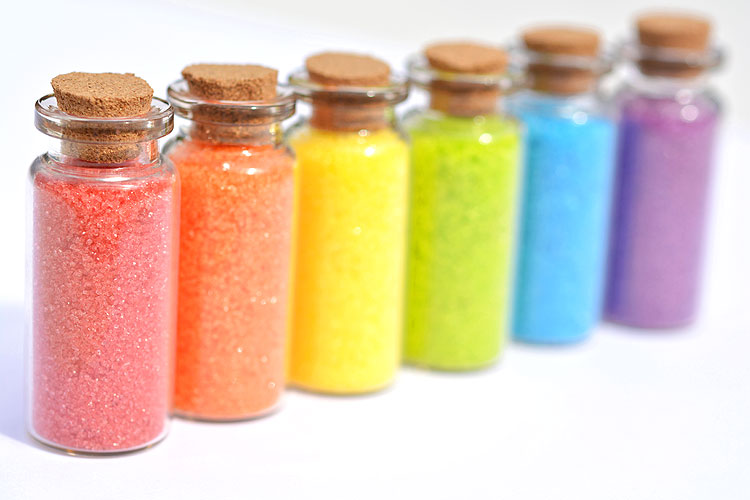
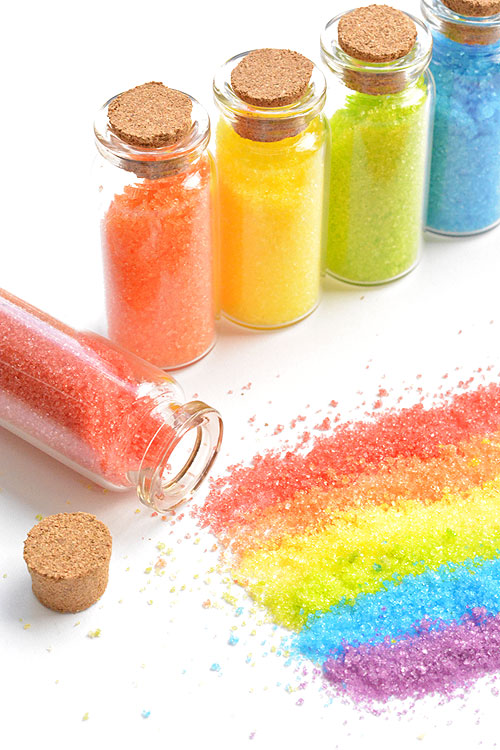
Then repeat for all the colours of the rainbow!
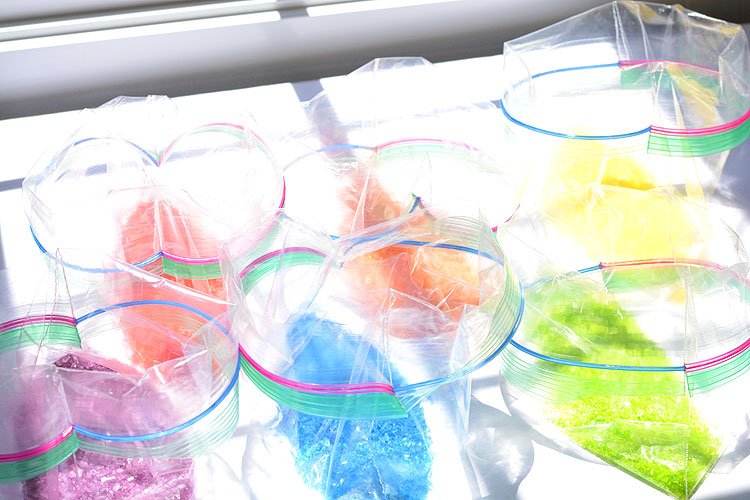
If you’re really eager, you can bake the homemade glitter in the oven for 10 minutes at 350F to dry it out.
I wasn’t sure how to keep all of the colours separated if I baked it, so I just opened all of the bags and set them in front of a warm window to dry out naturally over night. Every once in awhile I’d go shake them up a bit, but mostly I let them air dry on their own.
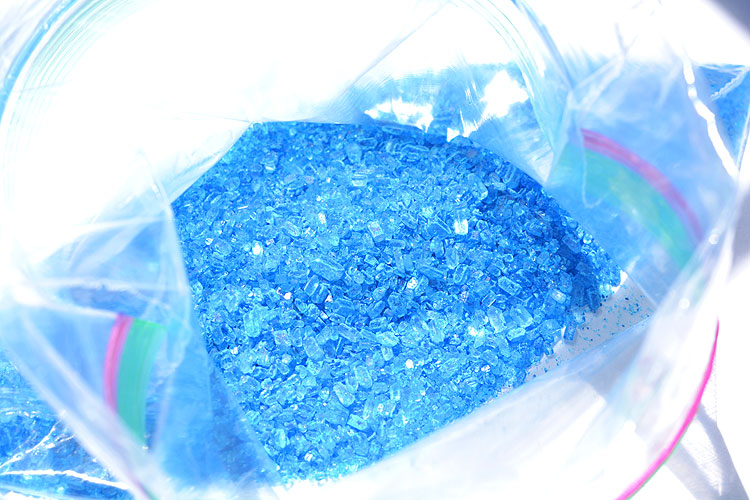
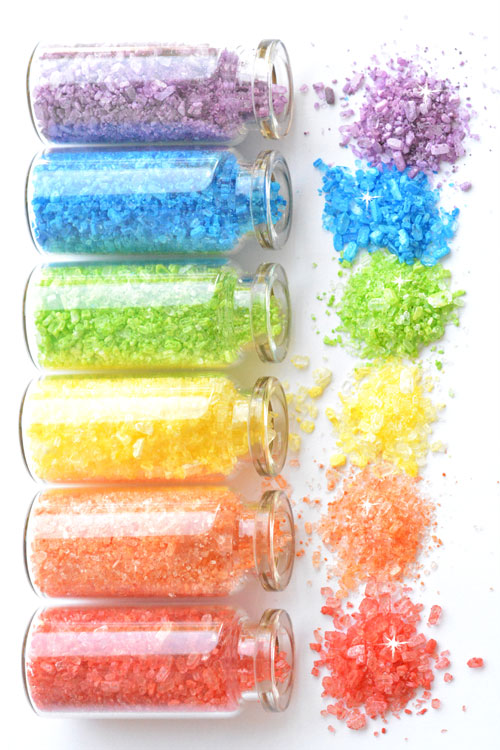
The Epsom salt glitter definitely had the coolest texture! It was kind of like working with little crystals! So pretty!
Here’s a comparison between sugar, salt and Epsom salt. All three of them worked really well, so it really doesn’t matter which one you choose.
Sugar Glitter had the brightest colours and the most sparkly and fine texture. It had the most clumps in it after it dried though. But it’s edible and you can even put it on cupcakes!
Salt Glitter held the colour really well, but wasn’t quite as bright as the sugar. It had a slightly larger grain than the sugar, but overall, the salt and sugar glitters were pretty similar. Except the salt dried out perfectly, without any of the clumps that the sugar had.
Epsom Salt Glitter ended up having a really cool crystal texture. The largest crystals didn’t hold the colour as well, but overall, it was just a really fun texture for craft projects!
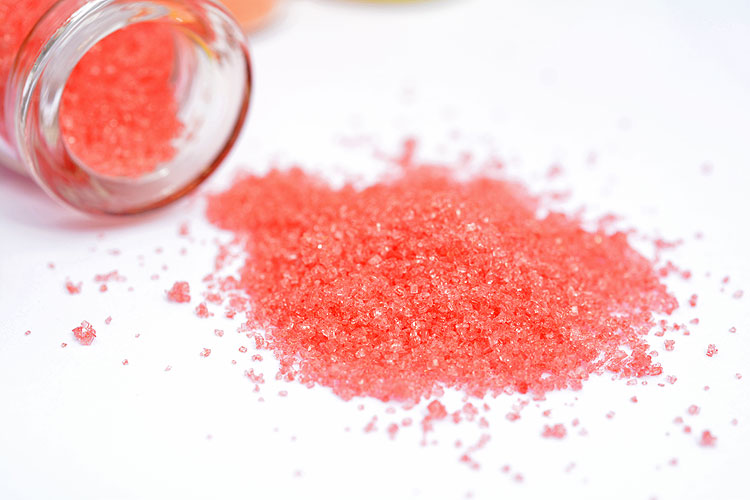
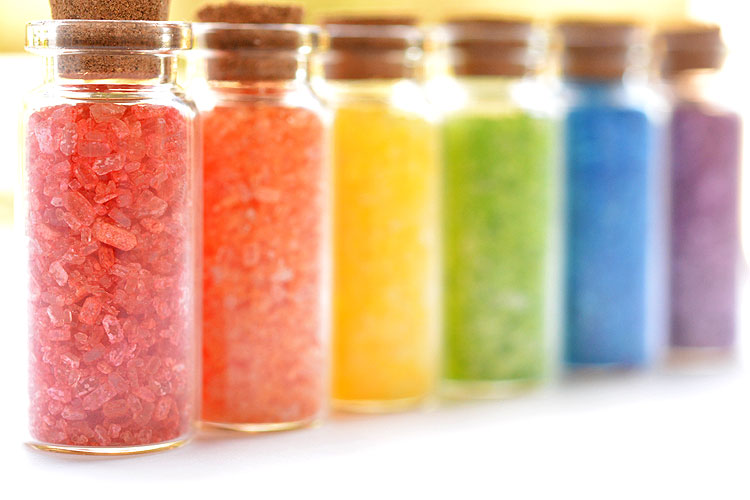
I found these little glass vials at the dollar store and I fell in love. Aren’t they perfect for homemade glitter!? This next photo is the sugar glitter:
The sugar glitter had a fun sand-like texture. And the kids LOVED taste testing it, even though I tried to hold them back.
The sugar glitter and the salt glitter were pretty similar with a sand-like texture.
The Epsom salt glitter was just plain fun. The crystal texture was so cool! Just like little vials of magic crystals. So fun for the kids’ imaginations!
When it came time to test it out on craft projects, the kids had a blast! They carefully squeezed out their pools of glue, and covered them with the homemade glitter. It was awesome to not have to worry about them wasting the whole vial of glitter! And we still have tons of glitter left over for next time too!
How to Make Homemade Glitter
Materials
- 2 Tablespoons of Epsom salt or regular salt or sugar
- 10 to 15 drops of liquid food colouring
- Zip Lock Bag
Instructions
- Pour 2 Tablespoons of Epsom salt (or regular salt or sugar) into a zip lock bag.
- Seal the bag, then give it a good shake and squish it all together until the colour is consistent.
- Fold the zipper part of the bag outwards to help keep the bag open. Then set the open bag in front of a bright window until it's completely dry (we waited 18 hours). Shake the bags up every once in awhile to help with the drying process.
- Sprinkle your homemade glitter onto glue and use it in your kids' crafts as you would use normal glitter.
Notes
This homemade glitter was so fun to make and even more fun to use in the kids’ crafts! The kids absolutely loved measuring the ingredients and adding the drops of food colouring!
And when it was time to clean up after craft time, all I needed was a damp cloth and all the glitter came up off of the table in one swipe. No glitter on the floor. And no glitter in my hair. Now that’s my kind of glitter!
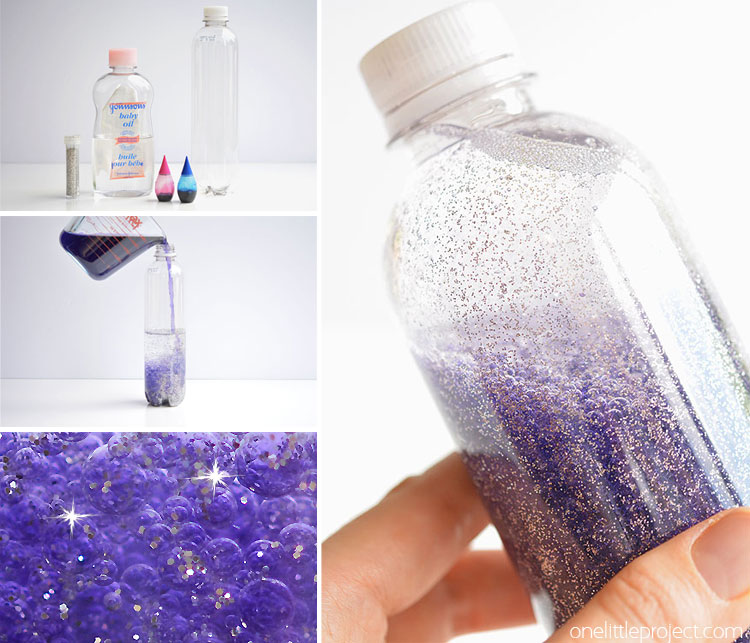
Here are some more fun kids projects to try at home! This sensory Galaxy in a Bottle craft was so beautiful and really easy to make!
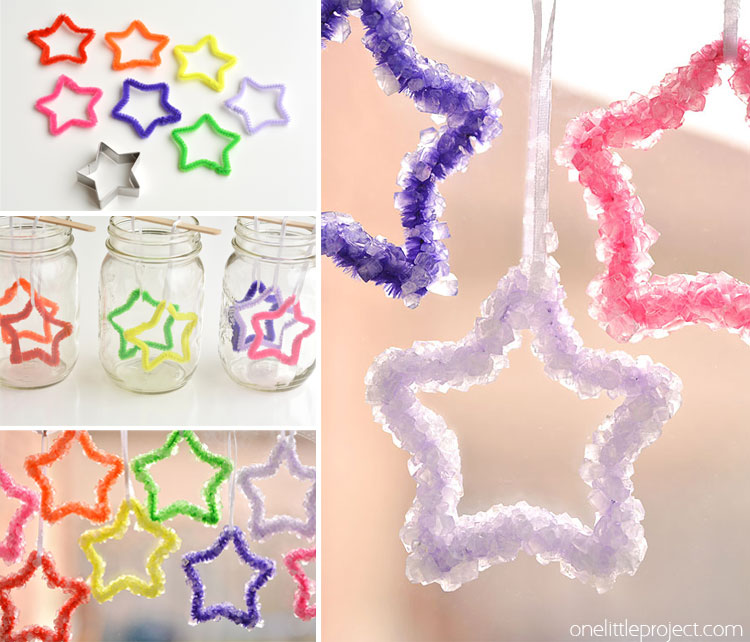
And these crystal stars were an awesome little science experiment and ended up looking gorgeous!
Source : onelittleproject.com
Read more...


")


Post a Comment
Post a Comment