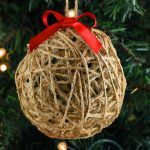
These DIY twine ball ornaments are super fun to make and add such natural beauty to your Christmas tree! All you need is twine, glue and a balloon! They’re surprisingly simple to make and are perfect if your tree has a rustic theme.
It’s easy to get carried away decorating with gold, silver and glitter, so I thought it would be a nice change to make something with a little bit of rustic charm. The twine looks so good against the green of the tree and looks GREAT next to pine cones or other wooden ornaments.
Have you ever seen something in a store and thought, “I could make that?!” I kept seeing similar ornaments in the Christmas aisle and was inspired to DIY some myself. It ends up being cheaper and it’s so satisfying to duplicate something you see in a store, all on your own!

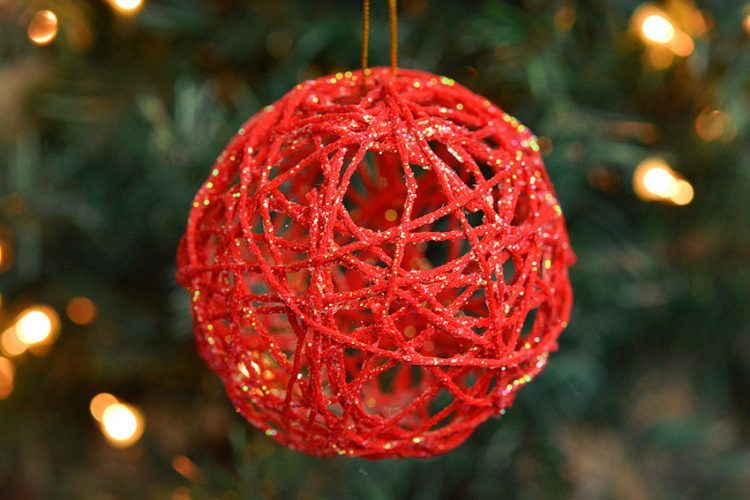
You might remember our Christmas ball yarn ornaments tutorial from a few weeks ago (so pretty with the glitter!). The process for making these twine ball ornaments is basically the same, except we’re using twine instead of yarn and we aren’t adding any glitter. (Although you totally could if you wanted to!?)
Just like the Christmas balls from yarn, we’ll be using balloons to help shape your twine. And – heads up – you’ll definitely have messy, glue covered fingers (but that’s half the fun, right?!).
Check out our video for how to make Twine Ball Ornaments:
Here’s a few more of our favourite (and most popular) Christmas ornament projects:
Glitter Ball Ornaments using Balloons
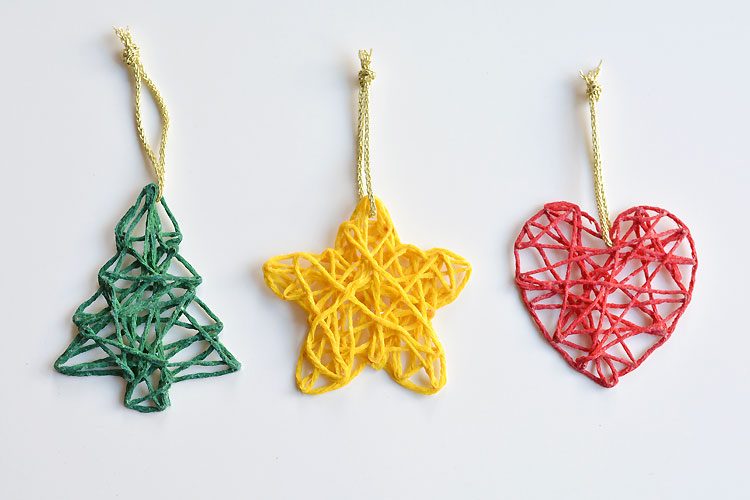
Wrapped Yarn Ornaments Using Cookie Cutters
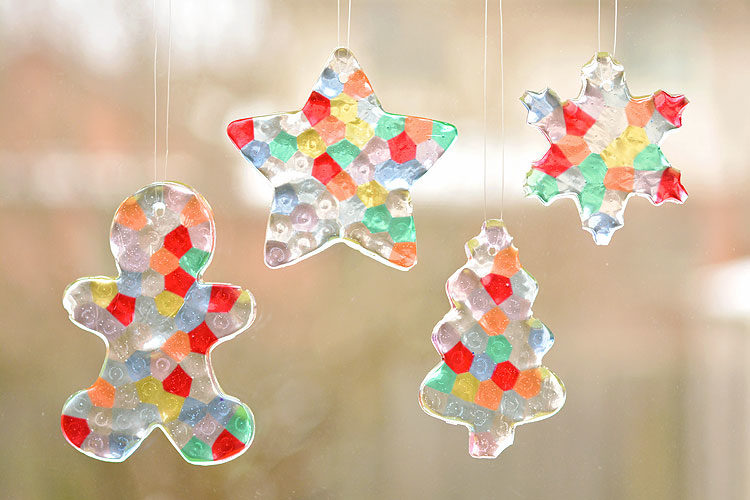
How to Make Melted Bead Ornaments
How to make Twine Ball Ornaments:
The following is a list of affiliate links to Amazon products that are similar to the materials we used. Here’s what you’ll need to make them:
- Small Balloons (I used 5 inch balloons)
- Twine
- Aleene’s Tacky Glue
- Disposable Bowl
- Plastic Fork
- Scissors
- Ribbon
I had some 5 inch balloons leftover from the Christmas ball yarn ornaments, and they work so well! Note that the size of these balloons is quite a bit smaller than regular balloons.
The smaller balloons are just the right size for making ball ornaments!

Measure out and cut a piece of twine to be about 2.5 feet (30 inches) long.

Then use that piece to measure out the rest of your twine pieces.
I recommend cutting about 12 to 15 pieces of twine per ball. The more twine you add to the ball, the better it will look in the end.

Blow up your balloon and slowly let out some air until you have a nice round ball shape. Mine were about 5 inches wide, but feel free to make yours larger or smaller.
You need to find somewhere to hang your balloon so you can work on it. Hang it from the handle on one of the kitchen cupboards, or from the light fixture above your table. We hung ours from a pipe in the basement.
Just be sure to protect the table/counter with newspaper or a drop cloth, because the glue will be drippy!

What Type of Glue To Use?
I used Aleene’s Tacky Glue and it worked soooo much better than dollar store glue! The Aleene’s glue made ornaments that were really strong. (On a side note, the ball ornaments made from twine were even more sturdy than the ball ornaments made from yarn.)
I’ve heard Mod Podge works really well too. Just remember that with Mod Podge, the ball ornaments will be shiny if you use Mod Podge with a glossy finish.
Dollar store glue will work (don’t water it down though), but the ornaments will be much more flimsy, so I highly recommend using either Aleene’s Tacky Glue or Mod Podge.

I didn’t really measure anything, but I mixed about 1 part glue with 1 part water. Without the water, the Aleene’s glue is really sticky and difficult to work with.

Helpful Tip: Mix your glue and water mixture in a disposable bowl for easy clean up. Cleaning glue out of your kitchen bowls is a huge pain so it’s much easier to throw out a disposable bowl when you’re finished.

Add one strand of twine into the bowl of glue at a time and mix it around with a plastic fork until it’s completely covered.
Find the end of the twine, then run it through the fork as shown in the photo below. You need to remove some of the excess glue, otherwise your ball is going to be a drippy mess.
However, if you remove too much glue, your ball won’t be as strong, so it’s a bit of a balance.

Press one end of the glue covered twine onto the top of the balloon, then wrap the rest of the strand of twine around the balloon. Take your time and wrap each strand of twine around the balloon – all in different directions.
When you get to the end of a strand of twine, tuck the end under another strand of twine, or press it to the top of another strand of twine to keep it in place.
Then place another strand of twine into the bowl, mix it around with the fork, then carefully run it through the fork to remove the excess glue.

Continue adding strands of glue covered twine in different directions until you’re happy with the way it looks. The more twine you add, the stronger (and better looking – in my opionion) your ball will be!
Just make sure you leave yourself a space somewhere in the twine that’s large enough to remove the balloon when everything dries.

How to Dry the Twine Ornaments
If you can leave your twine ball ornaments hanging from your kitchen cupboards overnight, that’s great! If not, try to find an empty closet to hang them from. We left ours hanging from a sturdy pipe in my basement with some newspaper underneath. They took almost a full 24 hours to dry completely.
Where ever you hang them to dry, make sure you protect the floor underneath – the balloons usually drip some glue as they dry.

Before you pop your balloon, make sure you separate the glued twine from the balloon. Poke your finger under the strands (they should be fairly stiff, but will have a little give). Some areas were too small to get my finger into so I used the back of a fork to separate the balloon from the twine.
You need to make sure you detach the glue under ALL of the twine from the balloon. Otherwise the balloon will pull the twine inwards as it pops, potentially ruining your pretty ball shape.
Now this is the BEST part. Make a small cut in the balloon, very close to the knot – it will just deflate, rather than pop if you cut close to the knot. When the balloon has deflated, you can pull it out!

I tied another short piece of twine (about 6 to 8 inches long) to the top of the ball ornament so I could hang it on the tree.
Add a pretty bow:
I also glued on a cute little red bow when I was done. I used 3/8 inch red satin ribbon.
Tying bows can be tricky for sure! I cheated and actually used a glue gun to make mine look better.

I LOVE how it turned out! It’s so simple but so beautiful!

DIY Twine Ball Ornaments
Materials
- 1 balloon 5 inch size
- 12 to 15 strands of twine 30 inches long each
- 1/4 cup Aleene's Tacky Glue approximately
- 1/4 cup water approximately
- 1 disposable fork
- 1 disposable bowl
- scissors
- satin ribbon
Instructions
- Measure and cut your twine into 30 inch pieces. You'll need about 12 to 15 strands of twine that are 30 inches each, for each ball ornament.
- Blow up your balloon to be approximately 5 inches wide and as round ball shaped as you can get it. Hang your balloon from the kitchen cupboard, the light fixture above your table or from a pipe in the basement. Protect the table/counter/floor below the balloon with newspaper or a drop cloth.
- In a disposable bowl, mix 1 part glue with 1 part water with a plastic fork. (Approximately 1/4 cup each of water and glue for each balloon)
- Add one strand of twine into the bowl of glue and mix it with the plastic fork until it's completely covered. Find the end of the twine, then run it between the fork tines to remove some excess glue.
- Press the end of the twine onto the top of the balloon, then wrap the strand around the balloon all in different directions. When you get to the end of a piece of twine, tuck the end under another piece of twine or press it to the top of another piece of twine so it stays in place.
- Continue adding twine to the glue, running it through the fork to remove excess glue and wrapping it around the balloon until you're happy with the way it looks.
- Allow the ball to hang and dry for about 24 hours. Again, make sure the floor/table below is protected because the glue will drip as it dries.
- When the twine ball is completely dry, detach the twine from the balloon by pushing your finger under the twine or using the end of a fork. You need to make sure ALL of the twine is detached from the balloon otherwise the twine ball shape will collapse when you pop the balloon.
- Make a small cut in the balloon, very close to the knot. Once the balloon has deflated, you can pull it out of one of the spaces between the twine.
- Cut 6 to 8 inches of twine and tie it to the top of the twine ball ornament so you can hang it on the tree.
- Tie some red satin ribbon into a bow and glue it to the top of your twine ball ornament. (Optional).

These DIY twine ball ornaments are SO FUN to make and they add such a beautiful, rustic charm to your Christmas tree! This is such a fun Christmas craft and a great way to make homemade ornaments! Such a simple and beautiful way to make rustic Christmas ornaments!
For even MORE holiday inspiration check these out:
Glitter Ball Ornaments using Balloons
Wrapped Yarn Ornaments Using Cookie Cutters
How to Make Melted Bead Ornaments
Source : onelittleproject.com
Read more...


")


Post a Comment
Post a Comment