You know that delicious golden brown colour on a warm, gooey marshmallow after you’ve roasted it over a campfire? It’s pure deliciousness! Except of course, if you’re anything like me, you probably lit the first two marshmallows on fire before you got that perfectly golden brown one. You know the sudden panic when you realize your marshmallow caught fire, but your stick is so long that it takes some serious effort to figure out how to get it anywhere near your mouth to blow it out? Good times!
Well guys, other than that, I’m really not the biggest fan of marshmallows. But I’ve discovered a new favourite! Honestly and truly, until now, I thought marshmallows any other time than at a campfire, were gross. But apparently marshmallows dipped in melted dark chocolate actually taste good! Like really good. (I know, I was surprised too!) Last night after the kids went to bed, I melted the leftover chocolate and dipped plain marshmallows in it and put them in a bowl as my snack. I thought my husband was going to raise his eyebrows right off his head.
It was one of those moments, that if the kids had woken up and walked in, they’d have seen me with a bowl full of melted chocolate and marshmallows binge watching Netflix. They’d never want to go to bed if they knew that’s what the grown ups do after we tuck them in at night!
If there’s one thing I love doing, it’s turning food into something fun! I’ve said it before – I’m not much of a baker, but I love doing crafts! And this little treat is more of a craft than anything else. And it has the added benefit of actually tasting good!
Marshmallow Reindeer Treats
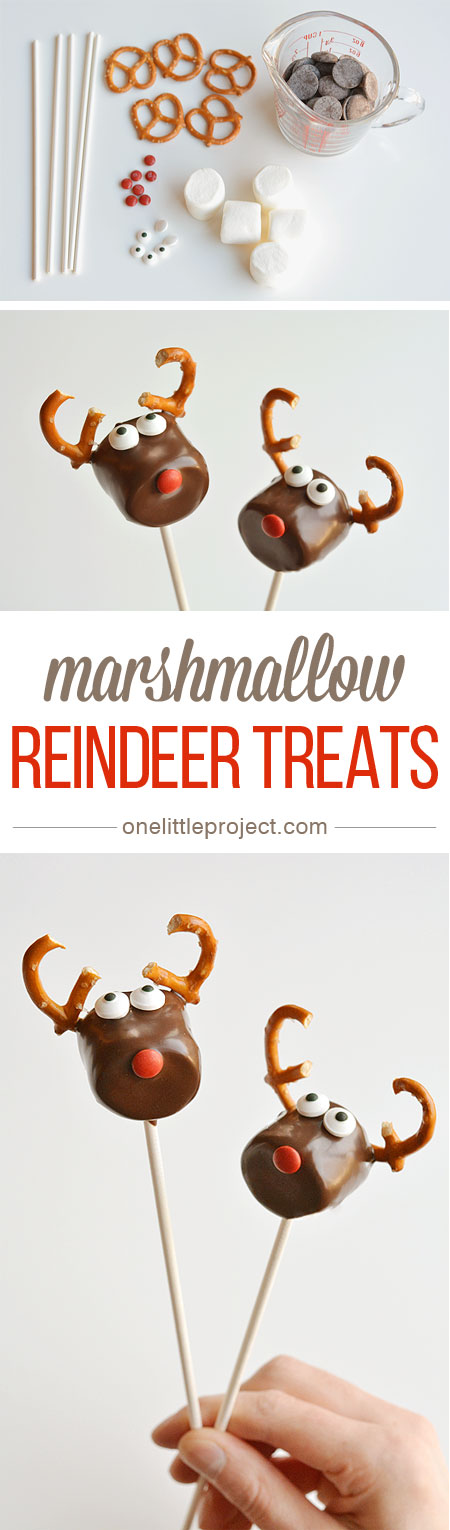
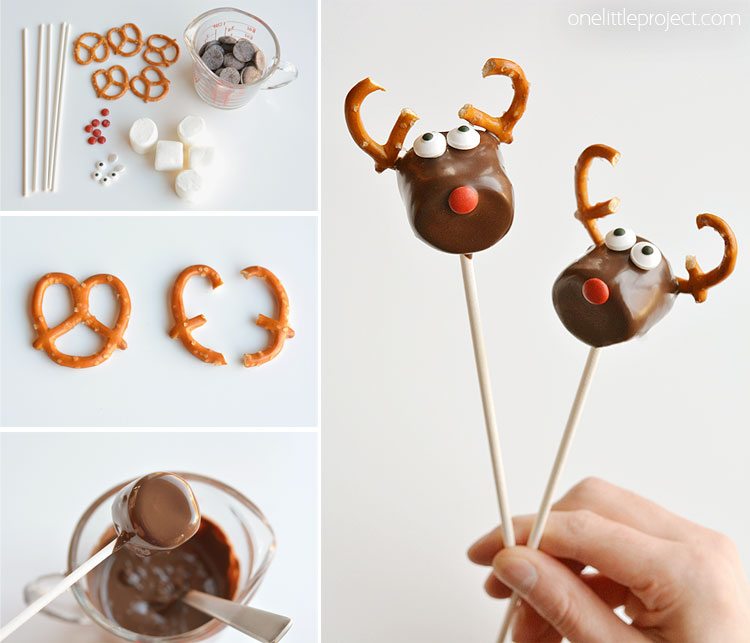
Here’s what you’ll need:
- 8″ Lolly pop sticks
- Pretzels
- Dark or Light Chocolate (I used dark Merkens, but chocolate chips will work too)
- Large Marshmallows
- Candy Eyes
- Red Mini M&M’s
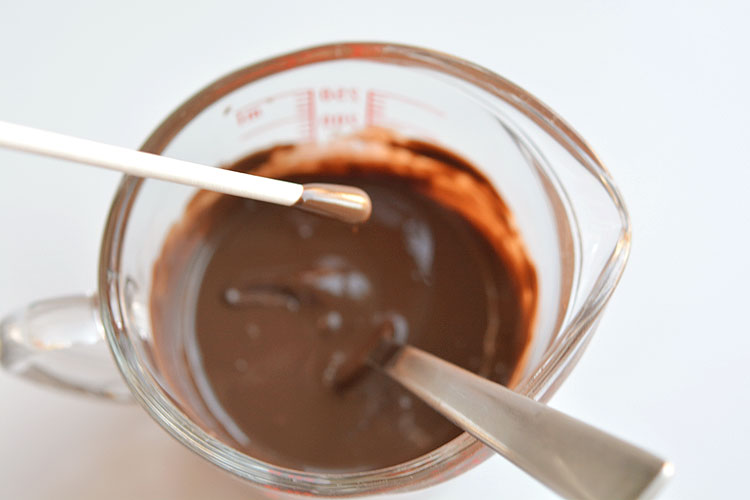
Melt the chocolate in the microwave on low heat stirring occasionally until it’s fully melted. I put it on at 3% power for 2 minutes, stirred it, and then put it in for another 1 minute at 3% power. Be careful though, all microwaves are different and you don’t want to burn it.
Add approximately 1 Tablespoon of oil, slowly (you might not need the full tablespoon), stirring as you add it until it’s a thinner consistency. Without this step, the marshmallows will have bumpy globs where the chocolate drips down instead of a smooth finish.

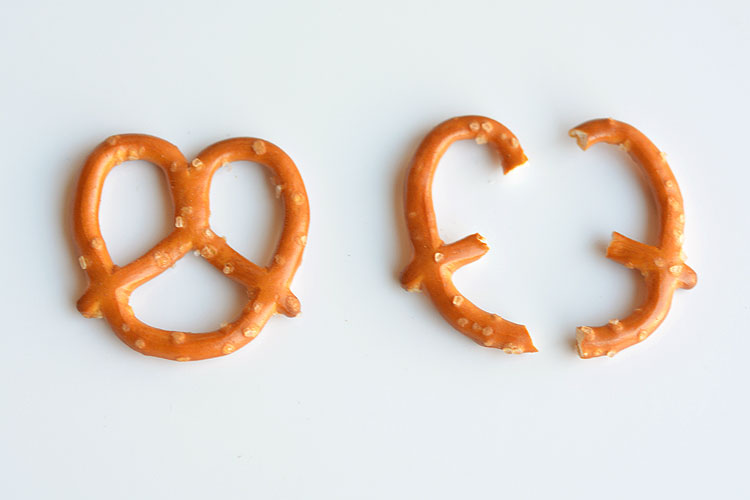
I’m not going to lie – breaking the preztels was a pain in the butt. If you’re making these, I highly recommend making them when you’re hungry, because you’ll be eating a lot of pretzel scraps from where they break in the wrong spots. I found it worked the best when I used my fingers to pinch them to break them off. The knife would cut where I wanted it to cut, but then they’d break in other spots. Very frustrating.
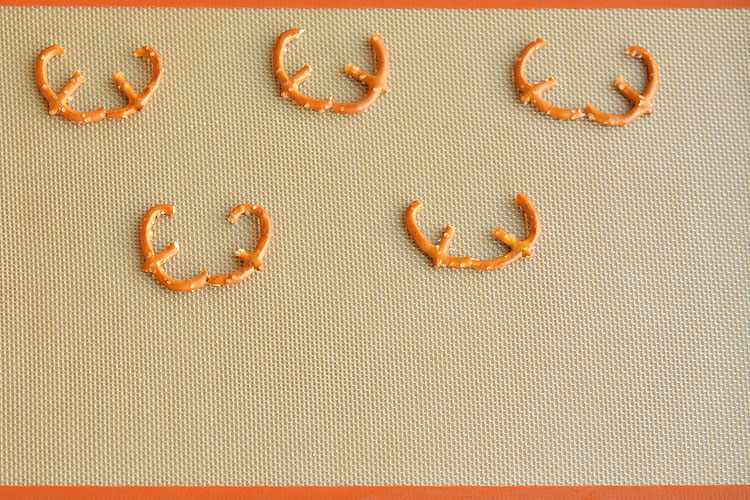
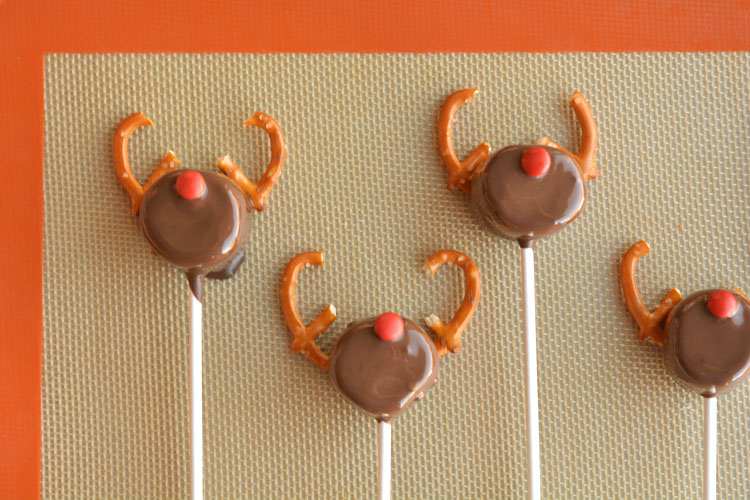
They don’t look like much on their own, but when you set the pretzels out on a silicone baking mat (which I highly recommend), or waxed paper or parchment paper, they start to look like antlers.
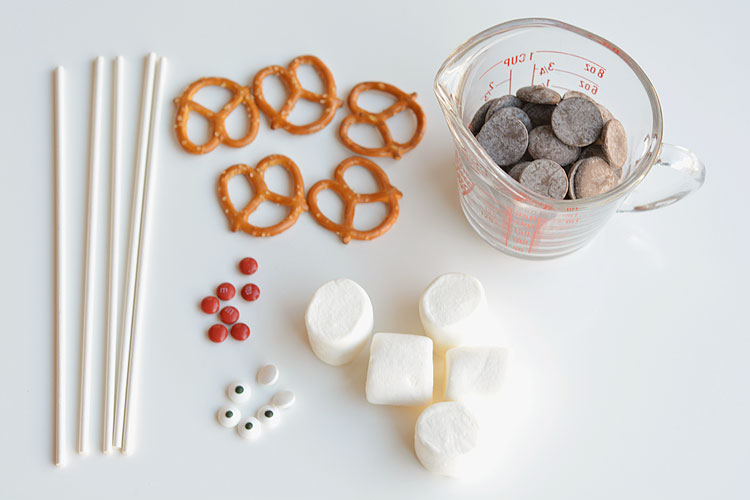
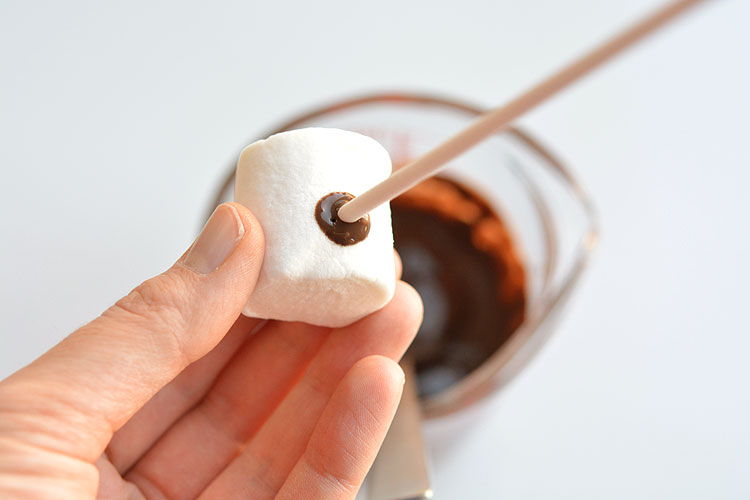
Dip the tip of the lolly pop stick into the melted chocolate.
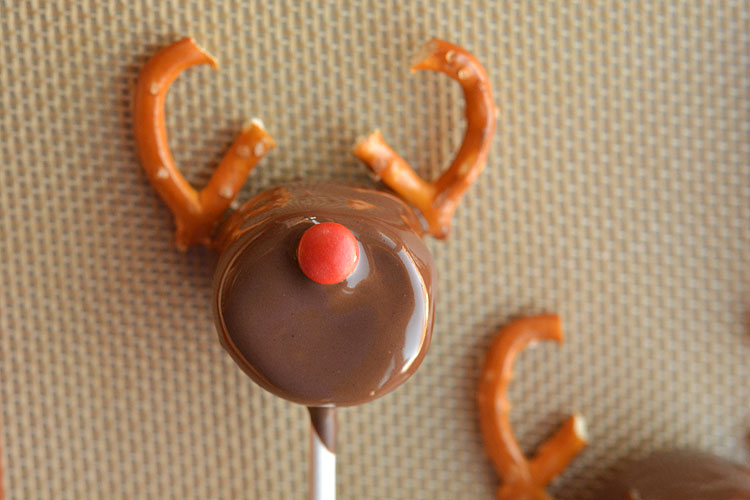
Then press it into the side of the marshmallow, just slightly off center. The chocolate will help keep the marshmallow from falling off.
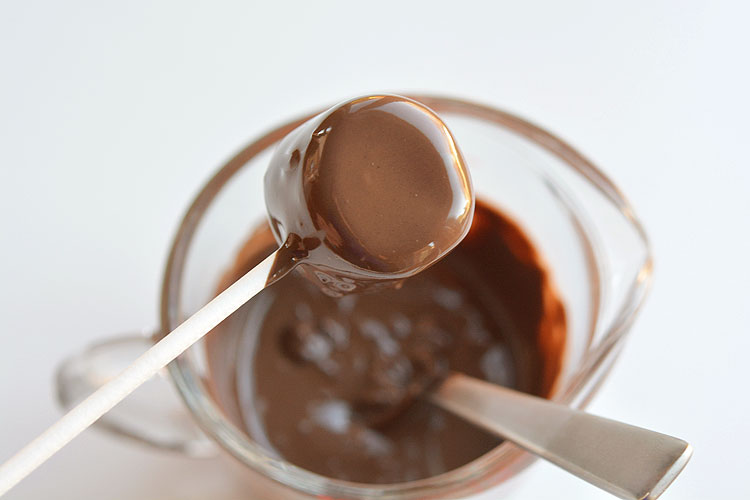
Dip the marshmallow into the chocolate until it’s fully coated. Tap it gently on the edge of the measuring cup to get rid of any excess chocolate.
Set the marshmallow on top of the pretzel antlers on the baking mat. The melted chocolate will glue them onto the marshmallow part as it hardens.
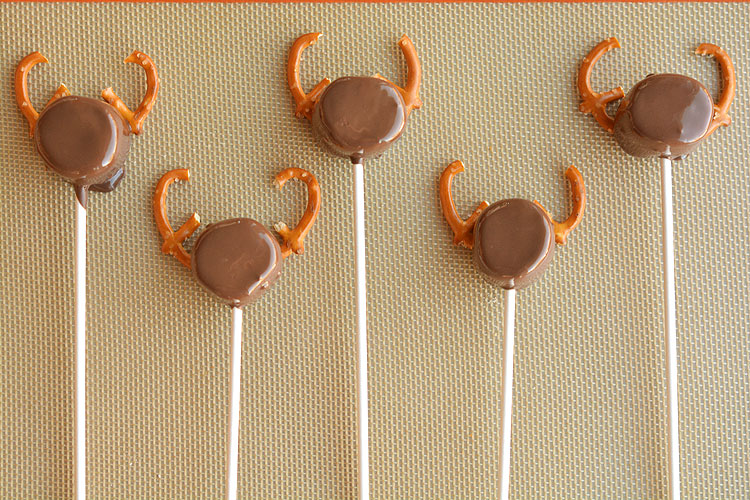
Add a red mini M&M as the reindeer nose. I guess if you’re being accurate, you could use brown mini M&M’s and have only one Rudolph with the red nose. But personally, I much prefer the way they look with all red noses.
Wait about an hour or two until the chocolate fully hardens. Don’t put it in the fridge though. Sometimes the chocolate gets condensation on it when you pull it out of the fridge and it can cause everything to discolour.
Wait to add the eyes until the chocolate is fully set, otherwise they’ll just slide right off.
Candy eyes rock! Seriously, whoever came up with the idea for them, is brilliant! I got mine at Michael’s, but you can order them online if you have trouble finding them.
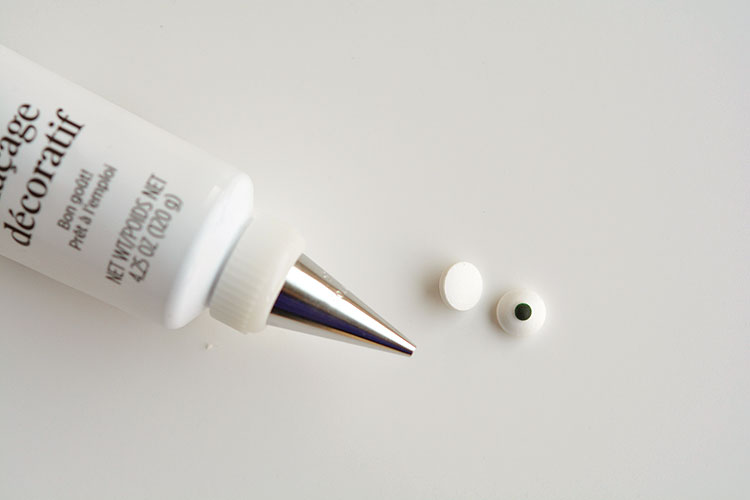
I like using pre-made icing as the “glue” to hold the eyes on, mostly because I use it for a lot of my projects, so I usually have several colour options on hand. But if you don’t have tubes of icing sitting around, just melt some chocolate and use a toothpick to “paint” the back of the eye with melted chocolate.
If you do use icing, just use a small amount. You don’t want it pushing out from under the eye.
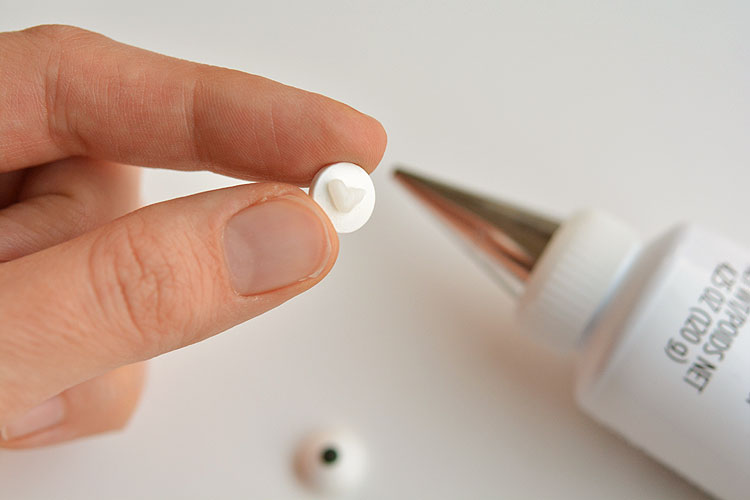
Then press the eyes near the back of the reindeer head, and you’re done!
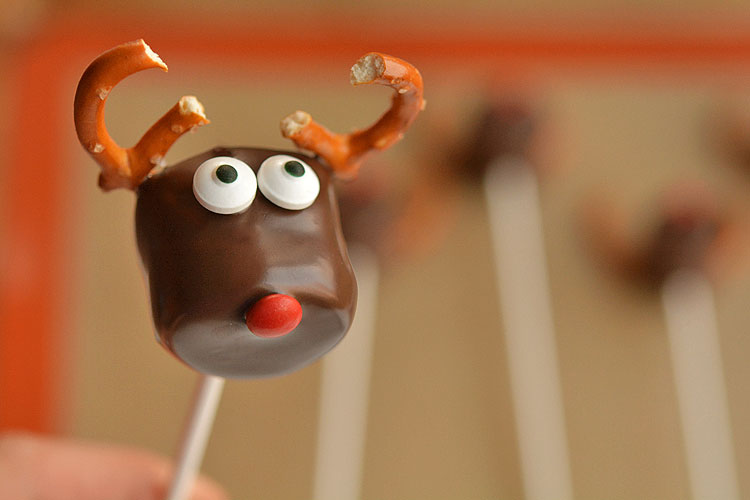
Light chocolate might look better, but to tell you the truth, the dark chocolate and marshmallow combination was DELICIOUS. So it was totally worth it that they were a little darker in colour.
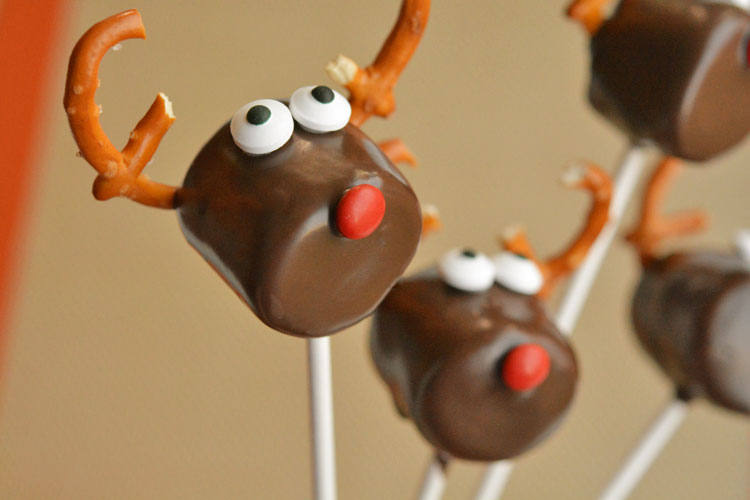
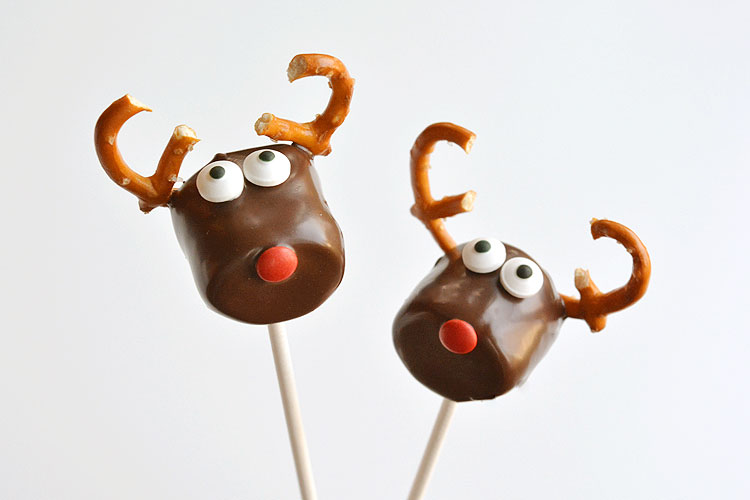
Aren’t they adorable?! And they are SO EASY! You know I love a good, easy project!
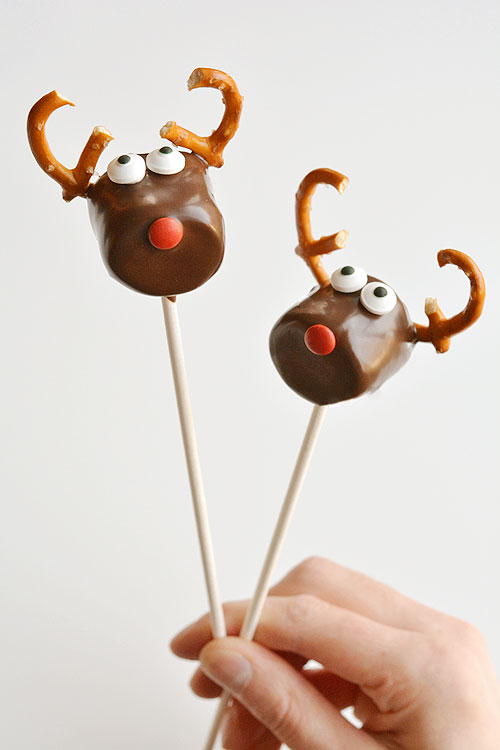
They’d be great at a Christmas party! And would be super cute to send to a school party too!
Here’s the printable recipe and instructions!

Chocolate Covered Marshmallow Reindeer
Ingredients
- 12 large marshmallows
- 1 bag small pretzels
- 12 eight inch lolly pop sticks
- 12 red mini M&M's
- 24 small candy eyes
- 1 cup dark Merckens chocolate or chocolate chips
- 1 tablespoon vegetable oil
Instructions
- Break the pretzels into antler shapes and set them in position on a silicone baking mat.
- Melt the chocolate in the microwave on low heat until completely melted, stirring every minute or so.
- Add a small amount of vegetable oil until the chocolate drizzles easily off a spoon.
- Dip the tip of the lolly pop stick into the chocolate and press it into the side of the marshmallow, slightly off center so it's near the back of the reindeer's head.
- Dip the marshmallow in the chocolate until it's fully coated. Gently tap the lolly pop stick to remove any excess chocolate drips.
- Set the marshmallow on top of the antlers.
- Add the red mini M&M nose.
- Allow the chocolate to set for 1 to 2 hours (but do not refrigerate).
- Use a small dab of icing or melted chocolate to "glue" the candy eyes onto the reindeer.
These chocolate covered marshmallow reindeer are so cute and SO EASY! And if you use dark chocolate, they actually taste amazing too! Make them for a Christmas party, or to send to a party at school, or just make them for fun on a Saturday afternoon with the kids. Simple, delicious and adorable!
Source : onelittleproject.com
Read more...


Post a Comment
Post a Comment