Yesterday I posted a tutorial for how to make a fabric flower headband for a baby, using old clothes in your donation pile. I am really happy with how it turned out! Kate looks super cute in her headband, so I had to make a headband for Leah as well. Leah’s turned out wonderfully too!

My girls seem to have a lot of crazy hair troubles. Kate’s baby hair is just starting grow long enough to get into her eyes. Leah is nearly 3 years old and has always been blessed with a ton of hair. The problem is she has so much hair that it keeps growing thicker and thicker and thicker, so there are always new bangs growing in and getting into her eyes. A headband will really help her out!
It’s great for Jason when I’m not around because it’s way easier for him to throw a headband in her hair to get the stray hair out of her eyes than it is to put together a neat and tidy ponytail with elastics and clips.
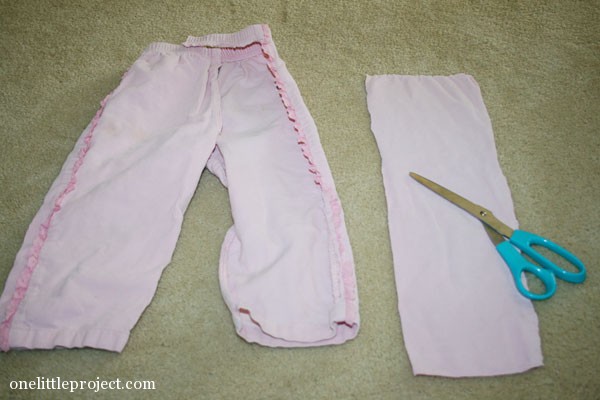
I am really excited about using old clothes to make these types of things! As i was saying yesterday, I found fantastic gray sweater fabric from an old sweater and some cute pink corduroy from an old pair of kids pants.
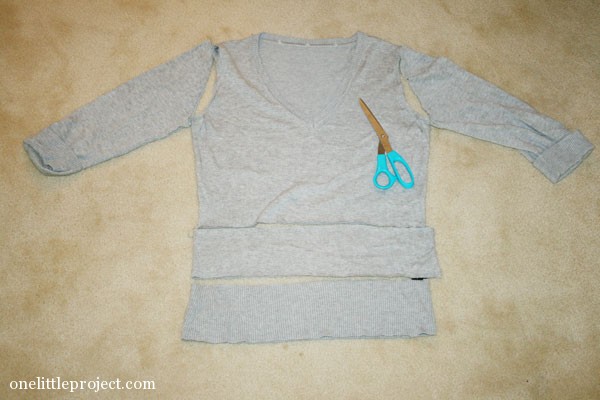
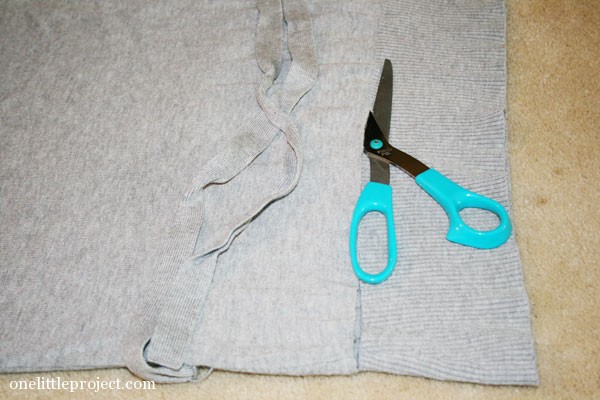
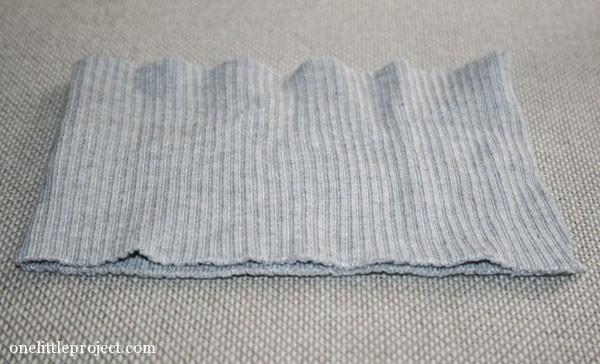
For Leah’s headband I cut off the waist band from the sweater and used the ribbed section for her headband. I just cut as close to the edge of the ribbing as possible. The edges don’t seem to be fraying at all, so no sewing required on this one, and I always love that!
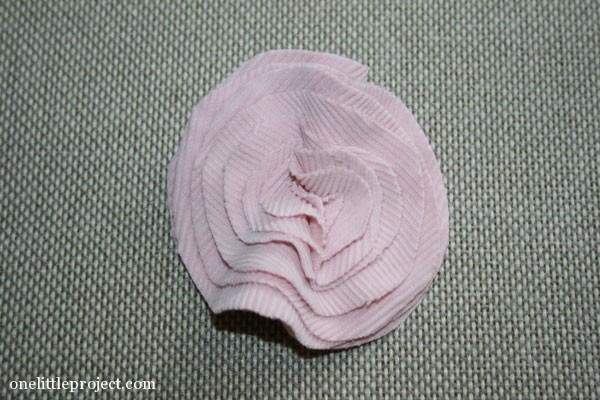
I used another section of the pink corduroy pants for the fabric flower.
Fabric Flower Headband Tutorial
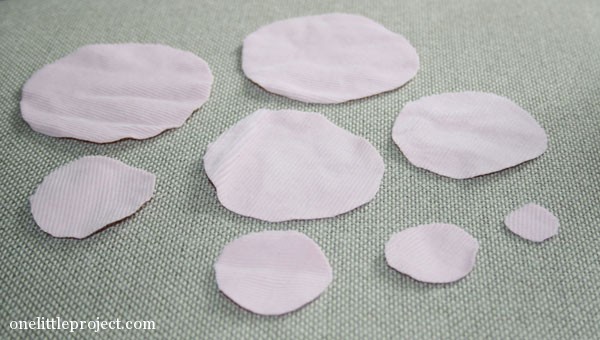
Cut out a few circles of all different sizes from your flower fabric. They don’t need to be perfect. I just eyeballed all of mine:
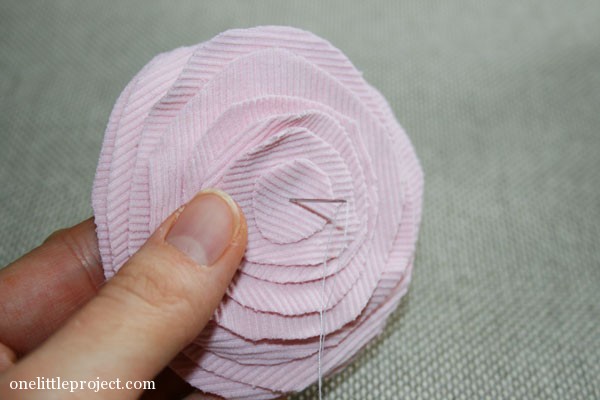
Stack all the circles together and run a needle and thread though the center to hold them together. I have all my corduroy lines going in slightly different directions to add to the texture of the fabric flower:
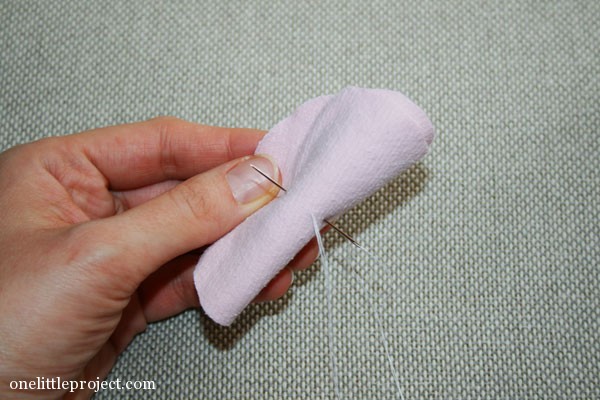
Fold the fabric flower in half and pull the needle and thread through again:
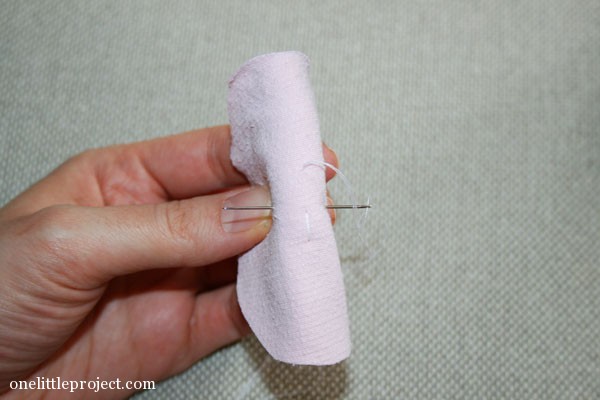
Then fold it in half the other direction and pull another stitch through:
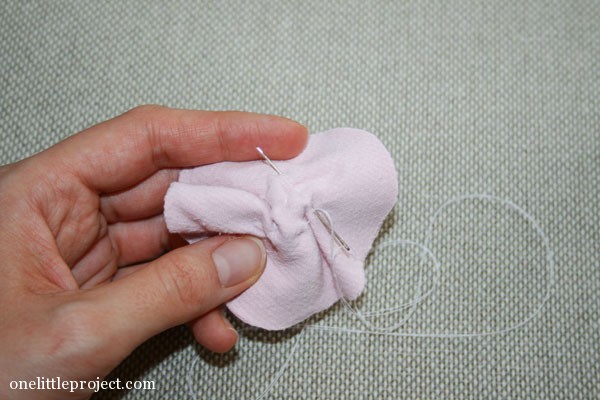
Pull a few stitches around the bottom of the flower until your flower has some depth and you get it into the shape you want:
It should end up looking something like this:
For the headband, I simply used the entire width of the ribbing from the sweater and cut it to about 12″ long. This section stretches a LOT so I wasn’t too picky on the size (at 12″ long it fits both me and 9 month old Kate!). The fabric edges held together really well, so I just left them bare:
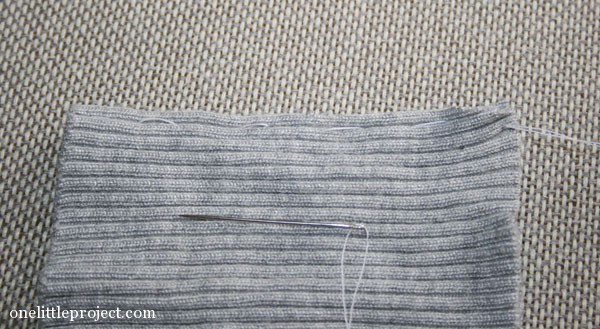
Run a quick stitch through the edges of the fabric to close the headband:
Then pull the thread to gather it:
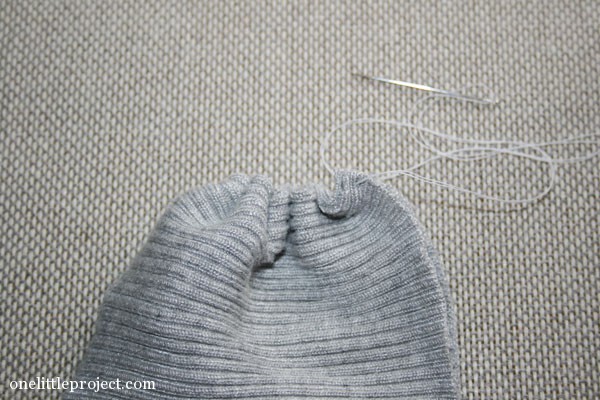
Turn it right side out, and sew on the flower to the headband at the seam:
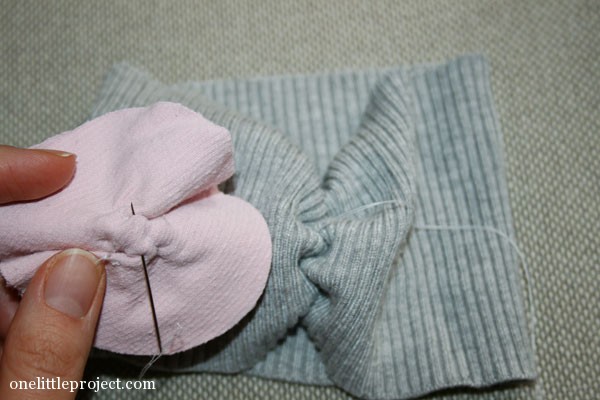
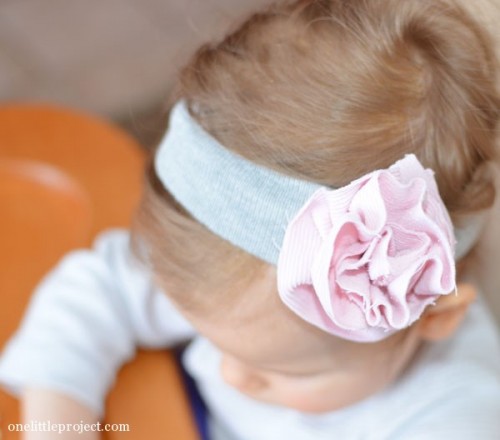
And you are done:

Leah really likes hers. She was really happy to have her own headband, and as much as I would like to switch them between my two girls, in typical older sister fashion, Leah hasn’t embraced the idea of sharing ANYTHING with Kate.


I still have tons of sweater fabric leftover and a surprising amount of corduroy left too, so I might have to experiment with other types of flowers and headband styles. These are so easy to make and really only take about 15 minutes – and even less time if you have already chosen the fabric and you don’t have to raid your donations pile. Although, I have to admit that was my favourite part!
If you haven’t already, be sure to check out the Fabric Flower Headband Tutorial #1 from yesterday for another great headband:
Source : onelittleproject.com
Read more...


Post a Comment
Post a Comment